SCIM Integration for Enterprise Organizations
EnterpriseSCIM is available on Enterprise plans. SCIM requires Single Sign-On (SSO) to be enabled, which can be done by your Account Representative if you're using GrowthBook Cloud or by yourself if you are self-hosting. Currently, GrowthBook only supports Okta and Azure AD/Microsoft Entra ID as identity providers.
SCIM, or System for Cross-domain Identity Management, is the standard for managing users and groups across multiple applications. With SCIM, you can automate the provisioning and deprovisioning of users in your GrowthBook account through your identity provider.
GrowthBook's SCIM integration currently offers the following features:
- User provisioning
- User deprovisioning
- Group Push
When a user is provisioned, they are added to your GrowthBook organization with your organization's default role. After provisioning, admin users can adjust their roles and permissions via the GrowthBook application as needed. It's important to note that if a user is provisioned through SCIM, they can only be deprovisioned through your identity provider.
GrowthBook does support the ability to optionally define a role when provisioning a user. Project-level permissions are not supported when provisioning a user via SCIM. That must be done via the GrowthBook application.
When a group is added to "Push Groups" in your Okta SCIM application, groups and their members will be synced with GrowthBook via a corresponding Team. Please note that only members that have been provisioned into the GrowthBook app will be added to the Team in GrowthBook. For example, if you have a push group with members A, B, and C and only A and B are assigned to GrowthBook on the "Assignments" tab, the corresponding team on GrowthBook will only include members A and B. Just like how user provisioning works, new Teams will be set up with your organization's default role. You'll need to adjust the permissions for the Team in GrowthBook. Group removal or membership changes will need to be done through your identity provider.
Configuring SCIM Integration
Okta Setup
-
Verify that your GrowthBook organization is on an enterprise plan with SSO enabled.
-
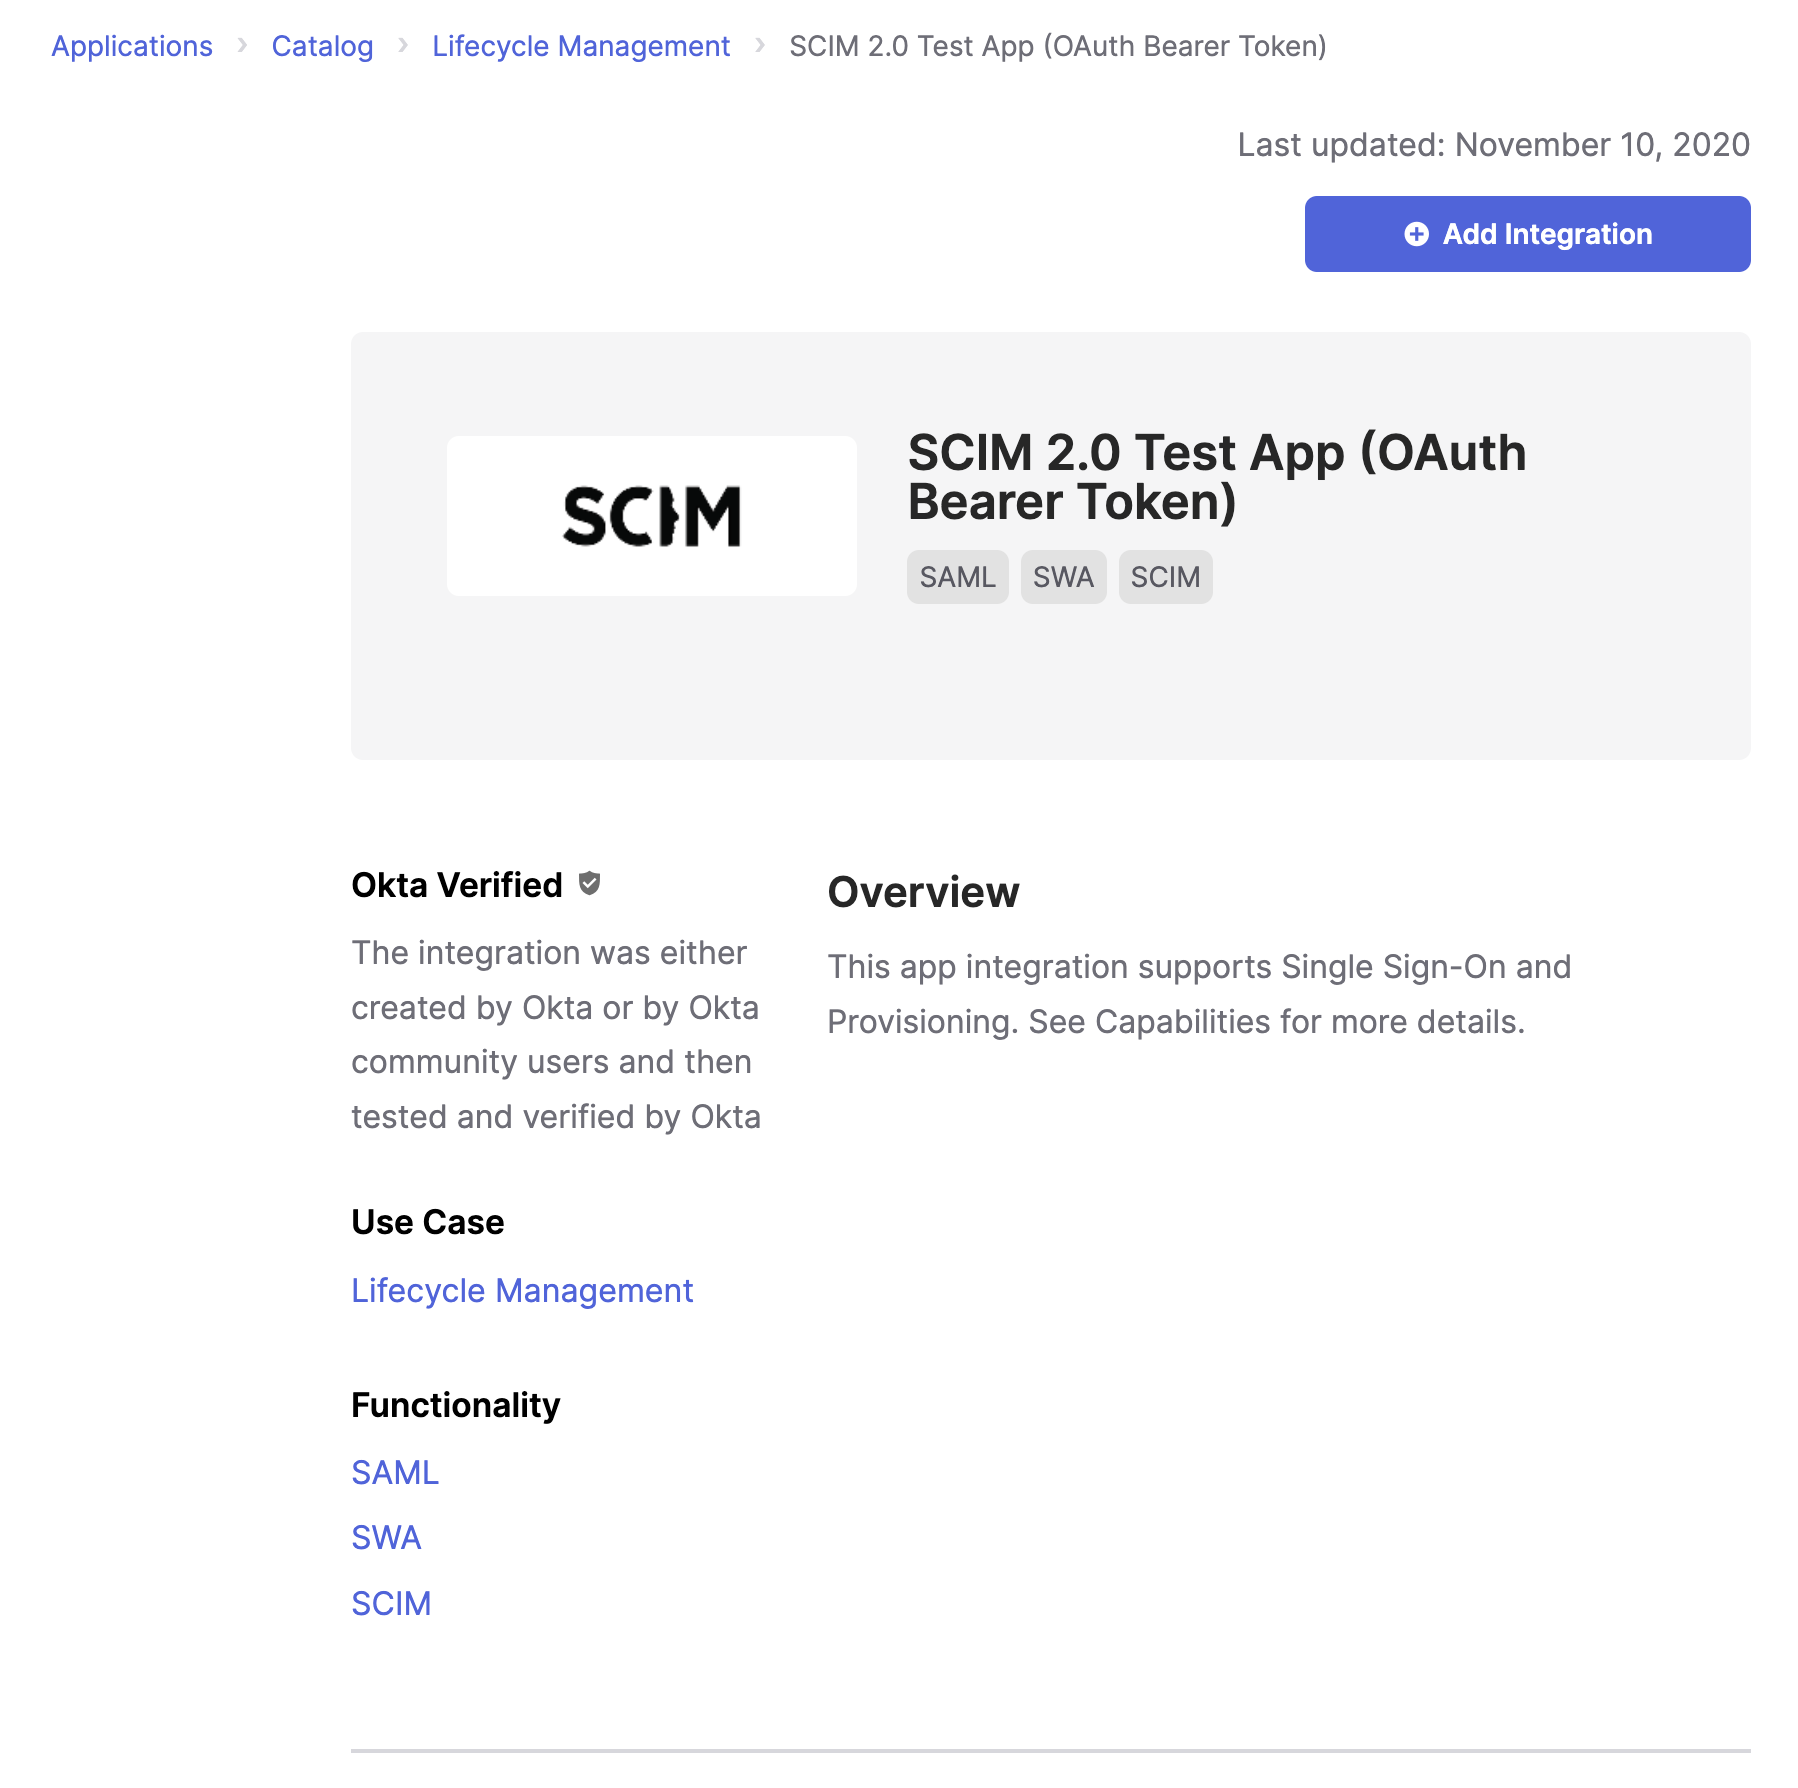
Log in to your Okta account and go to the Applications page. Select "Browse App Catalog," then search for "SCIM 2.0 Test App (OAuth Bearer Token)." Click "Add Integration" to add the app to your Okta account.
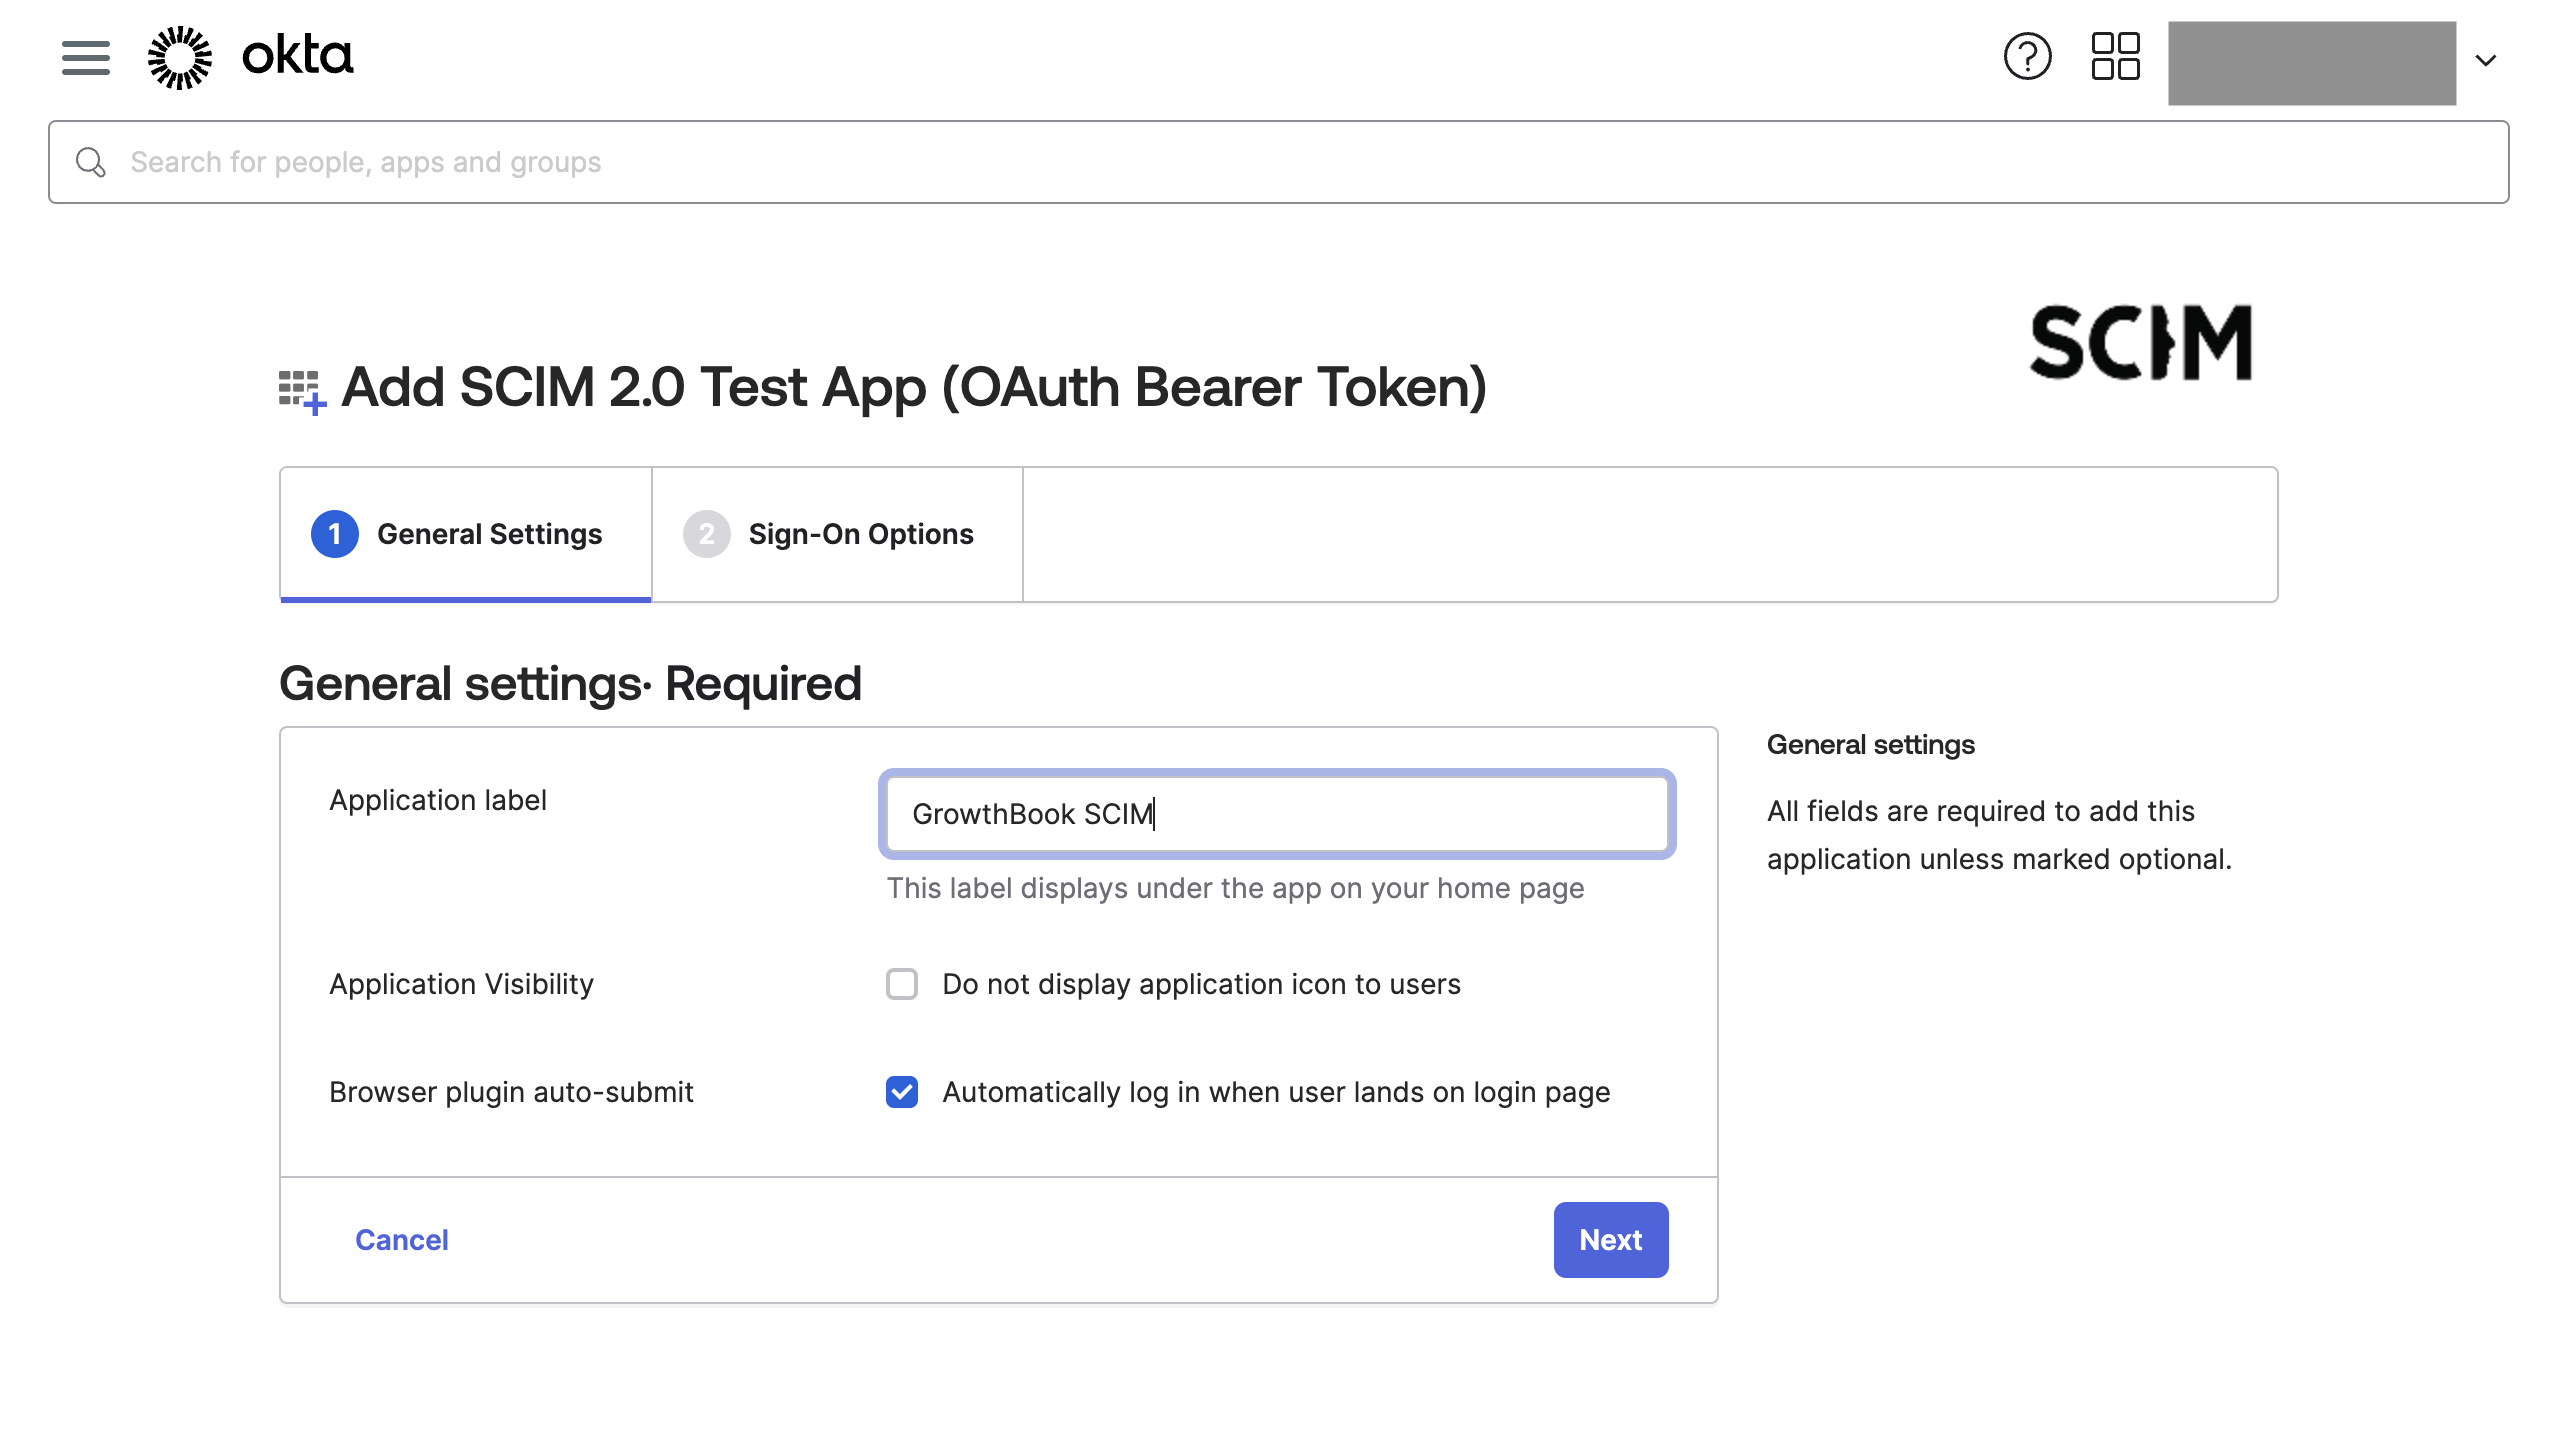
- Once the app is added, you can change its name, for example, to "GrowthBook SCIM." Click "Next."
-
On the next page, you don't need to modify any settings. Simply click "Done."
-
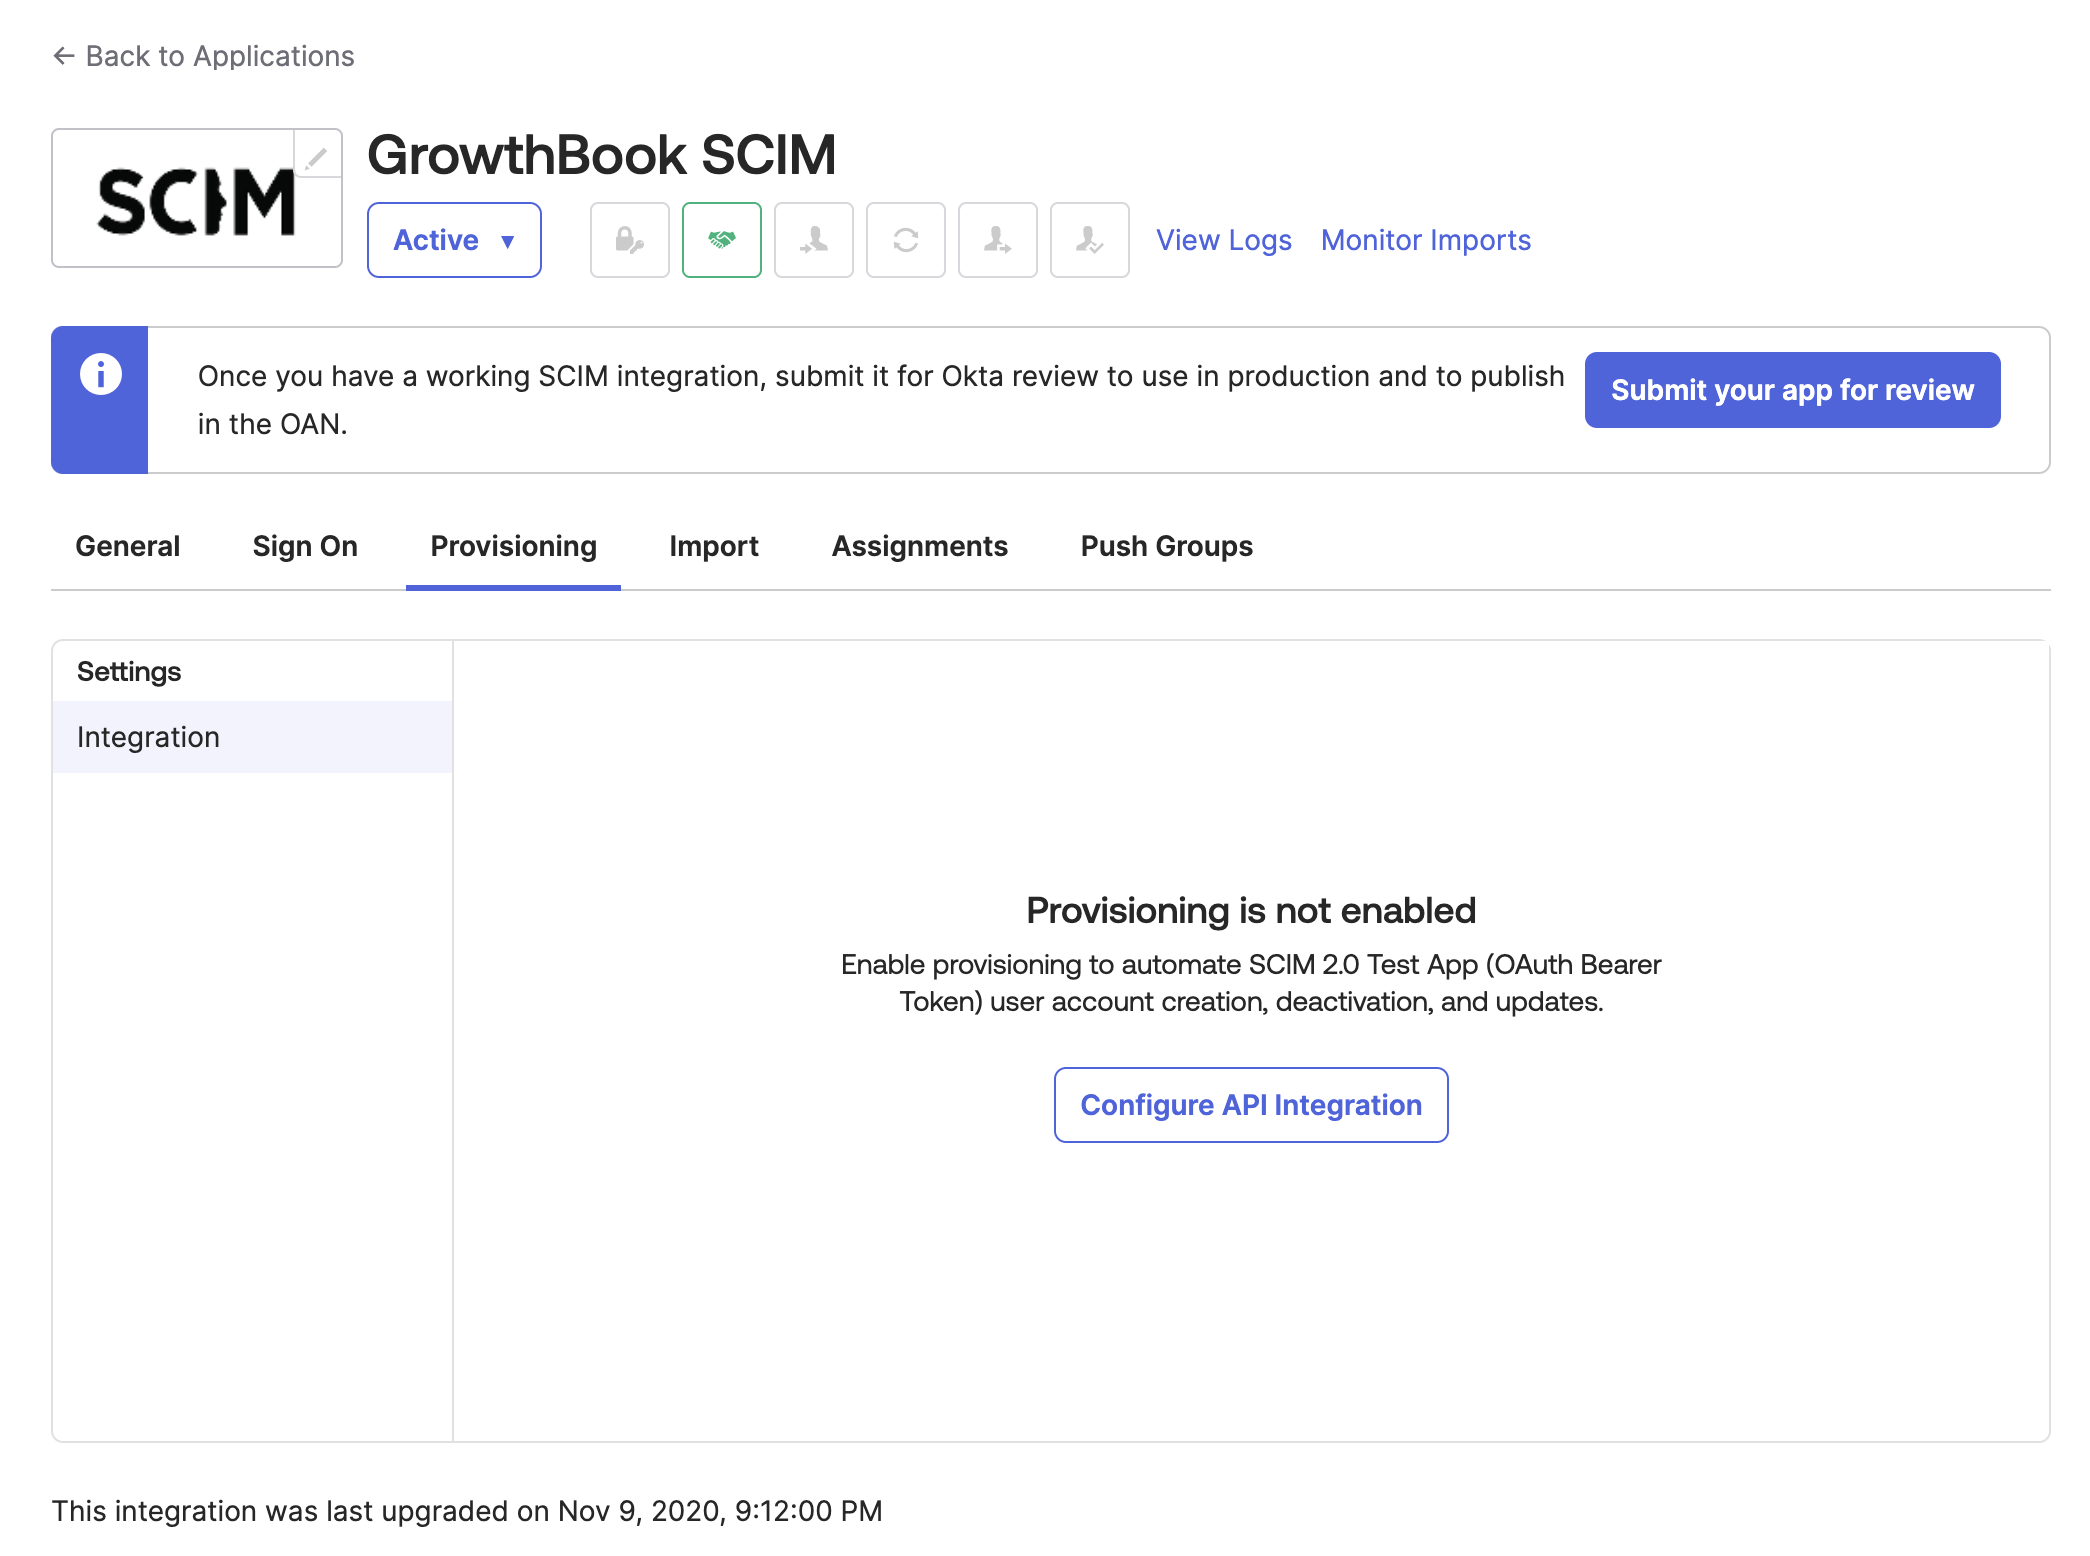
With the application created, click on the "Provisioning" tab and select "Configure API Integration."
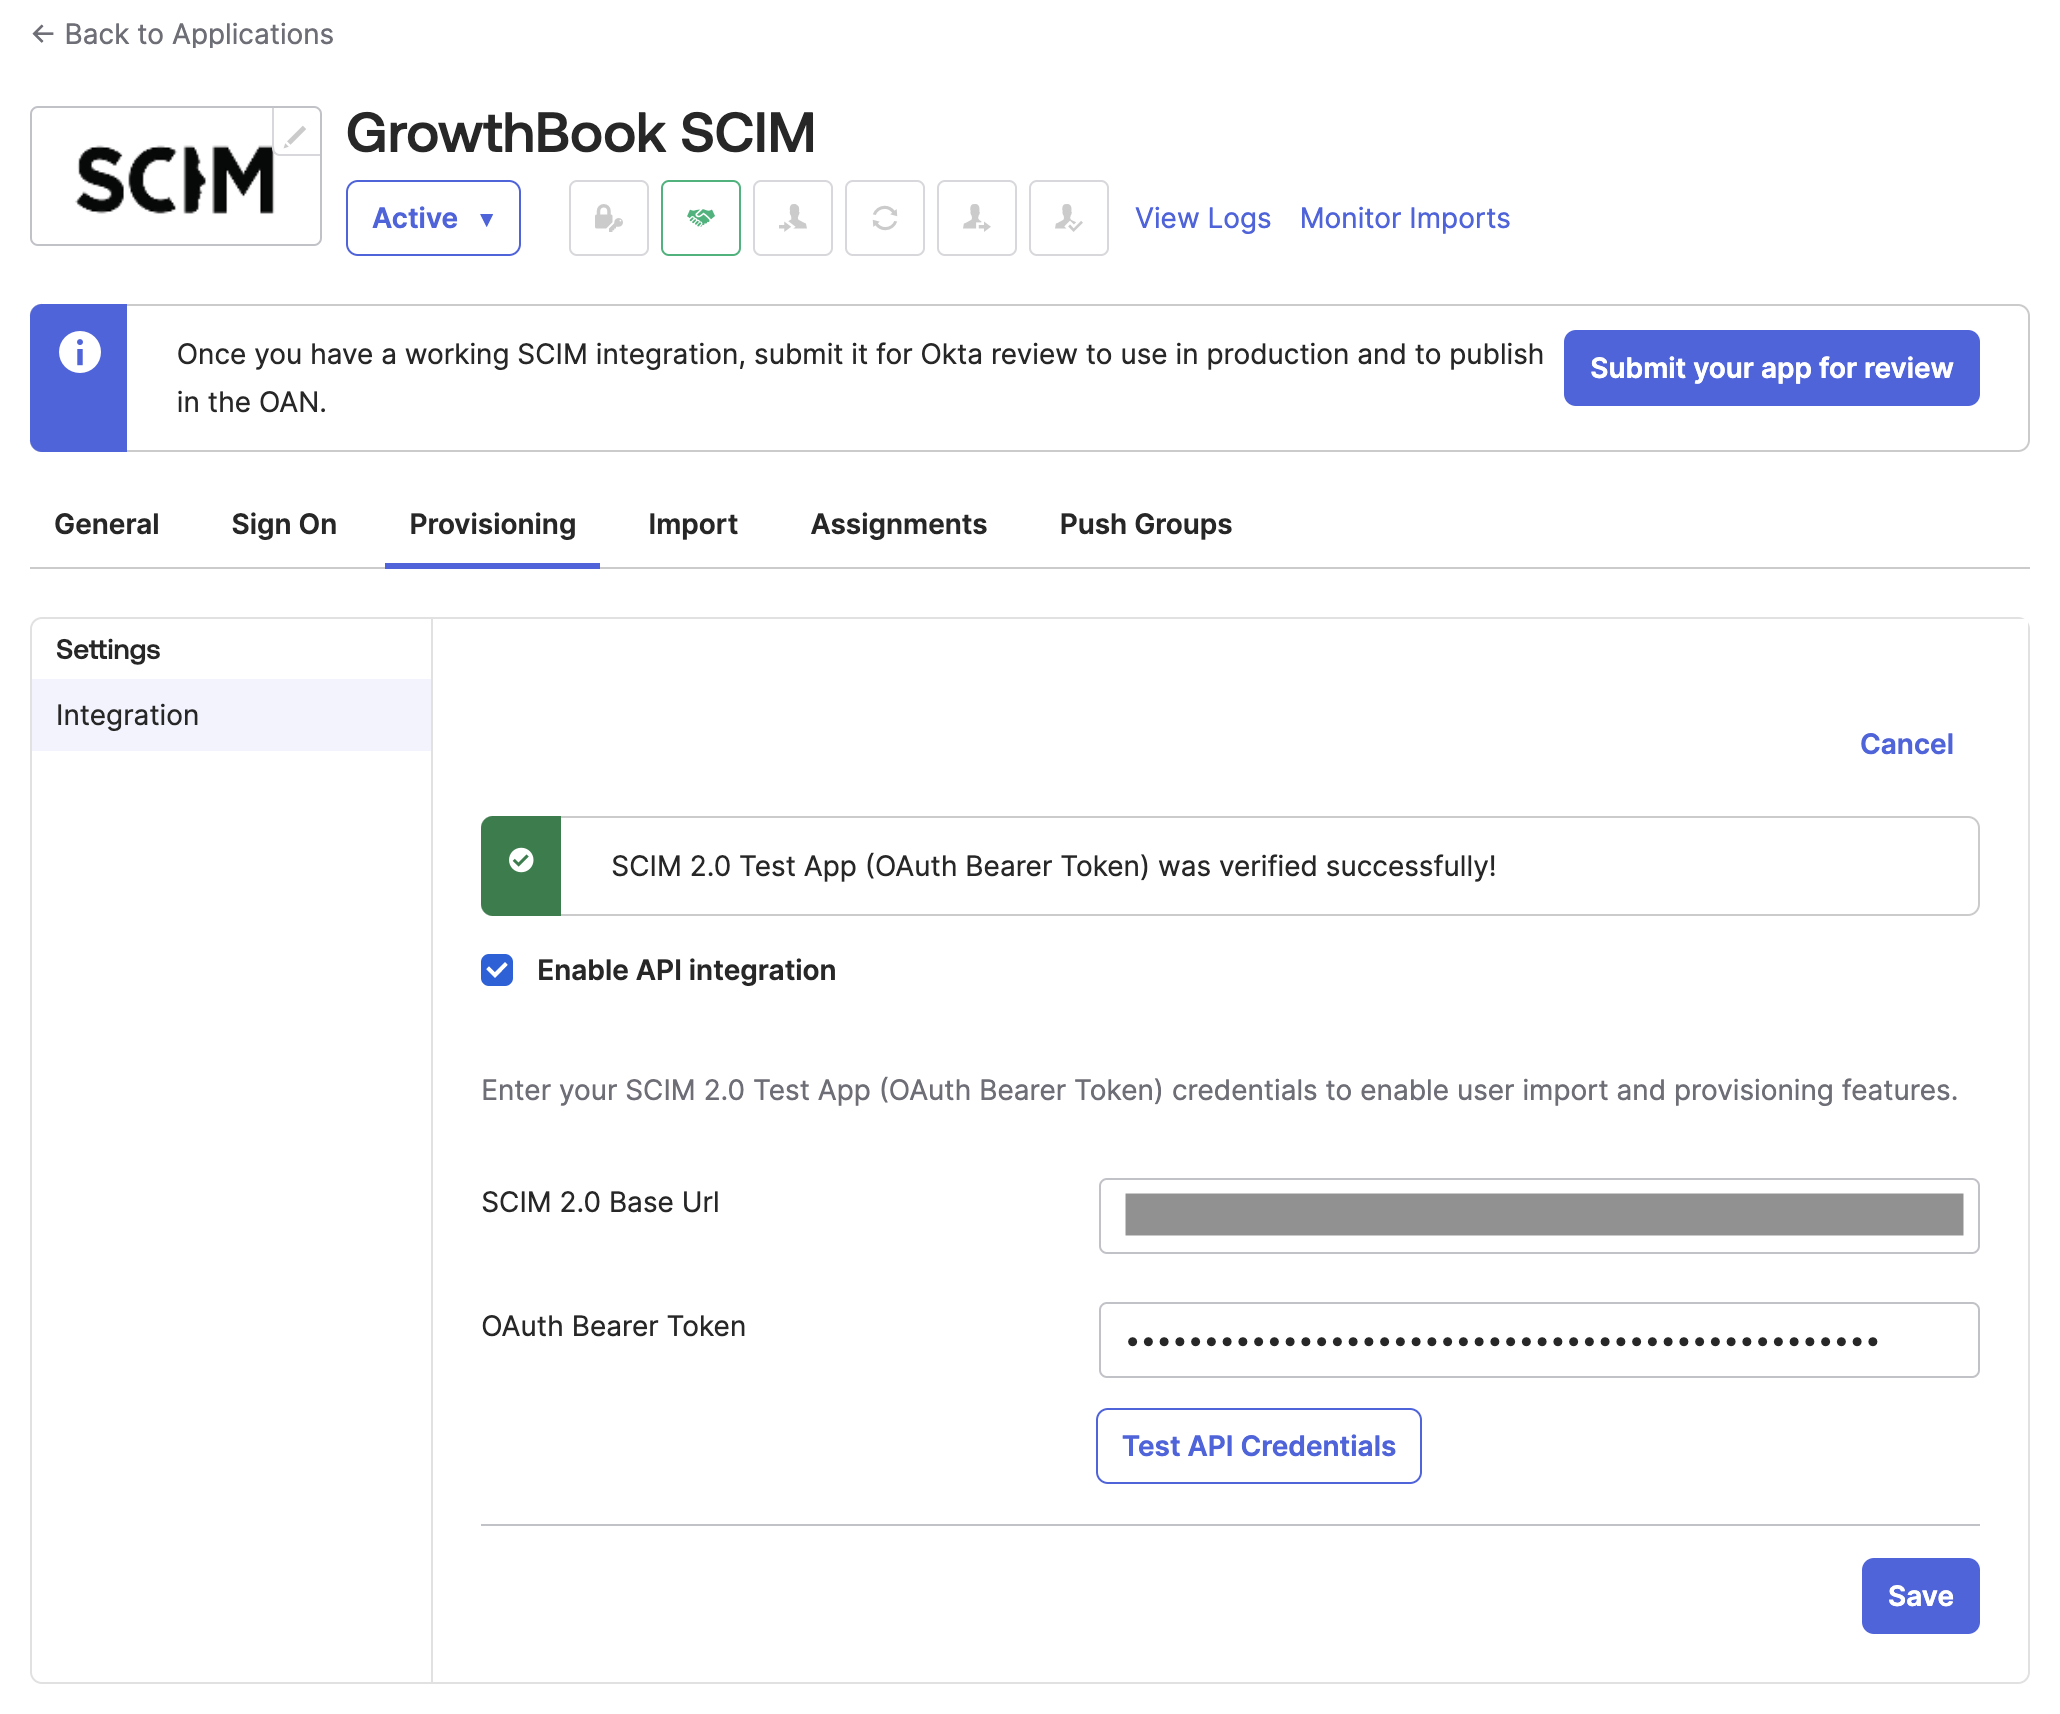
- Now you can enter the Base URL and your OAUTH Bearer Token.
- For GrowthBook Cloud users, the Base URL is
https://api.growthbook.io/scim/v2. If you're self-hosting GrowthBook, the Base URL will be{YOUR_API_HOST}/scim/v2. - You can obtain your OAuth Bearer Token by creating a new Secret API Key with an
Adminrole. To do this, go to your GrowthBook account, and in the left navigation, select "Settings → API Keys." We recommend creating a dedicated API key exclusively for your SCIM integration.
If self-hosting GrowthBook on a VPN or behind a firewall, allowlist Okta's IP addresses to ensure SCIM API calls can hit GrowthBook's SCIM server.
- After adding your credentials, click "Test API Credentials" to ensure they are valid. If they pass the test, click "Save."
- Next, click on the "To App" tab and select "Edit" to enable "Create Users" and "Deactivate Users." Once enabled, click "Save."
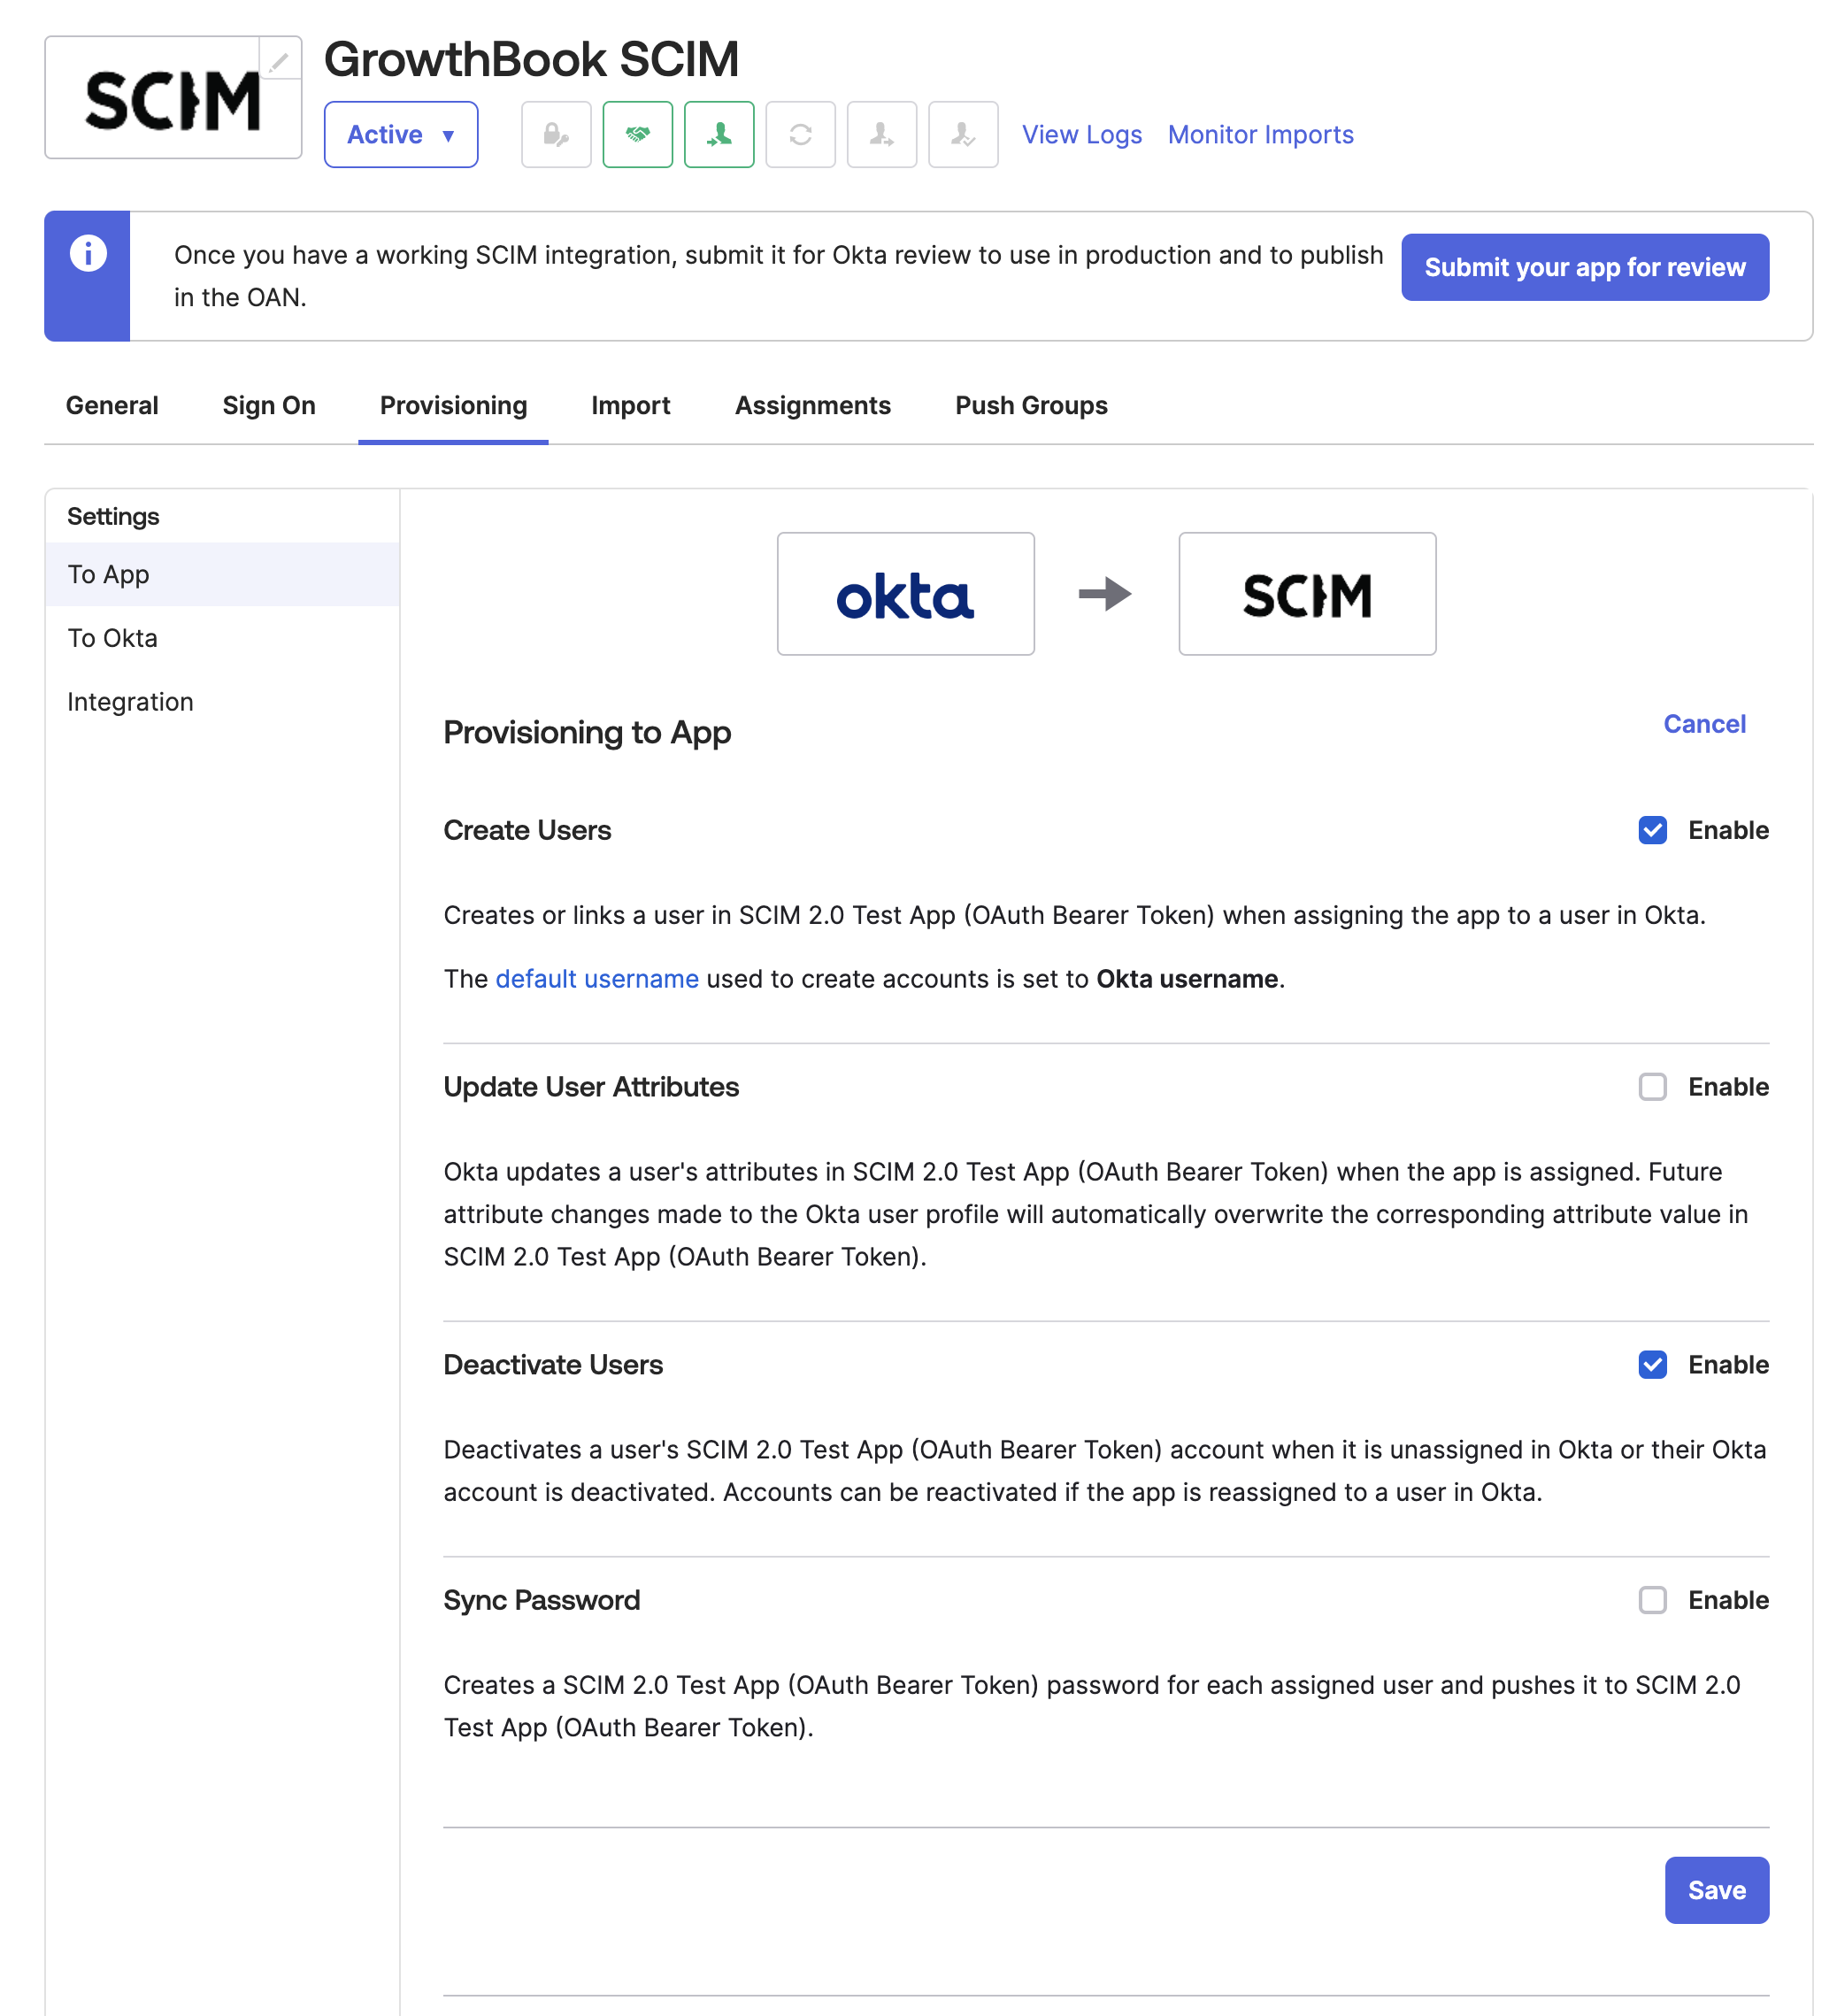
- Congratulations! Your application is now set up. You can navigate to the "Assignments" tab and assign people to GrowthBook and to the "Push Groups" tab to sync groups with GrowthBook Teams.
Okta: How to Define User Roles When Provisioning
-
First, ensure that you've followed the general setup instructions above.
-
In Okta, navigate to the Application you created for GrowthBook SCIM, and click on the "Provisioning" tab, and scroll to the "Attribute Mappings" section, before clicking "Go to Profile Editor".
-
Then, you'll click "Add Attribute" to create a new attribute. with the following details.
- Data type: string
- Display name: GrowthBook Role
- Variable name: growthbookRole
- External name: growthbookRole
- External namespace: urn:ietf:params:scim:schemas:core:2.0:User
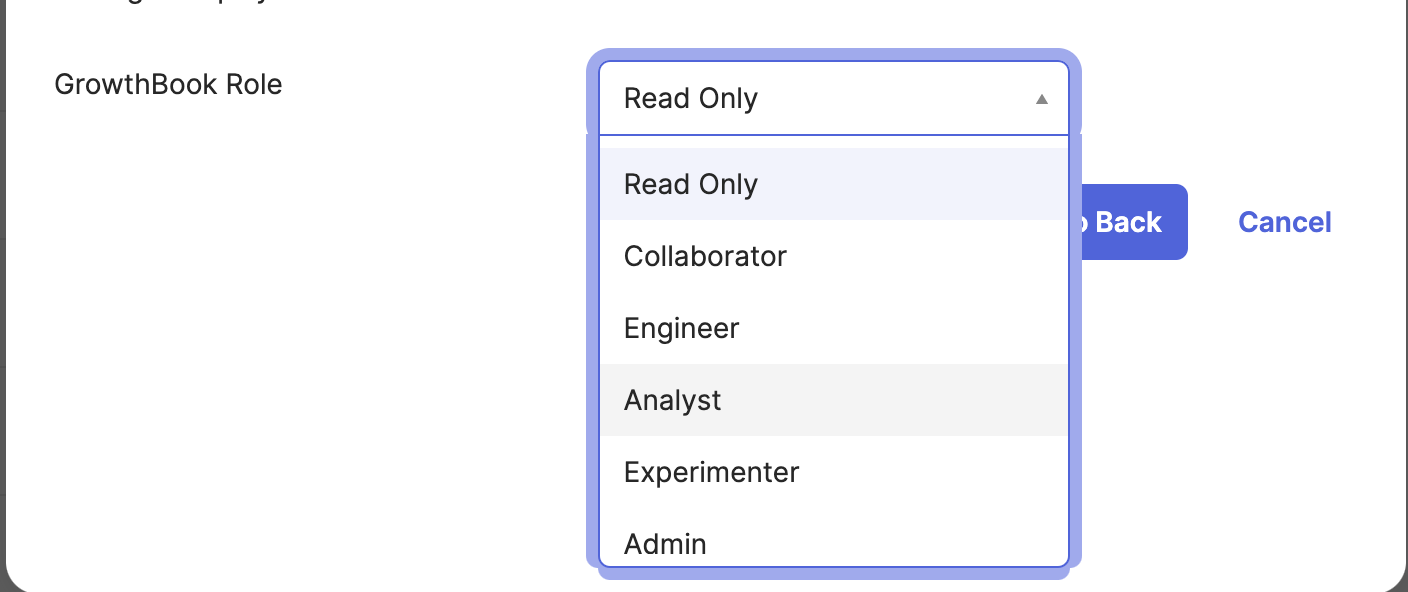
- Check the box to define an enumerated list of values
- Here, you need to add the following enum Options
- Display name: Read only
- Value: readonly
- Display name: Collaborator
- Value: collaborator
- Display name: Engineer
- Value: engineer
- Display name: Analyst
- Value: analyst
- Display name: Experimenter
- Value: experimenter
- Display name: Admin
- Value: admin

It's important each of these values are entered exactly as shown above, including capitalization. If there is a descrepancy, the user's role will fall back to your organizations default role.
- Once complete, when you provision a user, you can select their role from the dropdown, and that will be applied to the user in GrowthBook. If you're not sure which role a user should have, you can view GrowthBook role permissions.
Azure AD/Microsoft Entra ID Setup
The setup directions below are shown using the Azure Portal (e.g., portal.azure.com); however, the steps are the same if you're setting this up via the Microsoft Entra Admin Panel (e.g., entra.microsoft.com).
- Verify that your GrowthBook organization is on an enterprise plan with SSO enabled
-
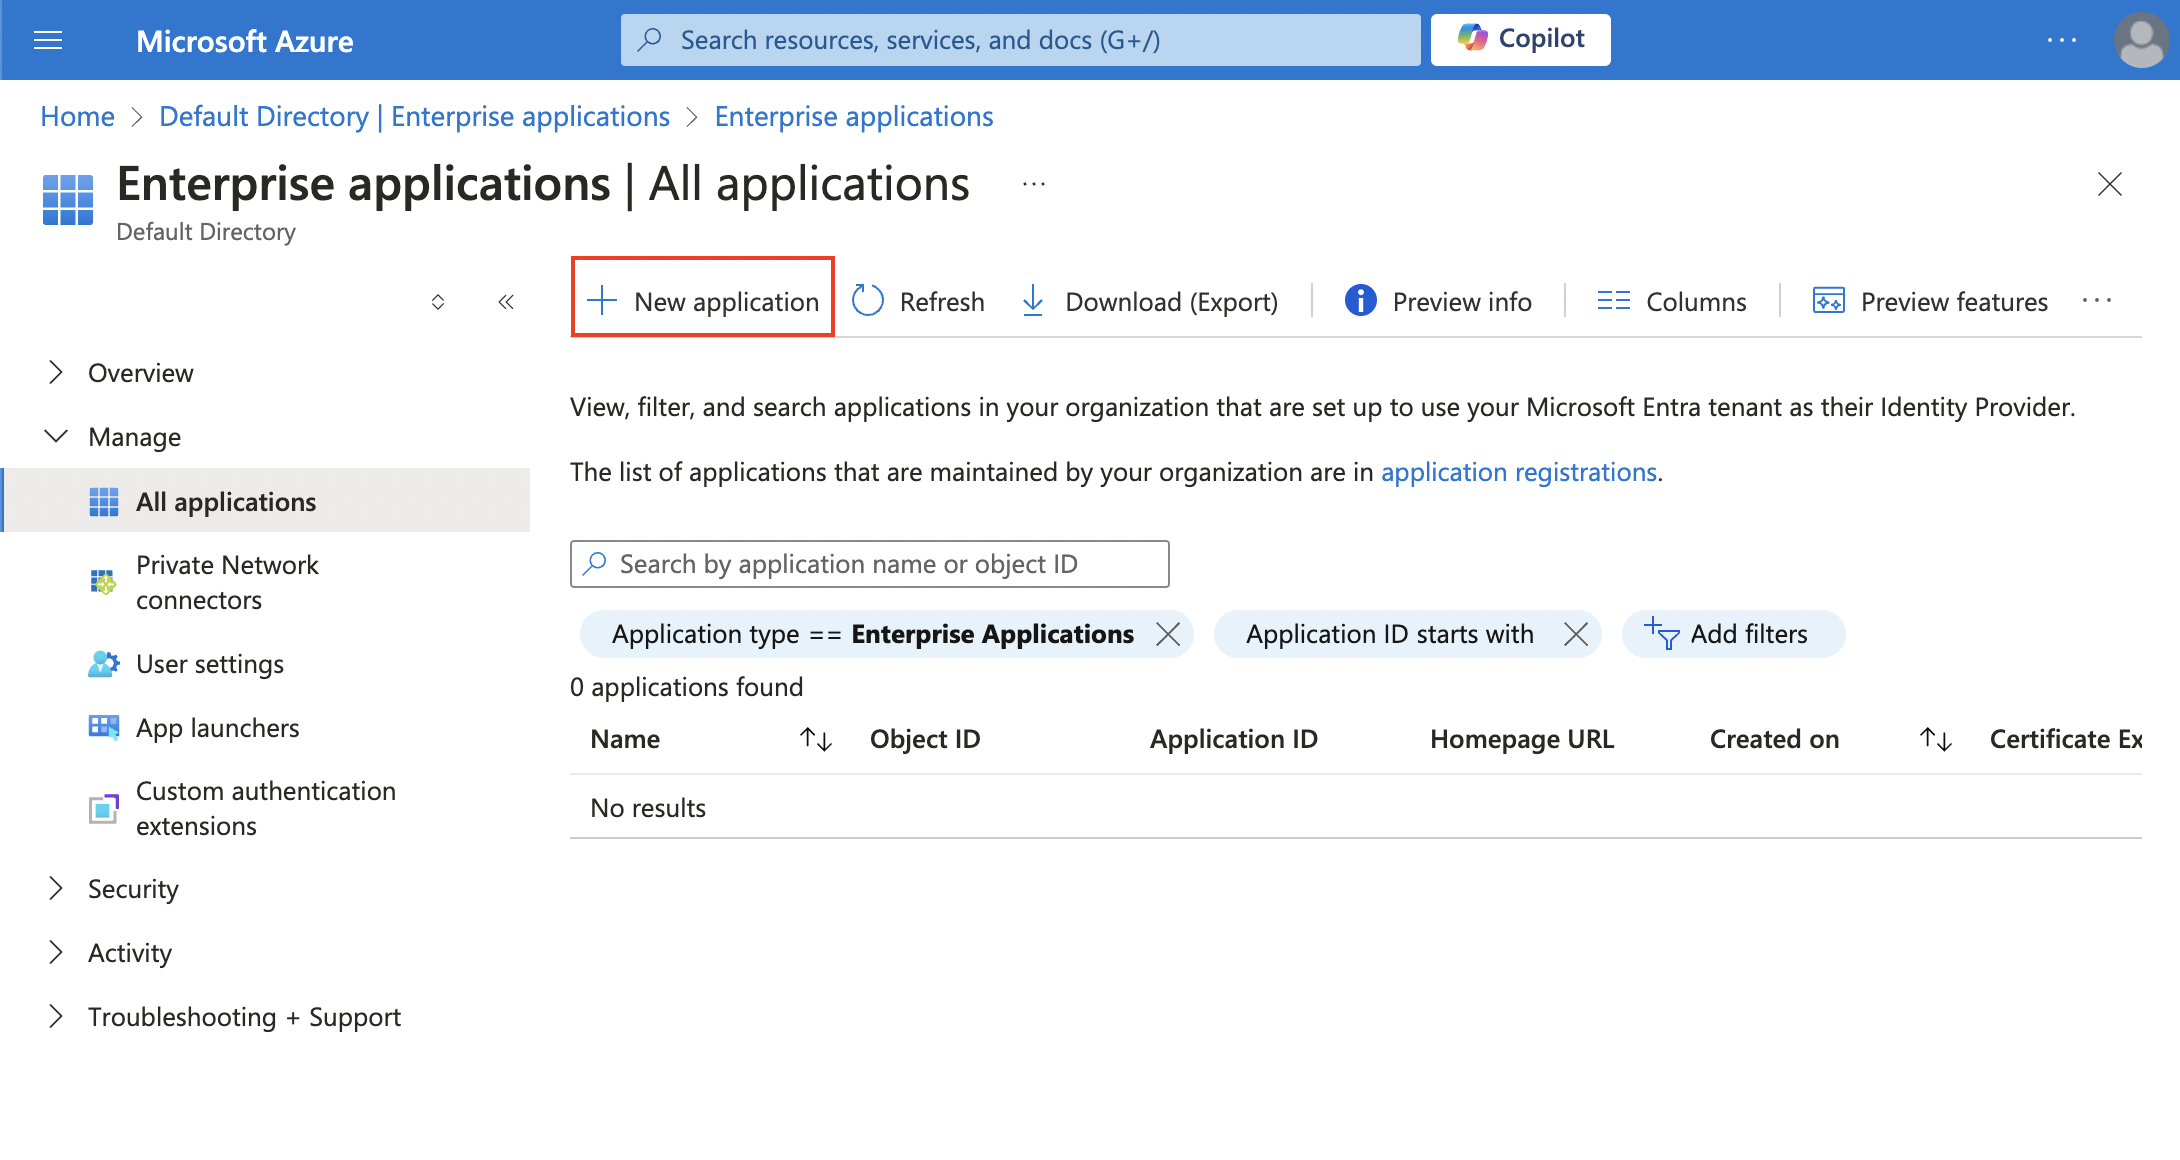
Log in to your Azure account, click Microsoft Entra ID, and in the sidebar menu, select Manage → Enterprise Applications → + New Application
-
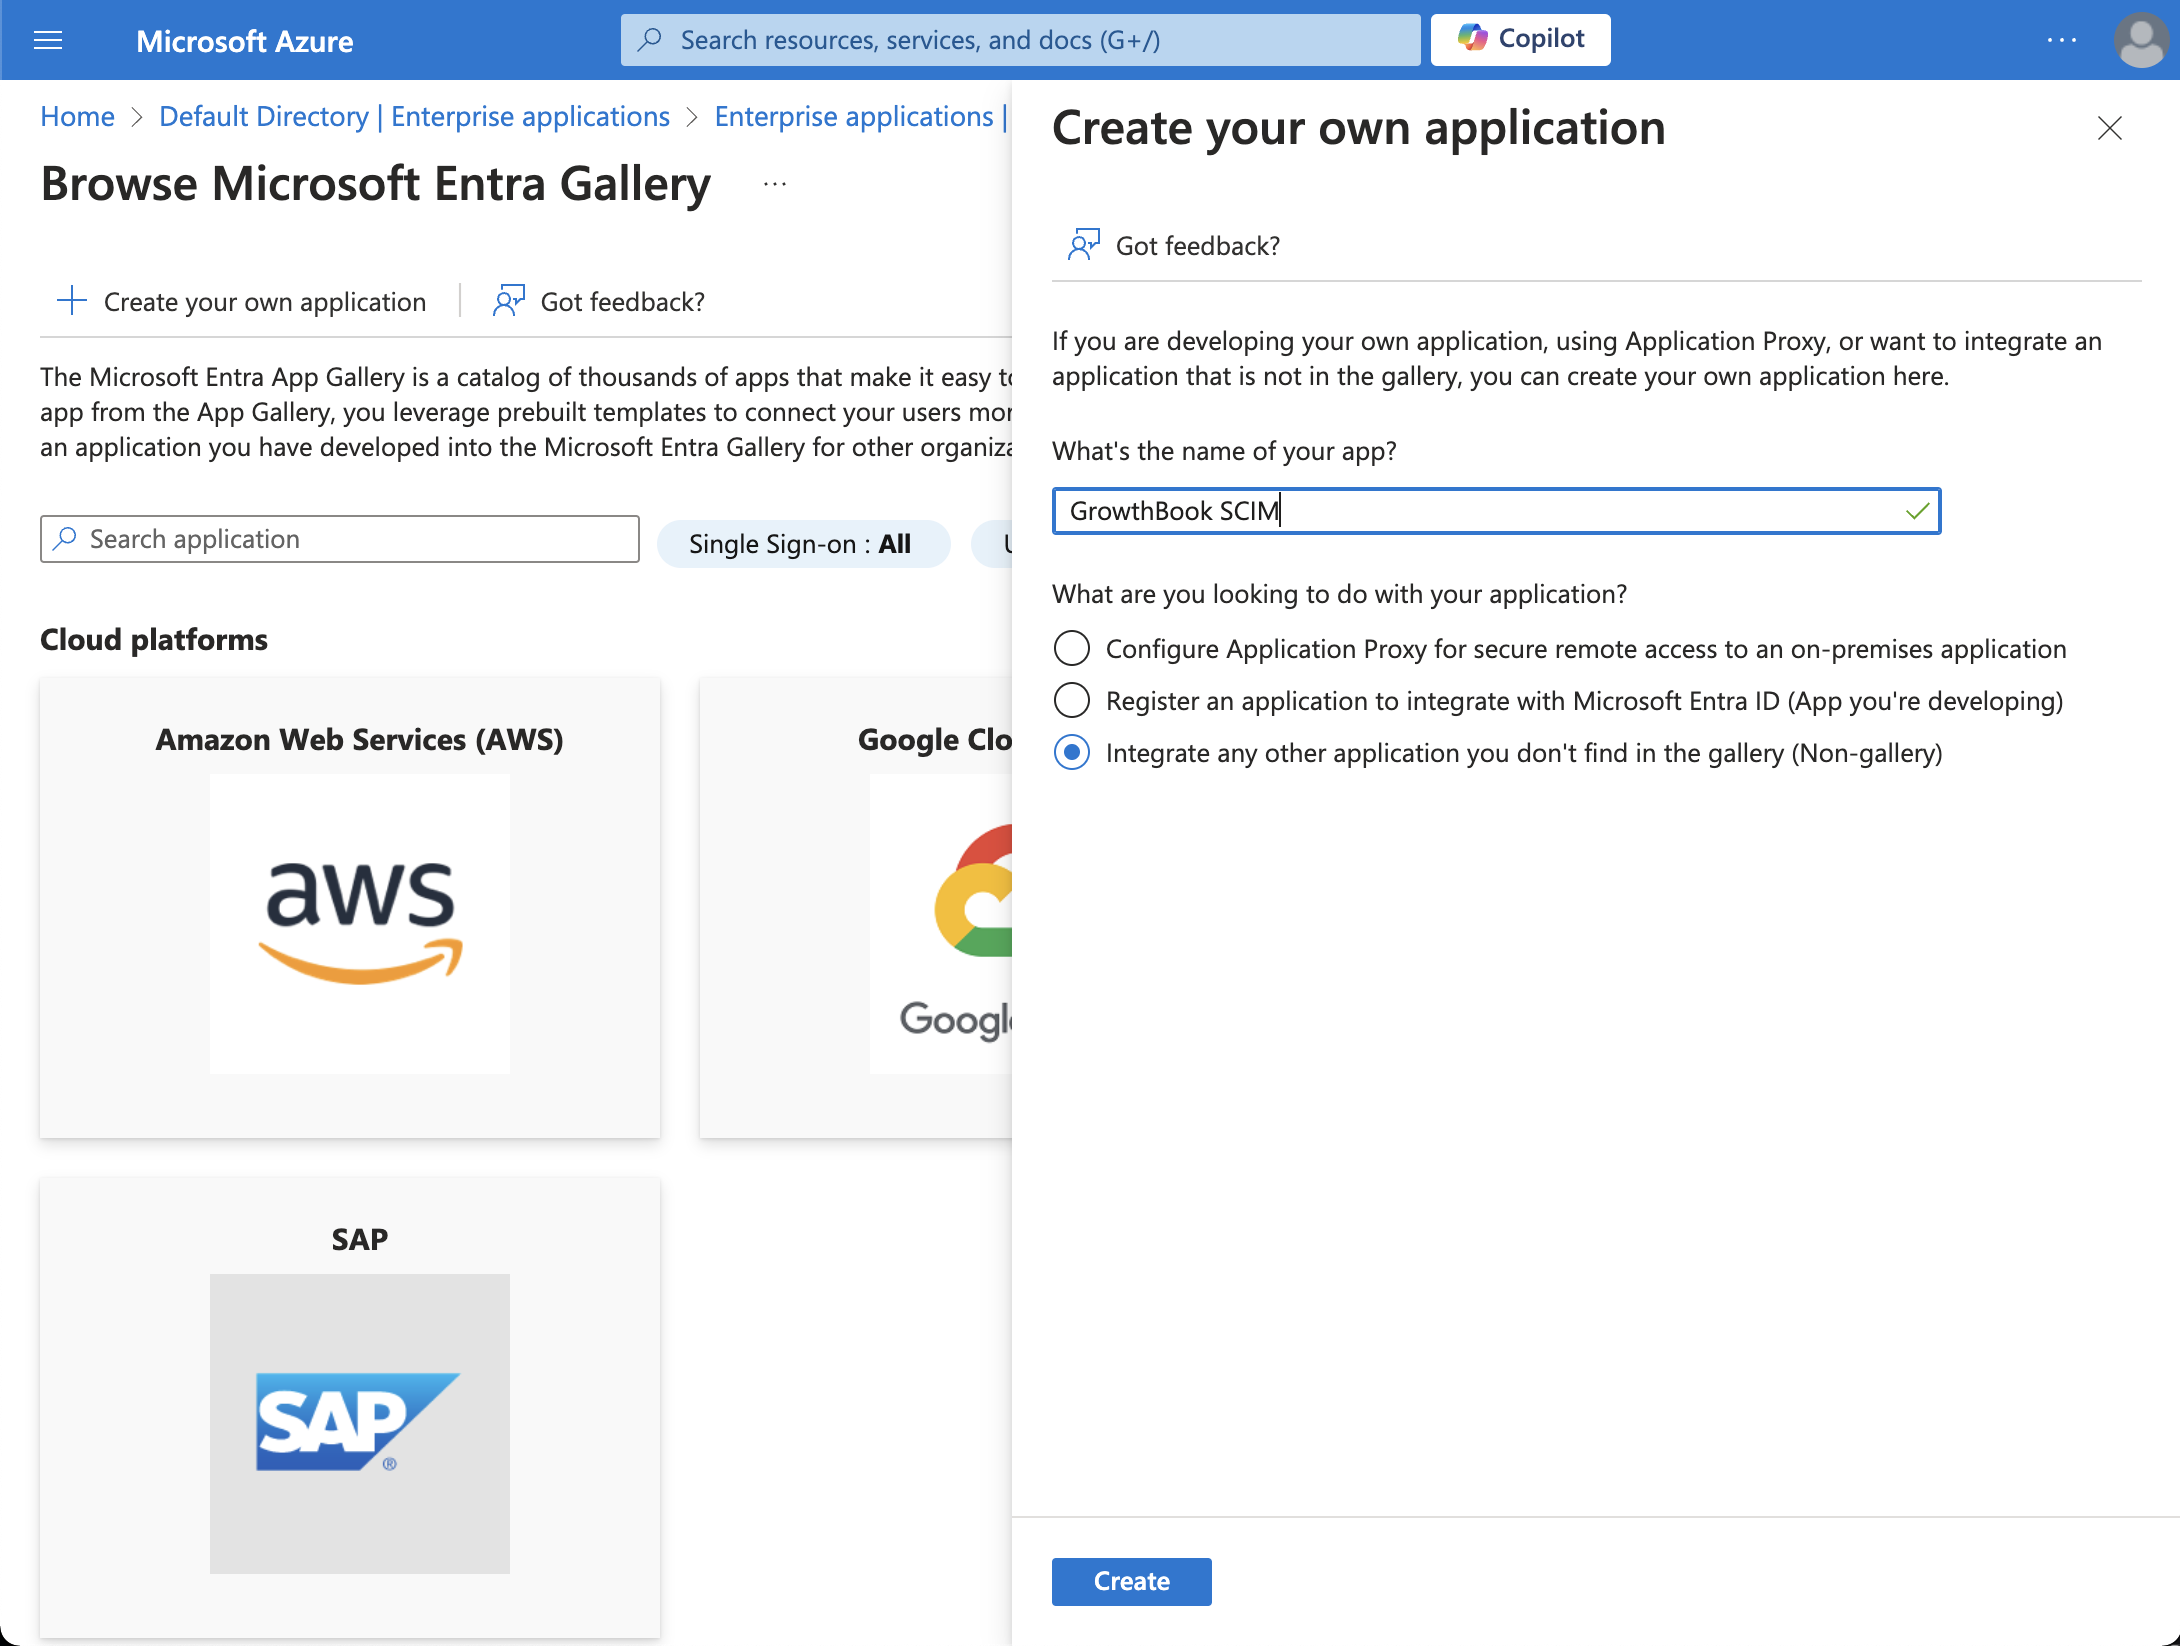
Select + Create your own application, add an app name, and select Integrate any other application you don't find in the gallery (Non-gallery).
- Once created, select the box to Provision User Accounts
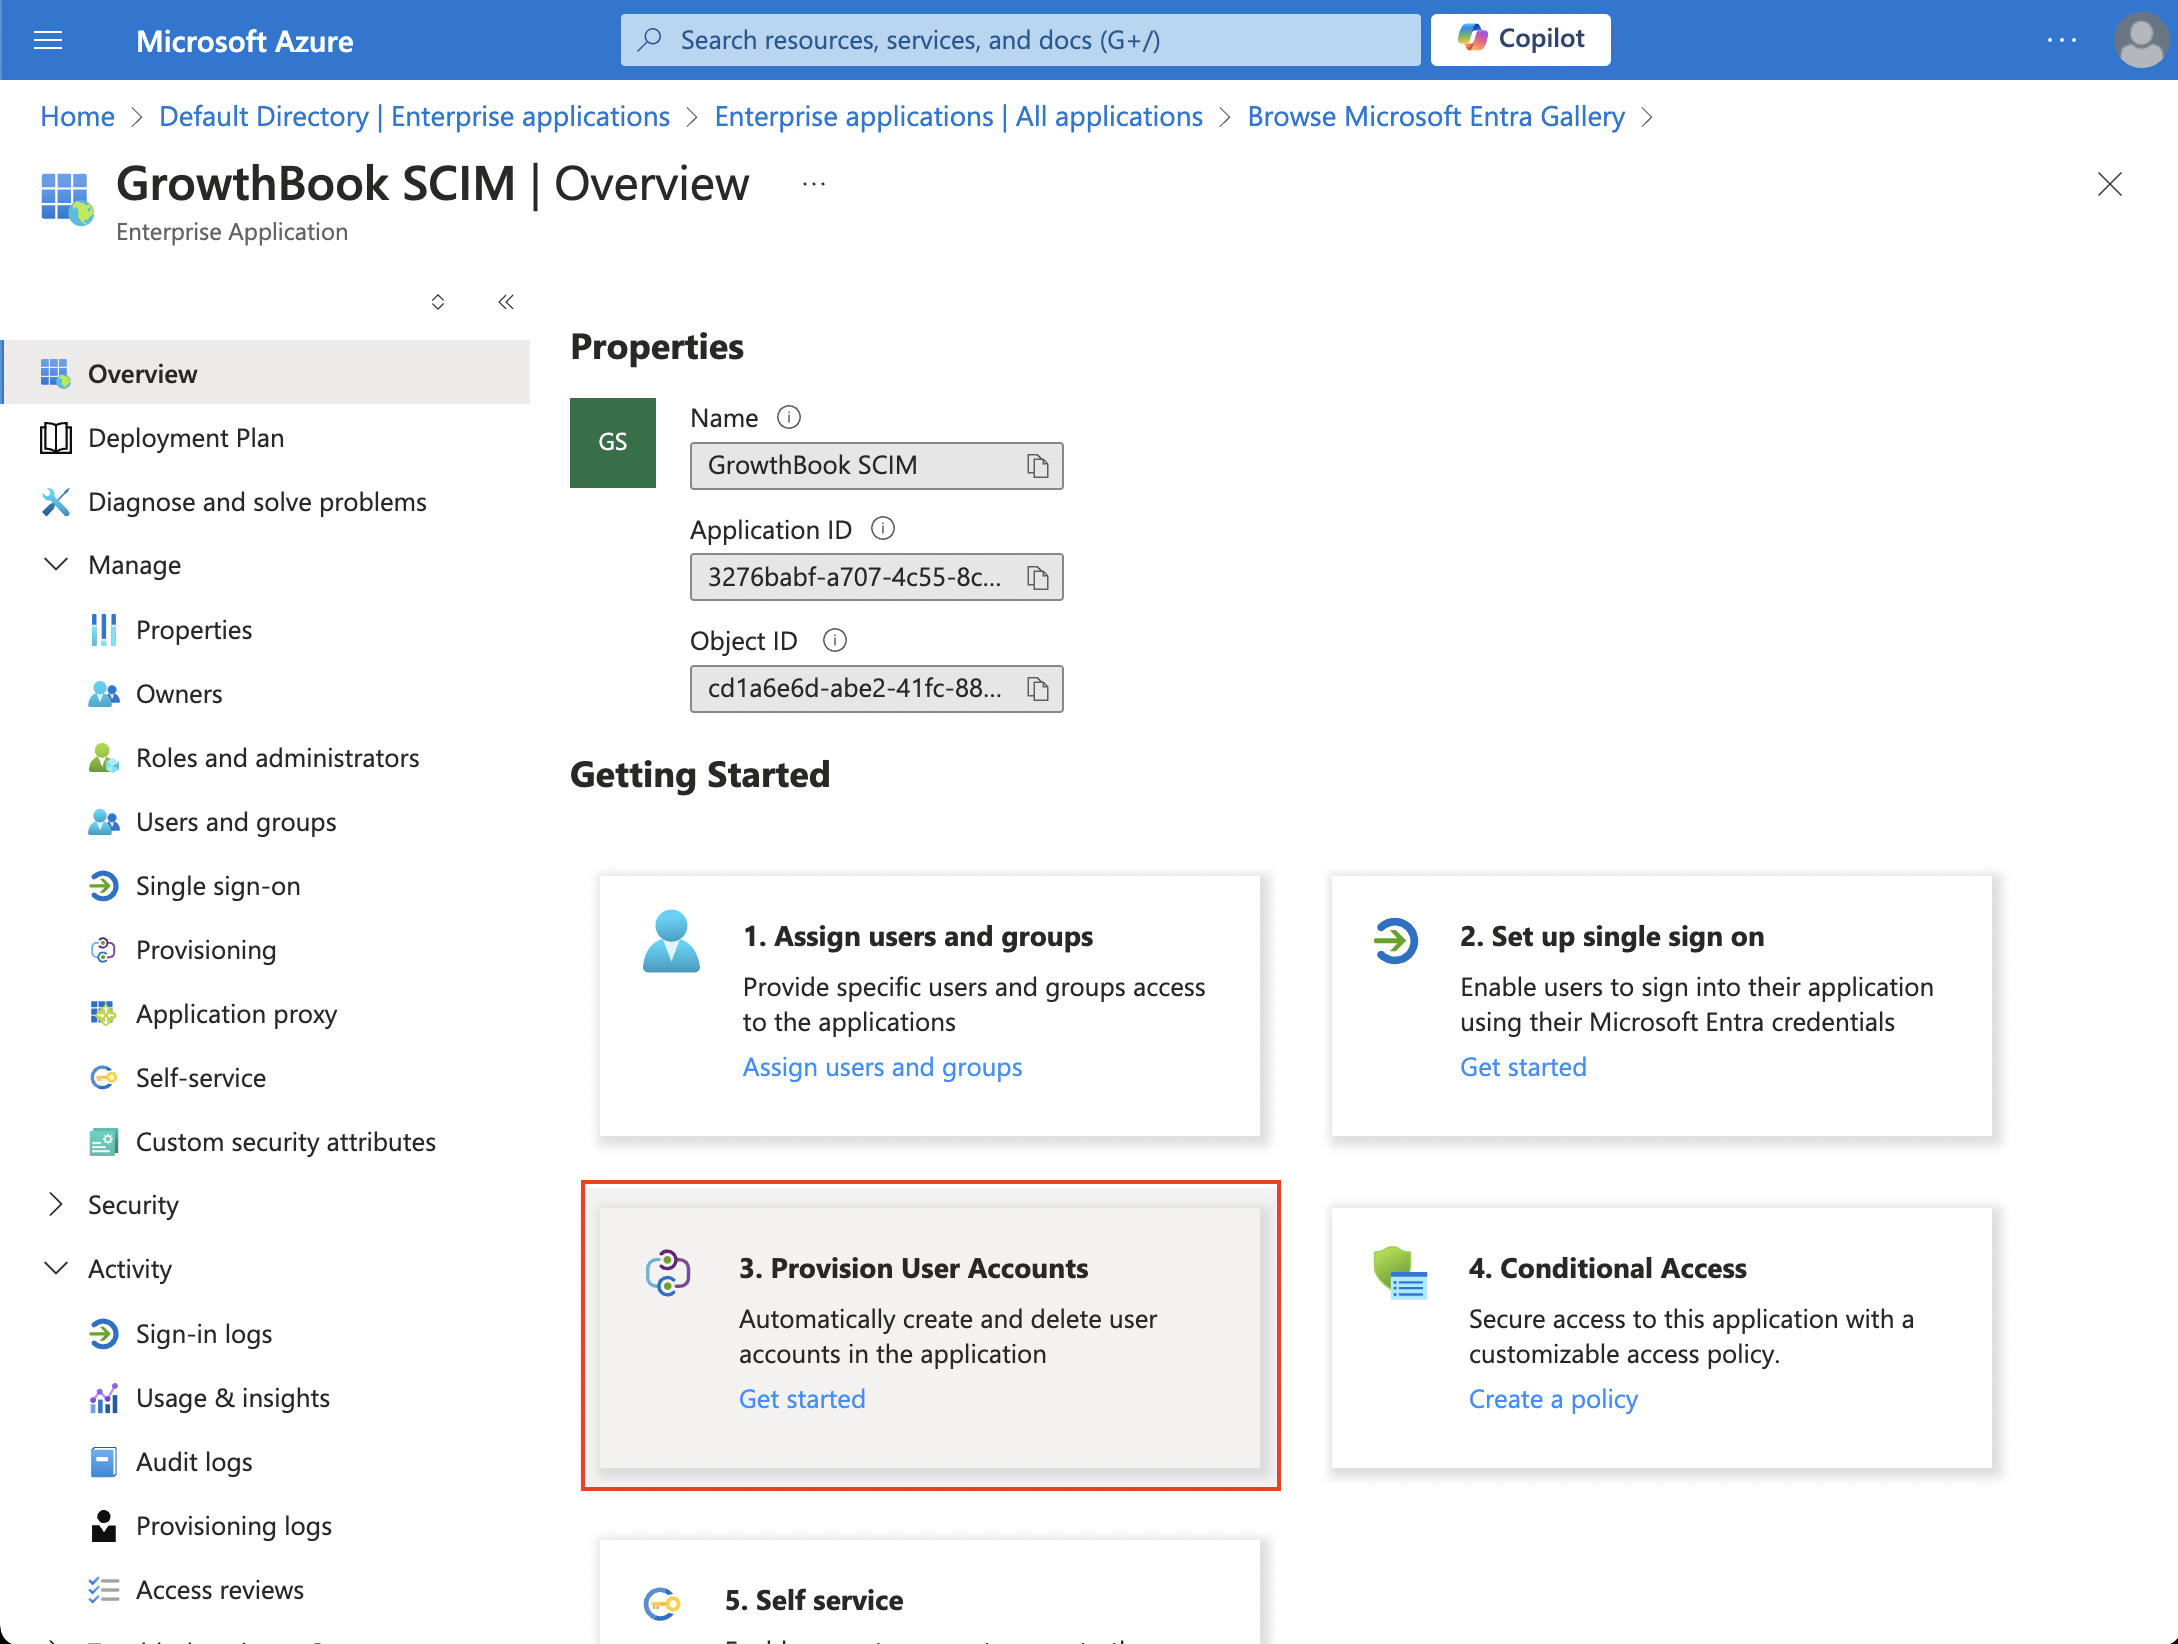
- Click Get Started
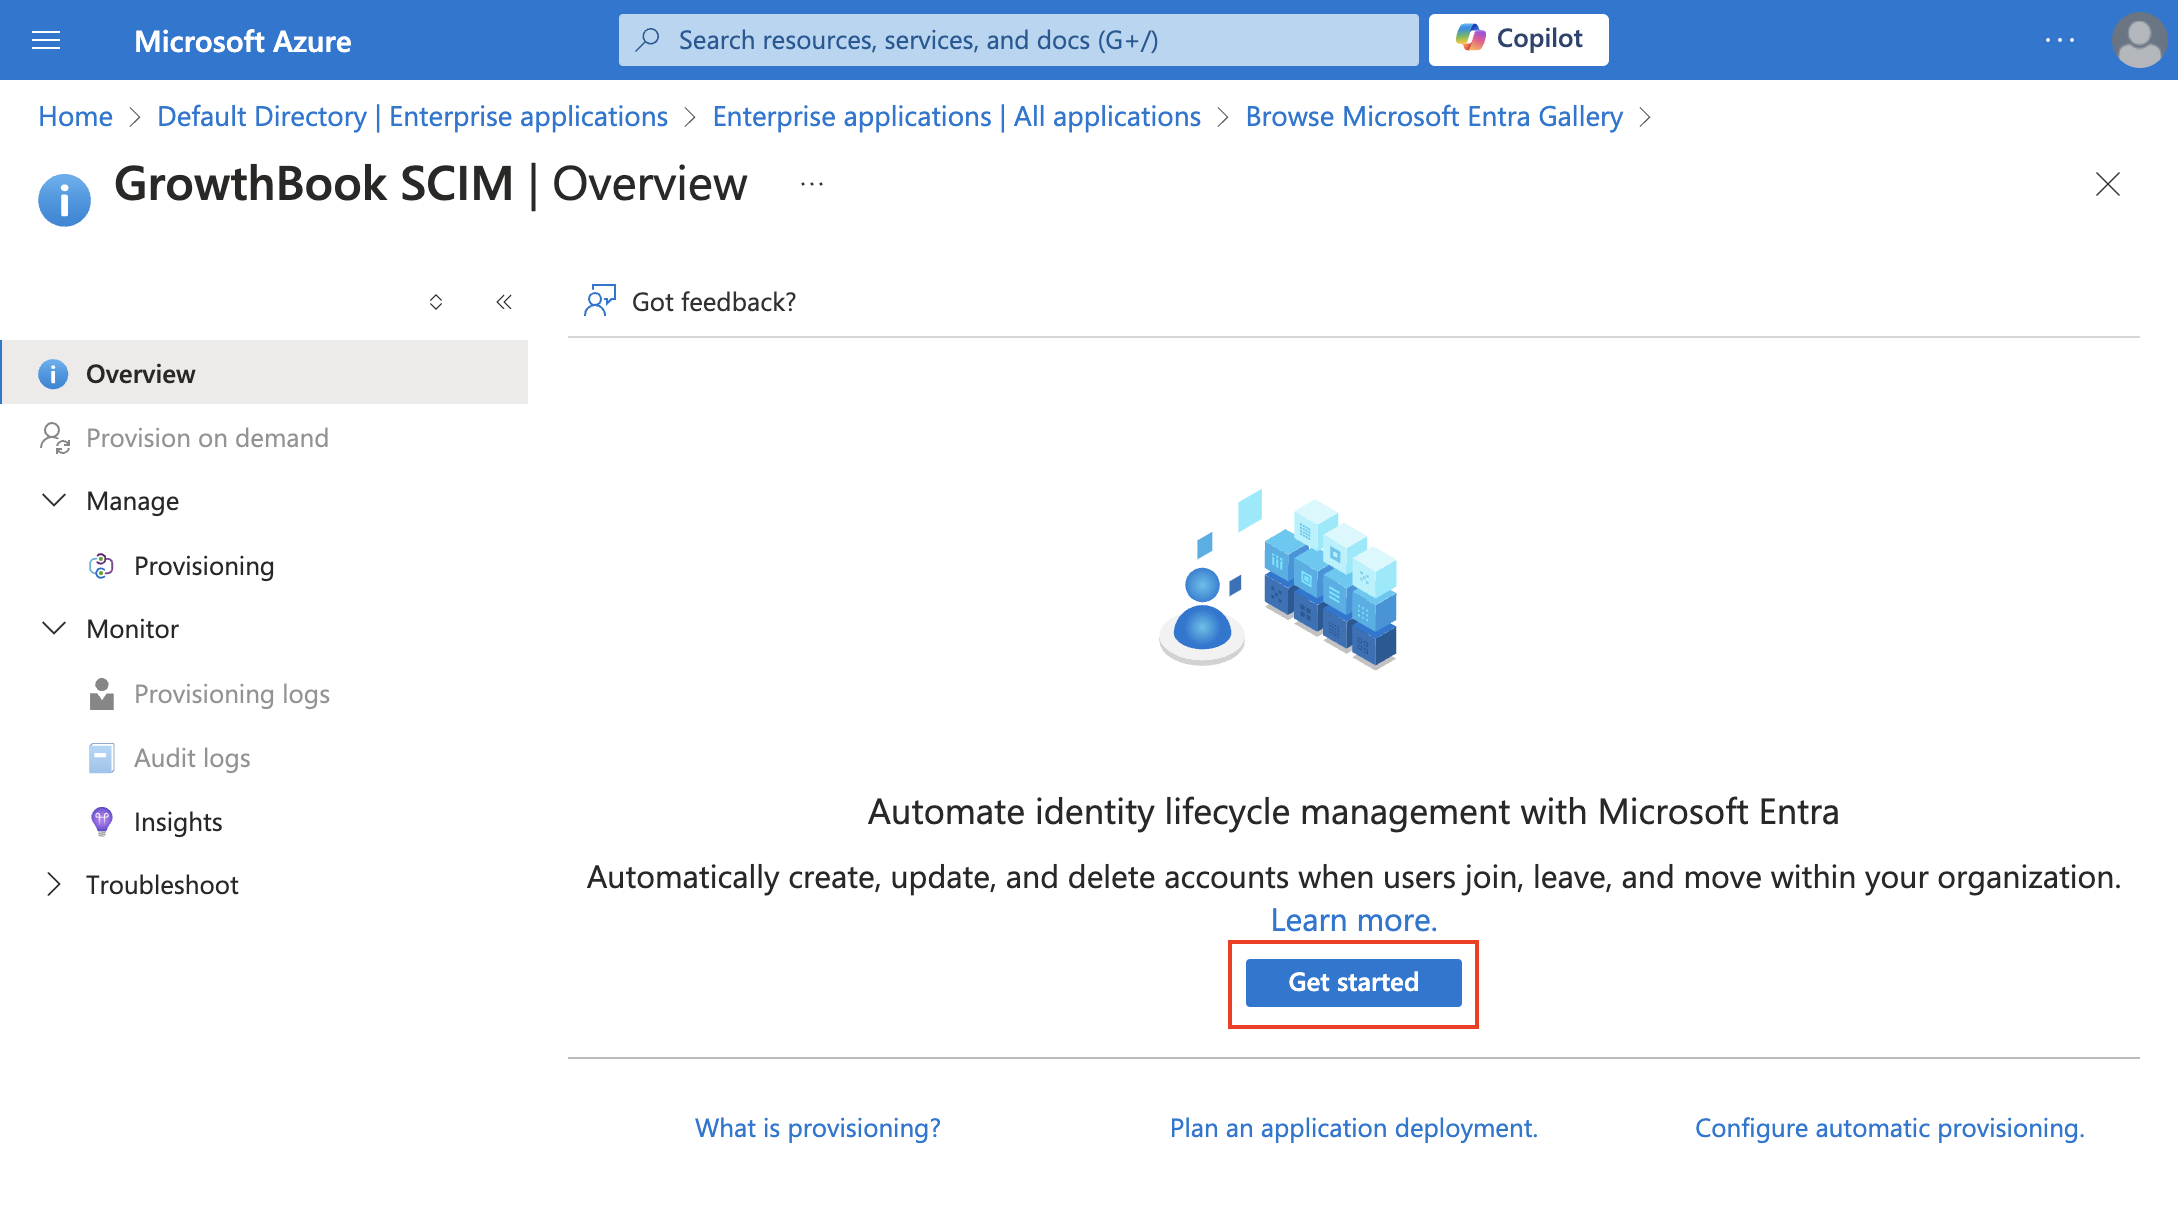
- Change the Provisioning Mode to Automatic before adding the Base URL and your OAUTH Bearer Token
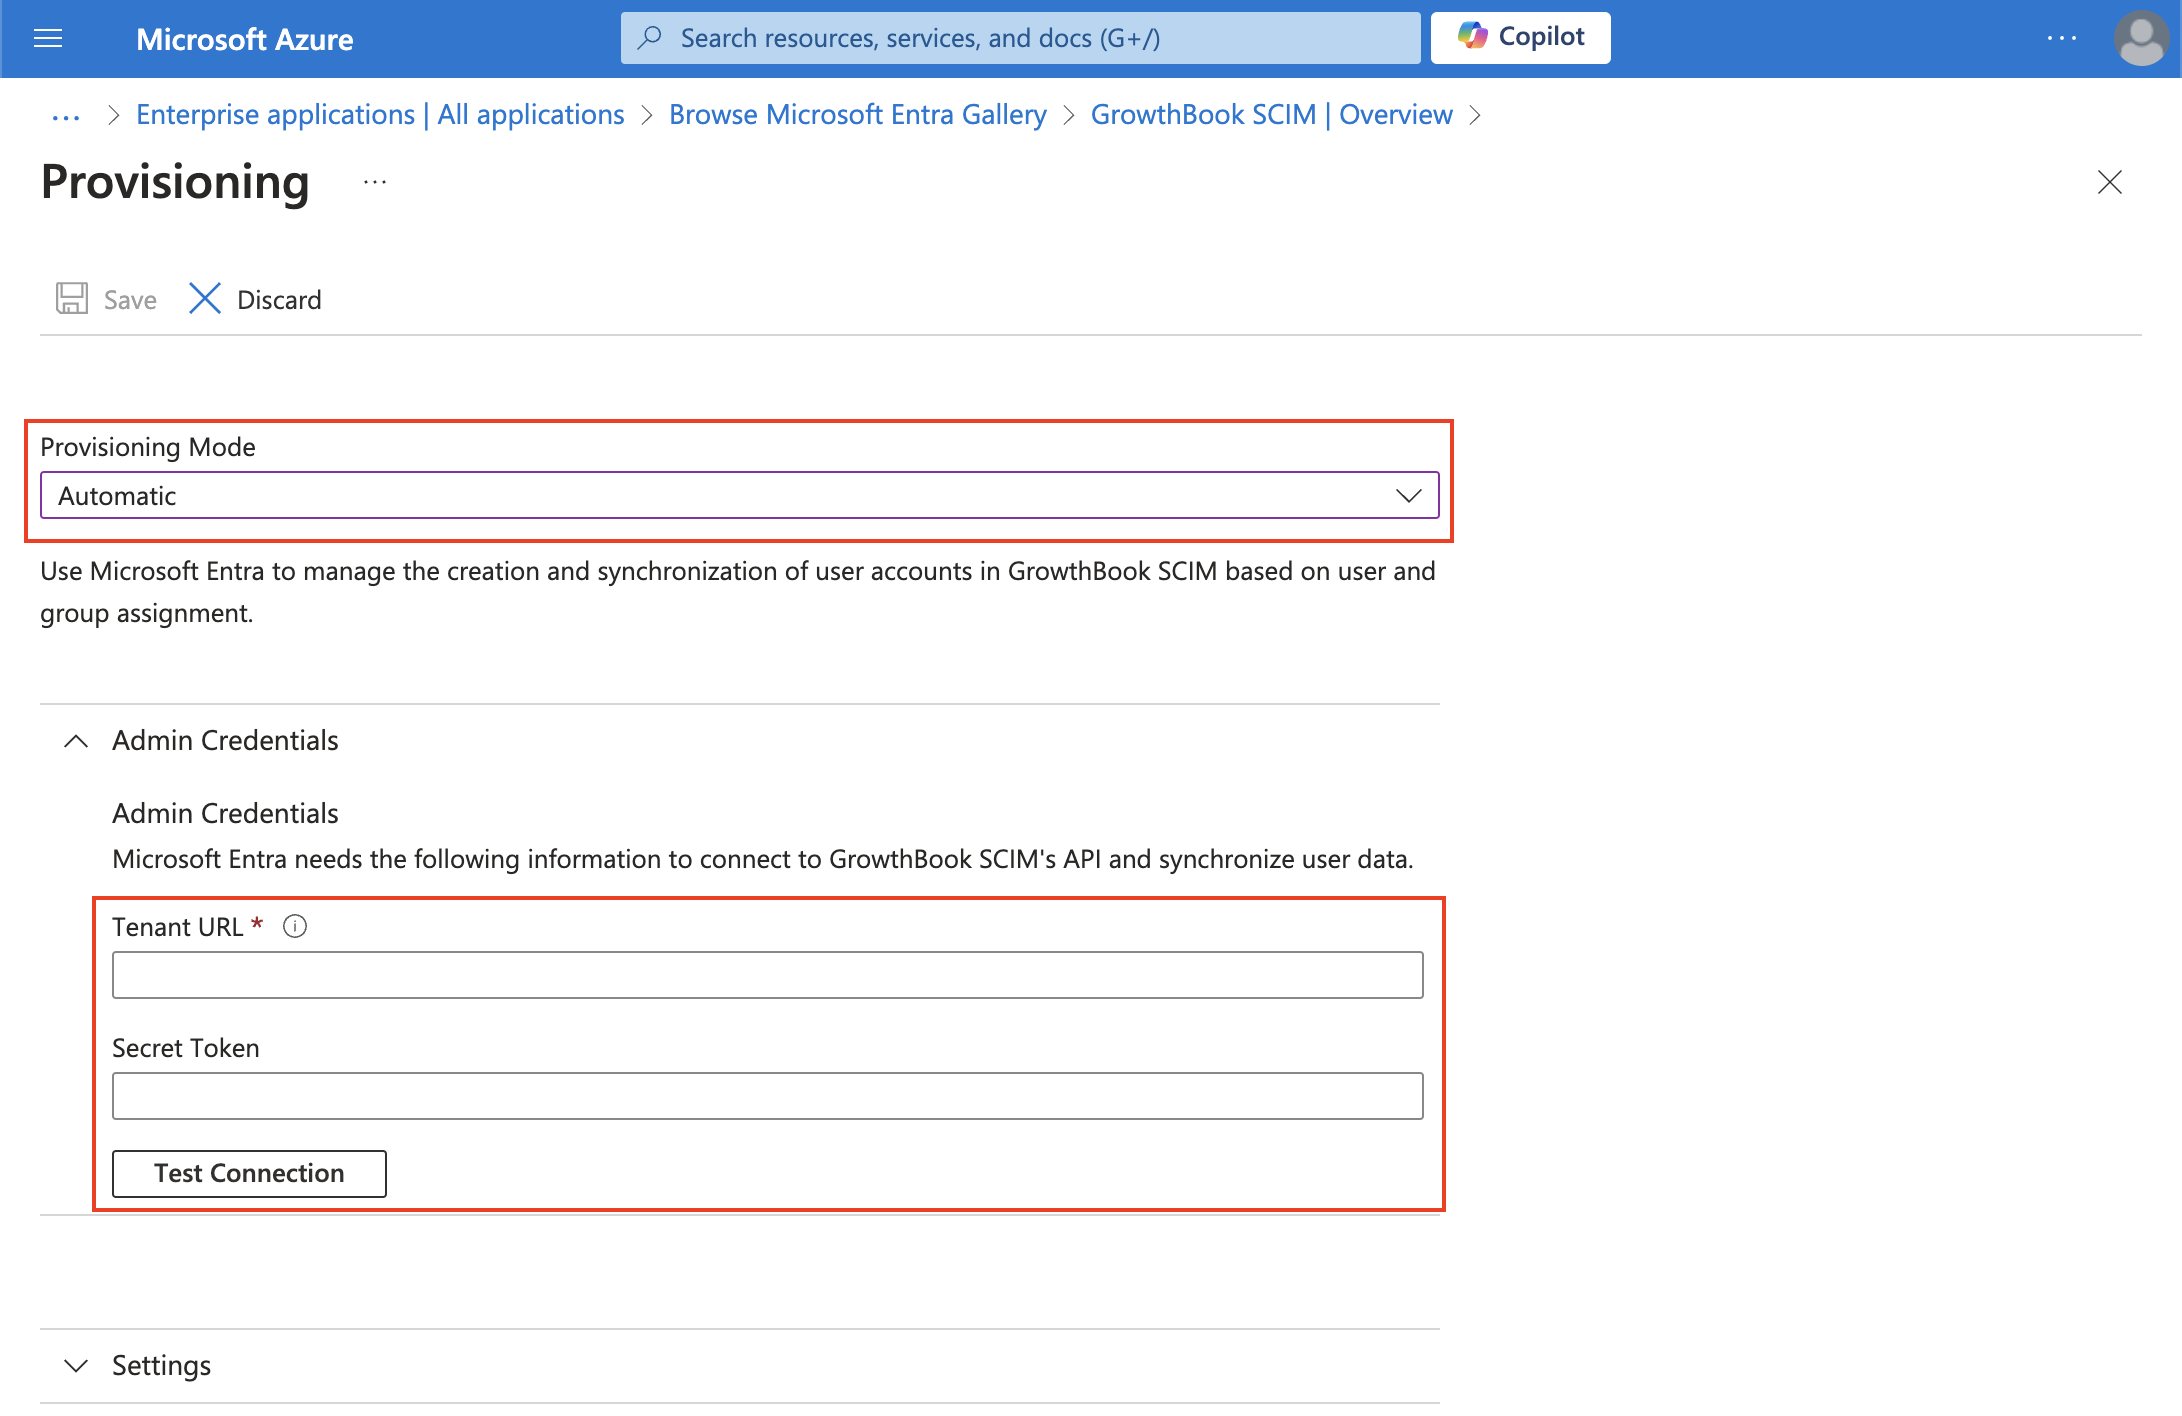
- For GrowthBook Cloud users, the Base URL is
https://api.growthbook.io/scim/v2. If you're self-hosting, the Base URL is{YOUR_API_HOST}/scim/v2. - Obtain your OAuth Bearer Token by creating a new Secret API Key with an
Adminrole. To do this, open GrowthBook and go to Settings → API Keys. We recommend creating a dedicated API key for your SCIM integration.
If self-hosting GrowthBook on a VPN or behind a firewall, allowlist Azure AD's/Entra ID's IP addresses to ensure the SCIM API calls can hit GrowthBook's SCIM server.
-
After adding your credentials, click Test API Credentials to ensure they're valid. If they pass the test, click Save.
-
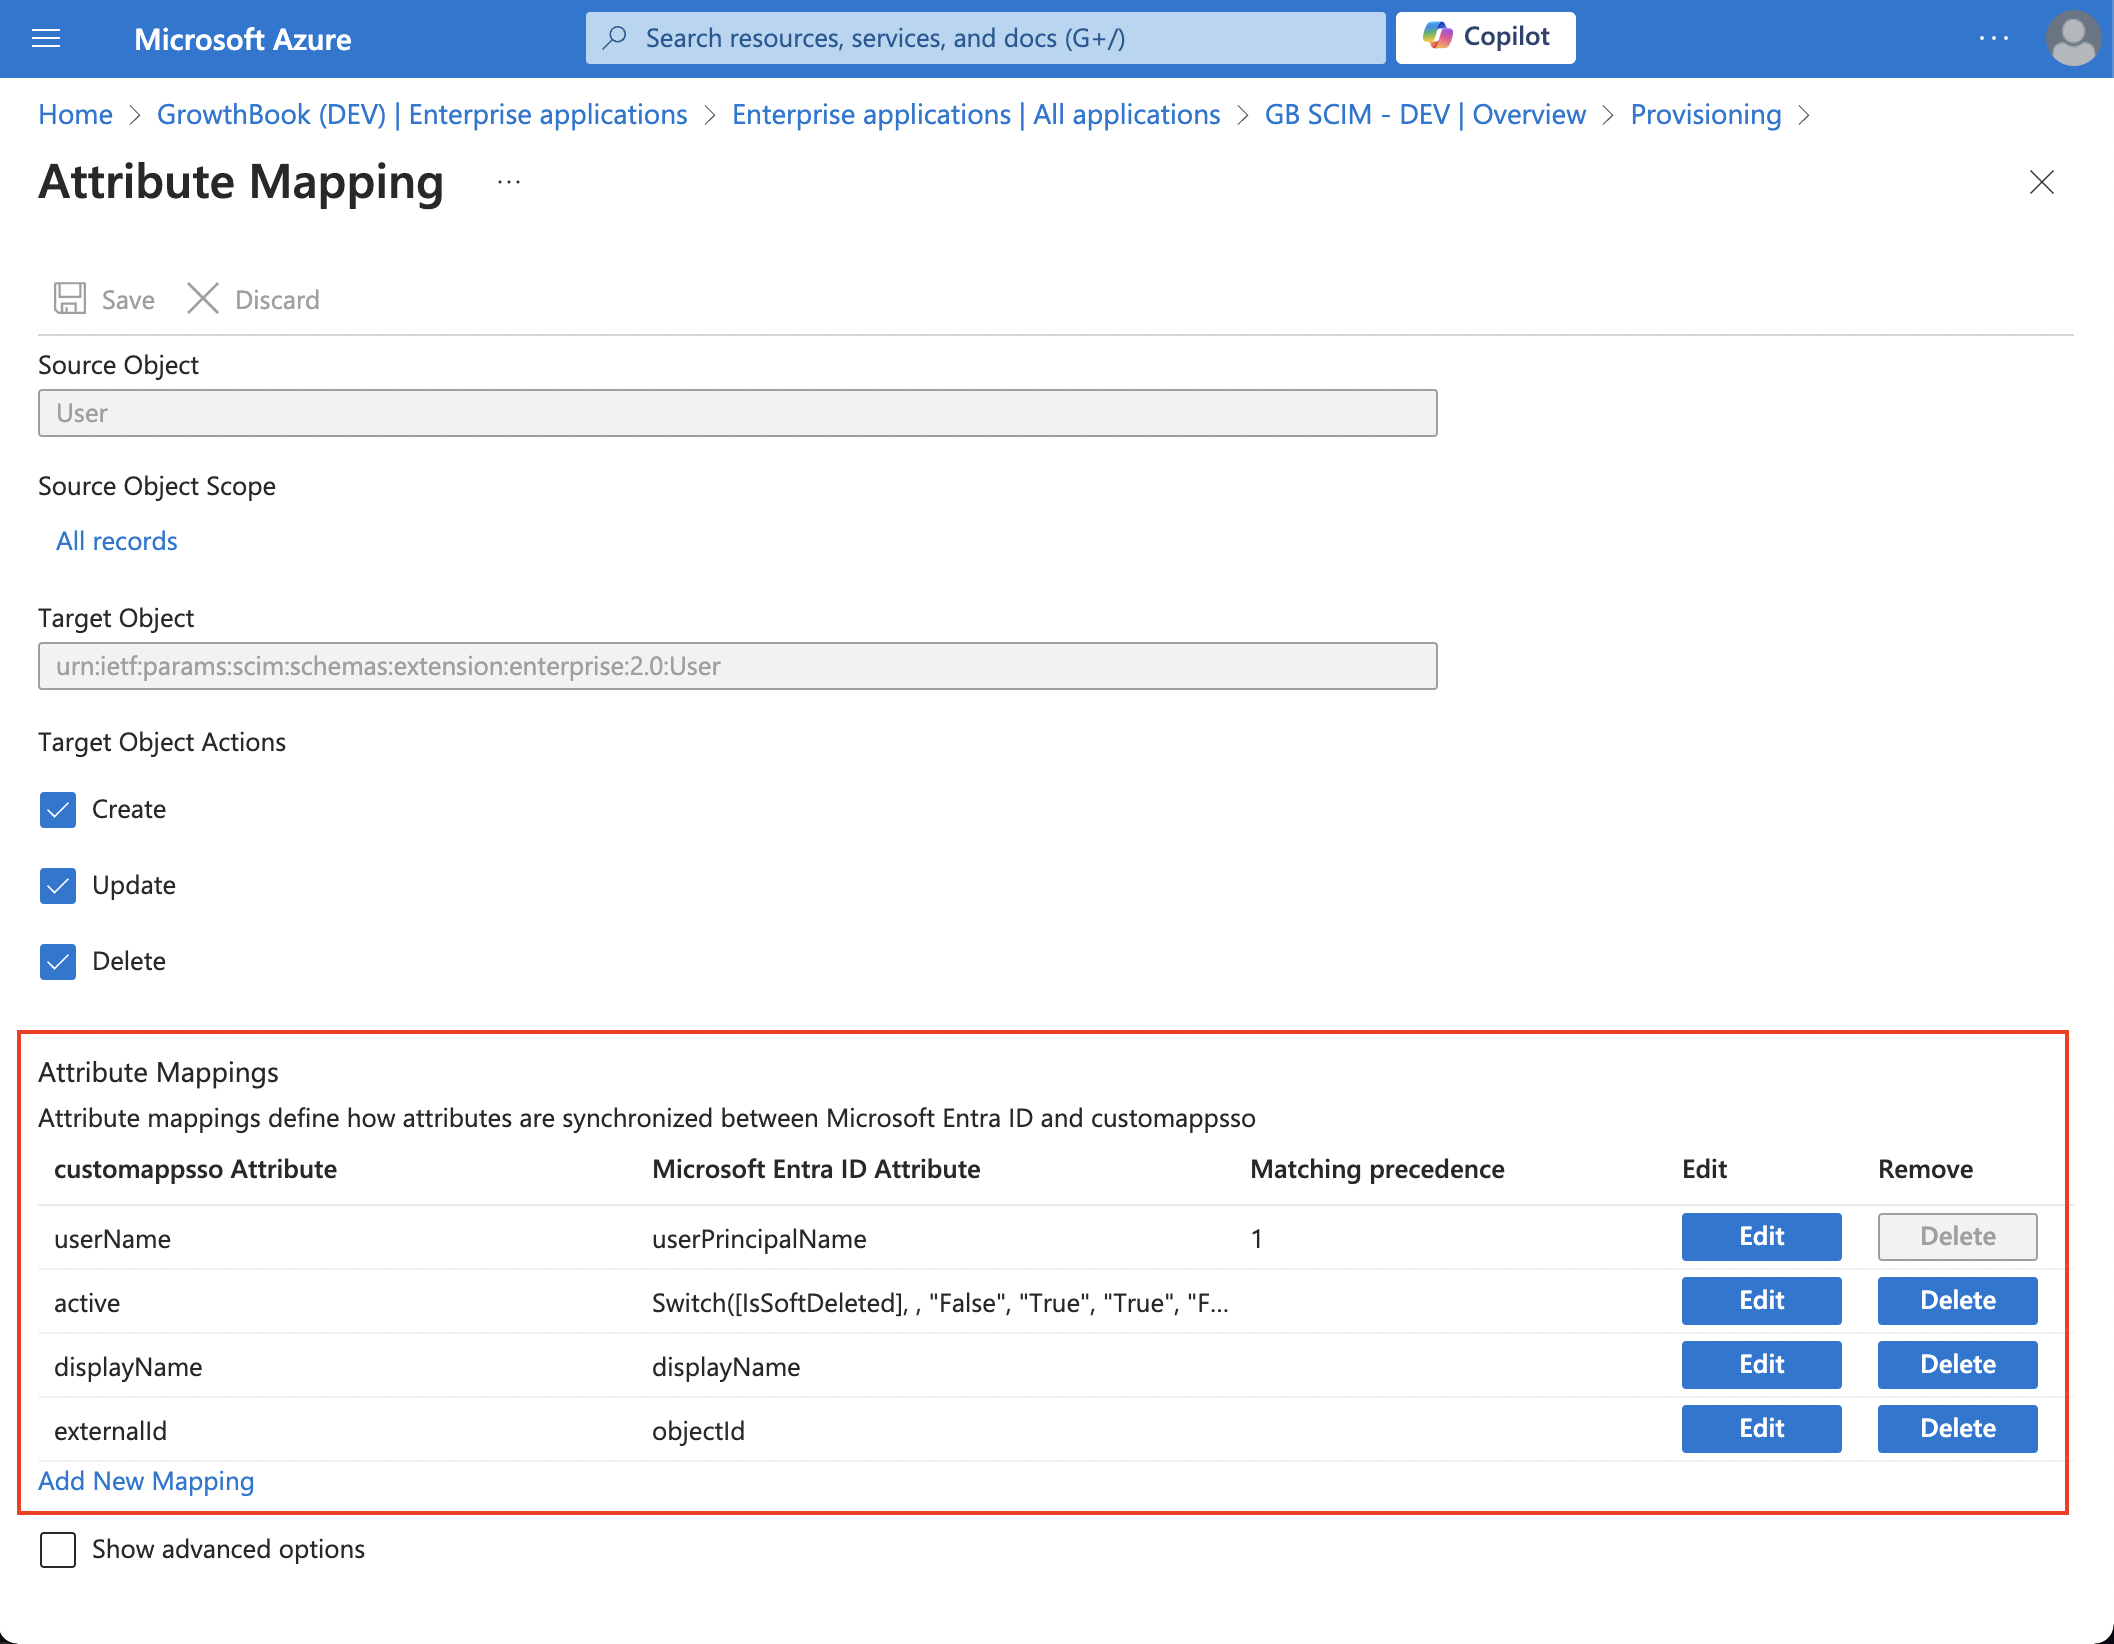
Once saved, enable/disable syncing of groups and users on the Mappings page. The two screenshots below show the necessary mappings. These must match exactly!
User Mapping
Customizing the attribute mapping is a critical step that enables the mapping of GrowthBook attributes to the correct Azure AD / Entra ID attributes. Below are the required attributes and how they need to be mapped for users.
| GrowthBook Attributes | Azure AD / Entra ID Attributes | Matching precedence |
|---|---|---|
| userName | userPrincipalName | 1 |
| active | Switch([IsSoftDeleted], , "False", "True", "True", "False") | - |
| displayName | displayName | - |
| externalID | objectId | - |
Group Mapping (Optional)
Using groups simplifies providing users with custom permissions. When a user is added to a group and the group is provisioned to GrowthBook, we'll create a Team in GrowthBook, and all users of the team will inherit the team's permissions. See more details on teams. If you don't plan on using Teams, you can disable group syncing and do not have to customize the attribute mapping.
If you are planning to use groups, below are the required attributes and how they need to be mapped.
| GrowthBook Attributes | Azure AD / Entra ID Attributes | Matching precedence |
|---|---|---|
| displayName | displayName | 1 |
| members | members | - |
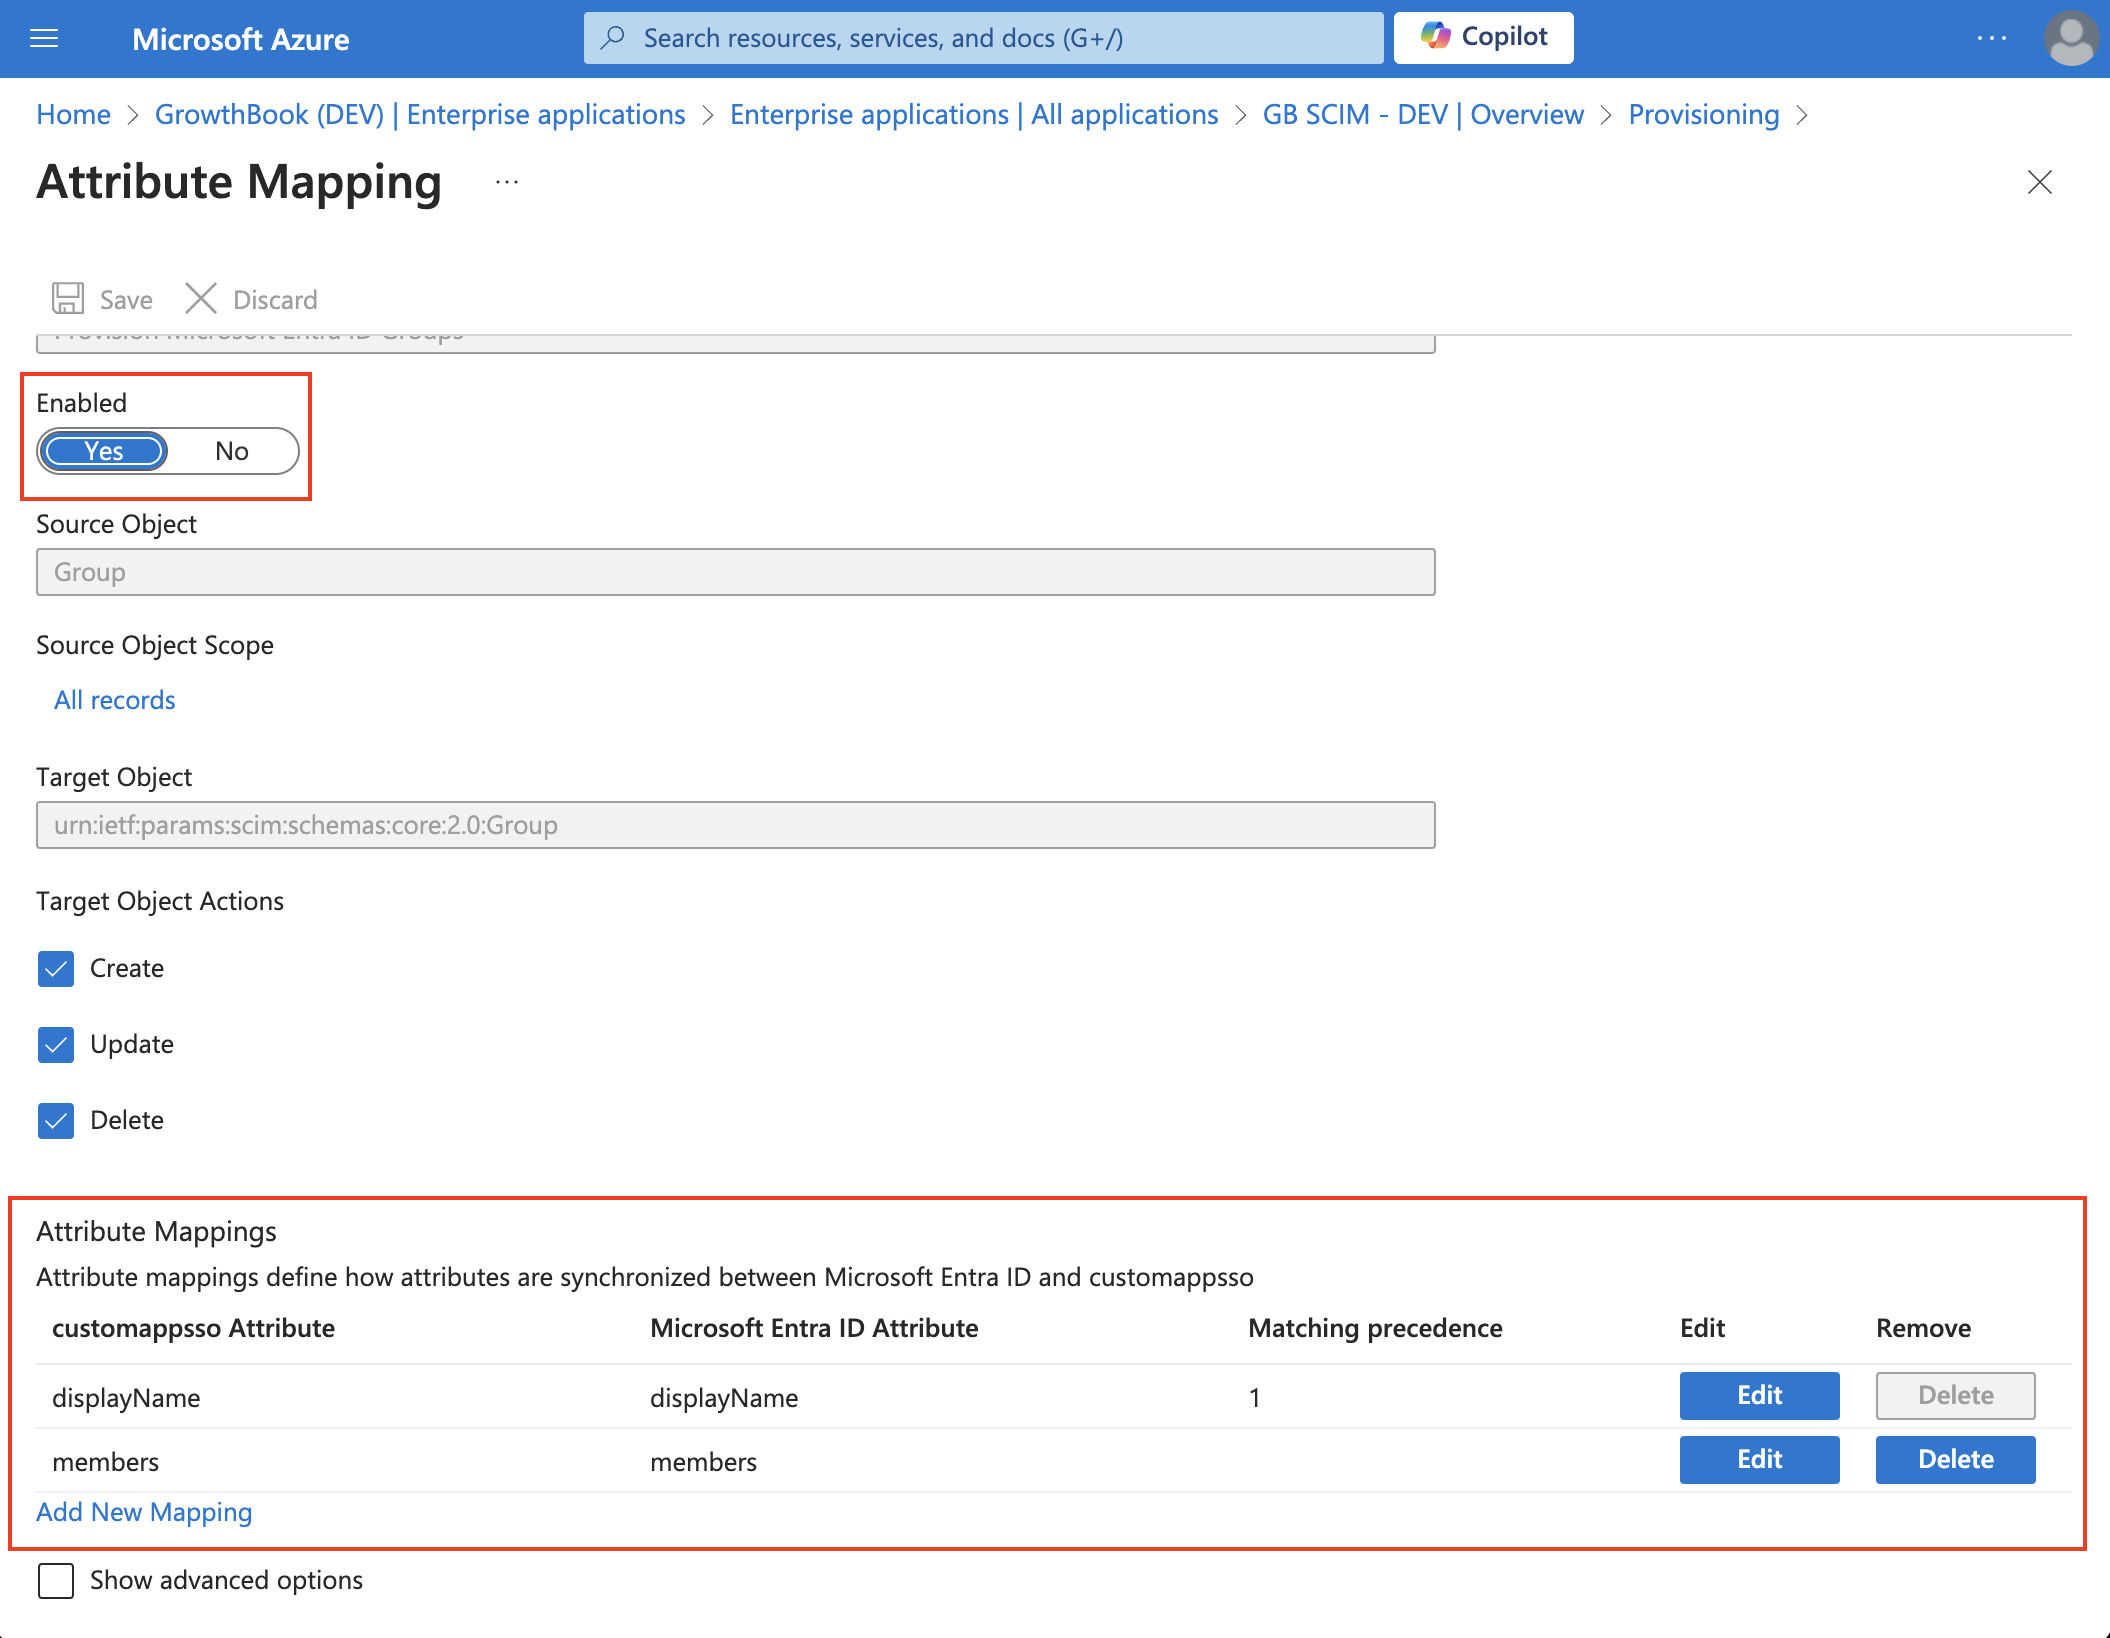
When a group is synced with GrowthBook, it creates a team in your GrowthBook organization and adds any members in the group to the team. This is handy because any role you assign to a team will also be inherited by its members. With Azure AD/Entra ID, all group members are synced to GrowthBook.
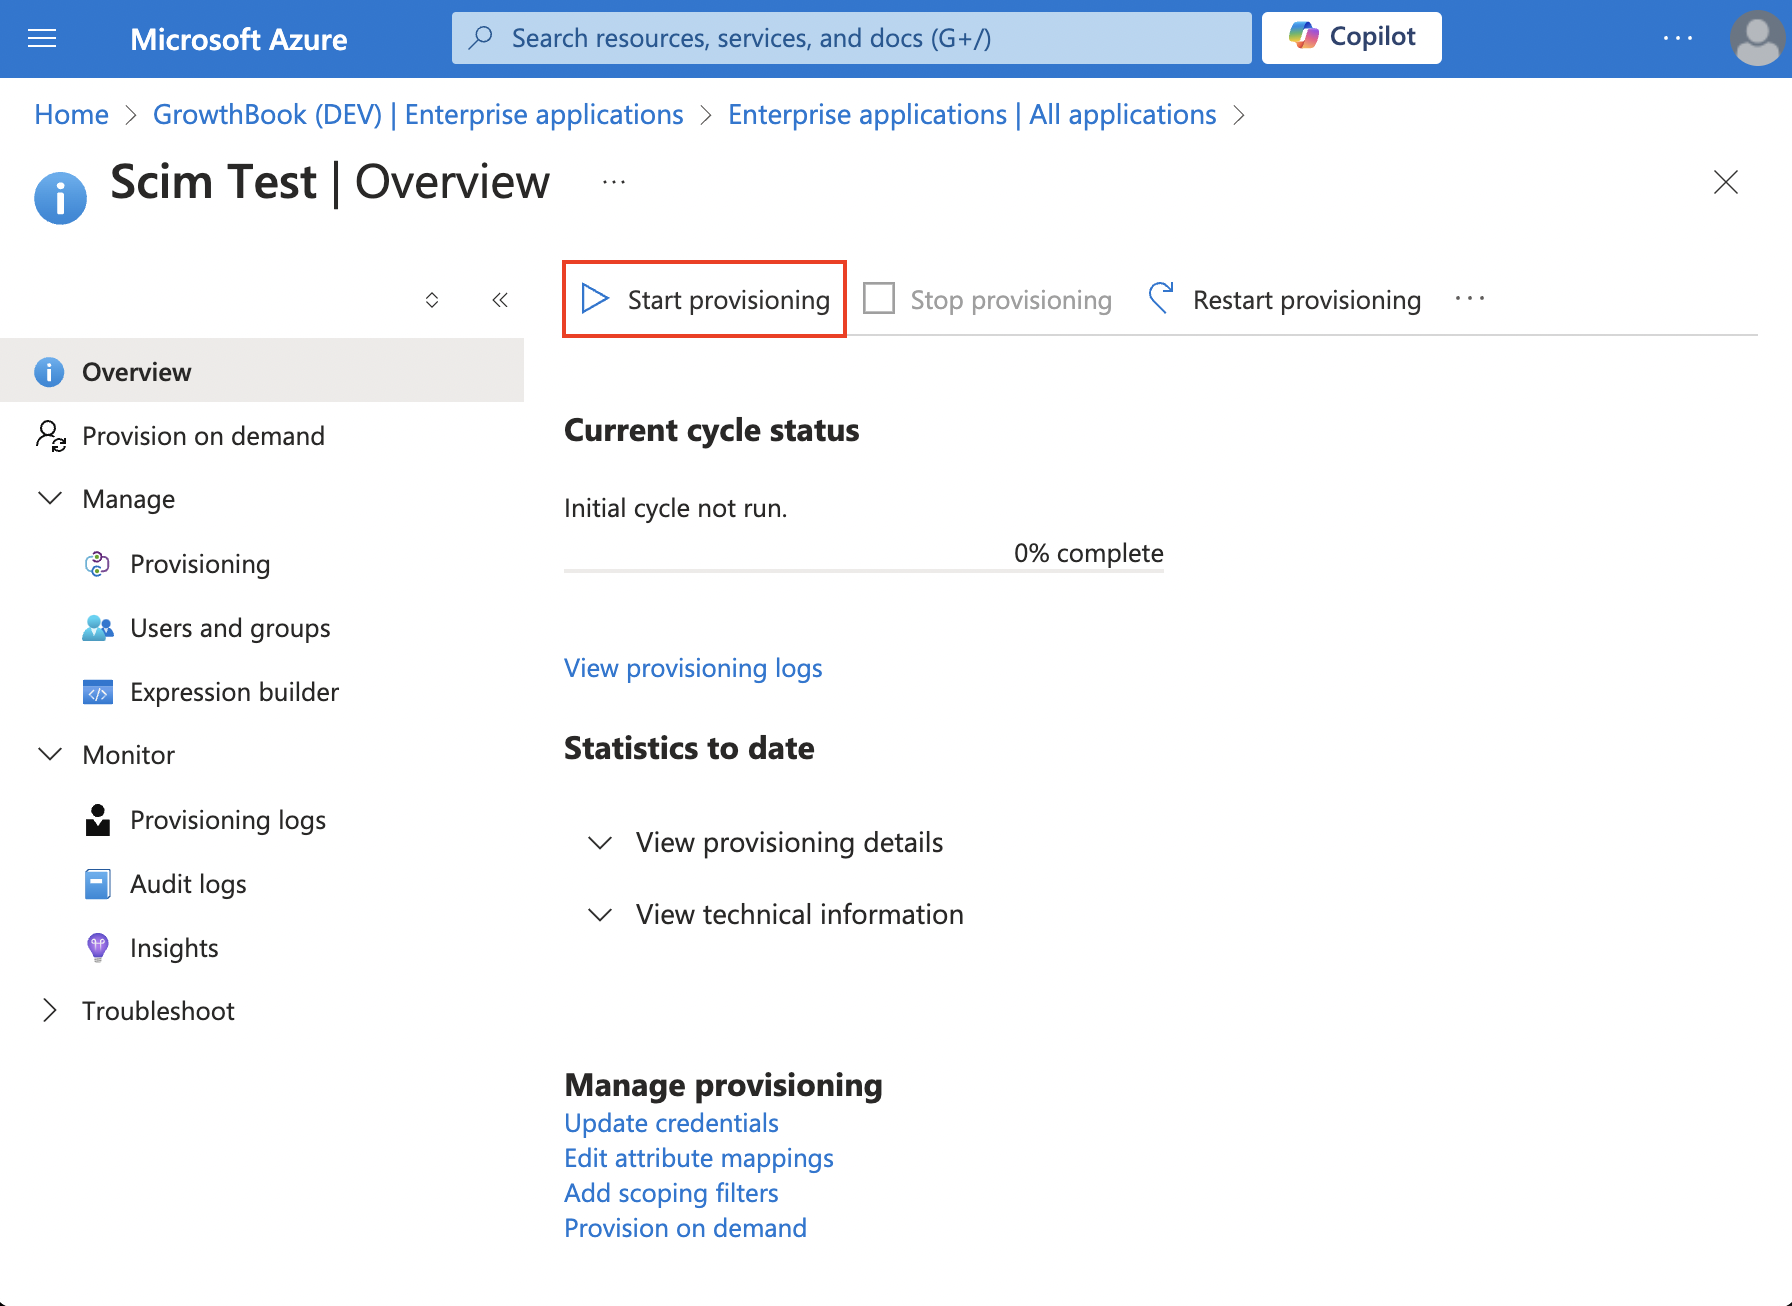
- Add users and groups. Then, click Start Provisioning.
FAQs
What features are supported with SCIM?
GrowthBook supports provisioning and deprovisioning users and groups.
What identity providers are supported?
GrowthBook officially supports Okta and Azure AD/Microsoft Entra ID. Given the standarized nature of SCIM, it's possible other identity providers will work, but we do not have official guides at this time.
What happens if I deprovision a user in my identity provider?
If a user is deprovisioned in your identity provider, they will be removed from GrowthBook. If they are re-provisioned, they will be added back to GrowthBook, and their role will reset to the organization's default role.
All the users from my group aren't being synced with my GrowthBook team. What's happening?
If you use Okta and notice that some users that you expect to be in your GrowthBook team from your identity provider are not being added in GrowthBook, double check that those users are assigned to the GrowthBook SCIM application in your identity provider.
- Okta: Only users that are both assigned and within the group are synced to the corresponding team.
- Azure AD/Entra ID: The user only needs to be in a group assigned to the application to be provisioned.
What if I already have users in GrowthBook?
Existing users in GrowthBook will not be affected by SCIM. You can continue to manage them through the GrowthBook application as usual. If you wish to transition them to be managed by your identity provider, you can provision them through your identity provider. As long as the email matches, the existing GrowthBook user will be converted to be managed by your identity provider.
Does GrowthBook follow SCIM 1.1 or 2.0 Protocol?
GrowthBook follows the SCIM 2.0 protocol.
What happens if I provision a user with a role that doesn't exist?
GrowthBook will fallback to your organization's default role.
Can I provision a user with project-specific permissions?
No, at this time, you can only provision a user's global role. Project-specific permissions must be managed through the GrowthBook application.
Can I change a user's global role after they've been provisioned?
Yes, you can change a user's global role through the GrowthBook application or via Okta. Please note that if you change a user's global role through the GrowthBook Application, it will then be out-of-date in Okta. If you then update the user in Okta, it will update the user's global role.
I'm changing a user's role in Okta, but it's not changing in GrowthBook.
For the user's role to be updated in GrowthBook, you must update your Application provisioning to support "updates." The only property GrowthBook supports updating is growthbookRole.
Why can't I change a user's name via my identity provider?
In GrowthBook, a user can belong to multiple organizations, so no single organization can update a user's name, as it would impact all organizations the user is part of.
Can I define a user's growthbookRole via Azure AD/Microsoft Entra ID?
It's possible to define growthbookRole by adding a custom attribute and mapping it accordingly, but we don't yet offer any additional documentation.
I'm using Microsoft Entra ID/Azure AD and I'm unable to sync groups.
Please ensure that your Microsoft Entra ID/Azure AD plan supports group syncing.
How do I change a user's email address once provisioned? It's not possible to update a user's email after they're provisioned. Instead, follow these steps:
- Deprovision the user
- Update their email
- Reprovision the user
This process creates a net-new user in GrowthBook with the updated email address.