Enterprise SSO
EnterpriseSSO is available on Enterprise plans.
SSO is available on GrowthBook Cloud or Self-hosted via OpenID Connect. If you are using the Cloud, your account representative will help you get this setup, though the steps are mostly the same. To enable SSO on your self hosted GrowthBook instance, you will need an active license key and then you may add the SSO settings for your provider. If your provider is not listed below, you can use the generic Open ID Connect.
For GrowthBook Cloud, you will need to send your account representative the following: CLIENT_ID, CLIENT_SECRET, EMAIL_DOMAIN, what provider you're using, and for some providers, the TENANT_ID. You can use the instructions below to get these values.
If you are self-hosting, you can use the instructions below to create a JSON object with the settings, then it should be
JSON encoded and then set to the environment variable SSO_CONFIG.
Generic Open ID Connect
- LICENSE_KEY - Your signed license key provided by the GrowthBook team
- SSO_CONFIG - A JSON-encoded string that configures SSO (using OpenID Connect). It should be an object with the following keys:
clientId(string)clientSecret(string)emailDomains(array of strings, optional) - Allow auto-joining from a specified email domain.metadata(object)issuer(string)authorization_endpoint(string)jwks_uri(string)id_token_signing_alg_values_supported(array of strings)token_endpoint(string)code_challenge_methods_supported(array of strings)logout_endpoint(string, optional)extraQueryParams(object, optional) - Dictionary of extra query params to be passed along with the/authorizeOAuth calladditionalScope(string, optional) - Additional scopes to include, along with the default value:openid profile email
For SSO, make sure the following callback URL is whitelisted:
{APP_ORIGIN}/oauth/callback
For the best SSO user experience, enable offline access and refresh tokens in your Identity Provider.
With all the SSO providers listed below, replace the all caps values with values from the provider, JSON encode the object, and set to the SSO_CONFIG environment variable for GrowthBook.
SSO Providers
Okta
{
    "clientId": "CLIENT_ID",
    "clientSecret": "CLIENT_SECRET",
    "emailDomains": ["EMAIL_DOMAIN"],
    "additionalScope": "offline_access",
    "metadata": {
        "issuer": "BASE_URL",
        "authorization_endpoint": "BASE_URL/oauth2/v1/authorize",
        "id_token_signing_alg_values_supported": [
            "RS256"
        ],
        "jwks_uri": "BASE_URL/oauth2/v1/keys",
        "token_endpoint": "BASE_URL/oauth2/v1/token",
        "code_challenge_methods_supported": [
            "S256"
        ]
    }
}
See complete Okta instructions
Create an OIDC Web application:
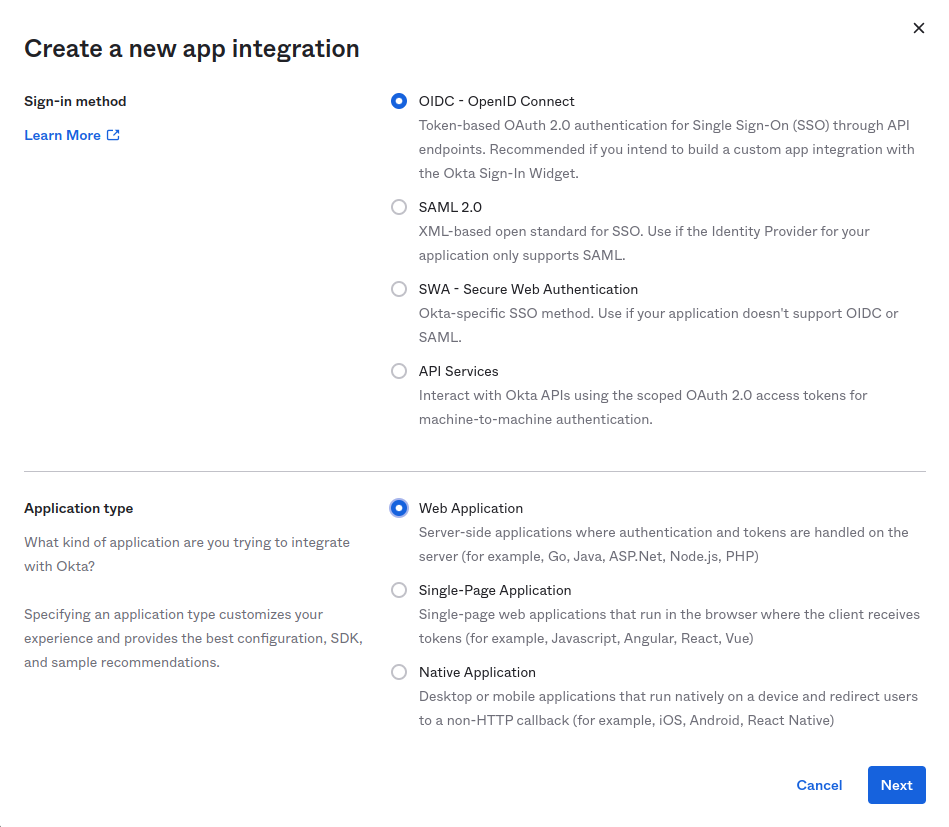
Allow refresh tokens and specify callback URLs. If you are using the cloud, you can use the following values:
- Sign-in redirect URIs -
https://app.growthbook.io/oauth/callback - Sign-out redirect URIs (optional) -
https://app.growthbook.io
If you are self-hosting, replace with
https://app.growthbook.iowith the value from yourAPP_ORIGIN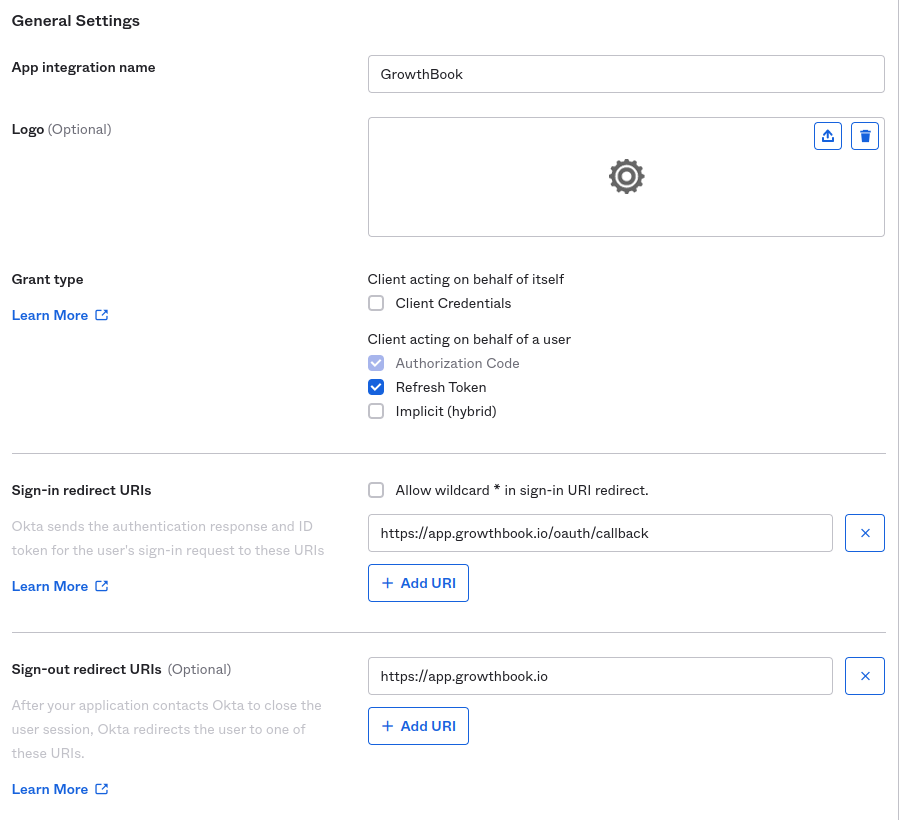
- Sign-in redirect URIs -
Require PKCE as additional verification(optional)
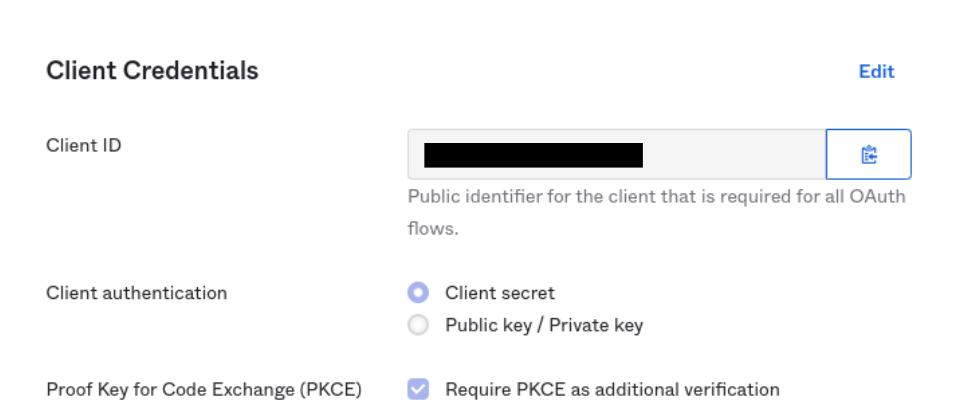
You will need the following in order to configure SSO in GrowthBook:
CLIENT_IDCLIENT_SECRETBASE_URL- This is typically in the format:https://your-company.okta.com/orhttps://your-company.oktapreview.com/EMAIL_DOMAIN
If using GrowthBook Cloud, send your account representative the above and we will enable SSO on your account.
If self-hosting, add the environment settings at the beginning of this section to enable SSO on your instance.
Google
{
    "clientId": "CLIENT_ID",
    "clientSecret": "CLIENT_SECRET",
    "emailDomains": ["EMAIL_DOMAIN"],
    "metadata": {
        "issuer": "https://accounts.google.com",
        "authorization_endpoint": "https://accounts.google.com/o/oauth2/v2/auth",
        "token_endpoint": "https://oauth2.googleapis.com/token",
        "jwks_uri": "https://www.googleapis.com/oauth2/v3/certs",
        "id_token_signing_alg_values_supported": [
            "RS256"
        ],
        "code_challenge_methods_supported": [
            "S256"
        ]
    },
    "extraQueryParams": {
        "access_type": "offline",
        "prompt": "consent"
    }
}
Auth0
{
    "clientId": "CLIENT_ID",
    "clientSecret": "CLIENT_SECRET",
    "emailDomains": ["EMAIL_DOMAIN"],
    "additionalScope": "offline_access",
    "metadata": {
        "issuer": "https://TENANT.auth0.com/",
        "authorization_endpoint": "https://TENANT.auth0.com/authorize",
        "logout_endpoint": "https://TENANT.auth0.com/v2/logout?client_id=CLIENT_ID",
        "id_token_signing_alg_values_supported": [
            "HS256",
            "RS256"
        ],
        "jwks_uri": "https://TENANT.auth0.com/.well-known/jwks.json",
        "token_endpoint": "https://TENANT.auth0.com/oauth/token",
        "code_challenge_methods_supported": [
            "S256",
            "plain"
        ],
        "audience": "AUDIENCE"
    }
}
When setting up Auth0, please ensure that you've enabled offline access, and check the OIDC Compliant checkbox.
Azure AD
{
  "clientId": "CLIENT_ID",
  "clientSecret": "CLIENT_SECRET",
  "emailDomains": ["EMAIL_DOMAIN"],
  "additionalScope": "offline_access",
  "metadata": {
    "token_endpoint": "https://login.microsoftonline.com/TENANT_ID/oauth2/v2.0/token",
    "jwks_uri": "https://login.microsoftonline.com/TENANT_ID/discovery/v2.0/keys",
    "id_token_signing_alg_values_supported": ["RS256"],
    "code_challenge_methods_supported": ["S256"],
    "issuer": "https://login.microsoftonline.com/TENANT_ID/v2.0",
    "authorization_endpoint": "https://login.microsoftonline.com/TENANT_ID/oauth2/v2.0/authorize",
    "logout_endpoint": "https://login.microsoftonline.com/TENANT_ID/oauth2/v2.0/logout"
  }
}
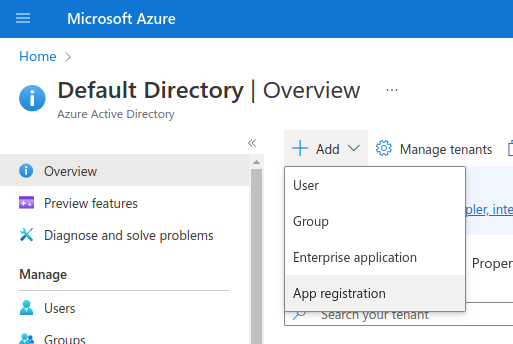
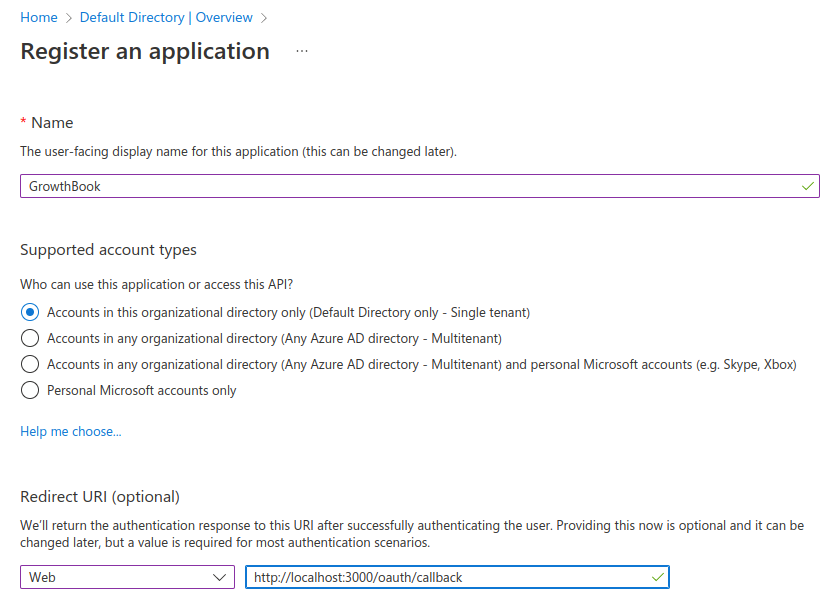
In Azure, register an Application, instead of Enterprise, as we use OpenID Connect, not SAML.
See complete Azure instructions
Register an Application (we use OpenID Connect, so choose regular app, not Enterprise)
Enter the redirect URL as APP_HOST/oauth/callback
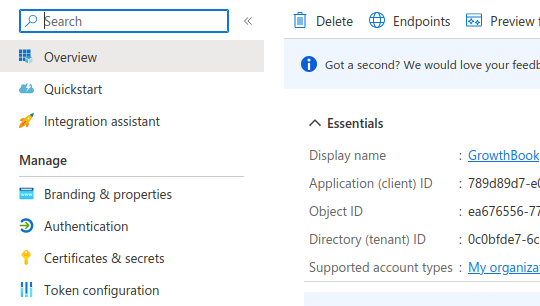
Take note of your Application Id (CLIENT_ID) and Directory Id (TENANT_ID). You will need it later
Generate a new Client Secret
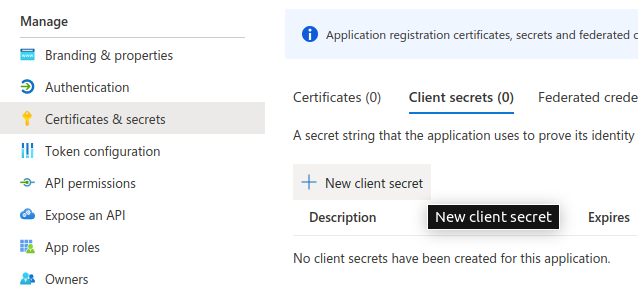
Take note of the Secret Value (CLIENT_SECRET). You will need it in the next step
Construct the JSON configuration for GrowthBook. Replace
CLIENT_ID
, CLIENT_SECRET, EMAIL_DOMAIN, and TENANT_ID, as into the JSON object above.Pass the JSON string into the environment variable SSO_CONFIG of your GrowthBook container
OneLogin
{
  "clientId": "CLIENT_ID",
  "clientSecret": "CLIENT_SECRET",
  "emailDomains": [
    "EMAIL_DOMAIN"
  ],
  "additionalScope": "",
  "metadata": {
    "issuer": "https://[ONELOGIN_DOMAIN]/oidc/2",
    "authorization_endpoint": "https://[ONELOGIN_DOMAIN]/oidc/2/auth",
    "token_endpoint": "https://[ONELOGIN_DOMAIN]/oidc/2/token",
    "id_token_signing_alg_values_supported": [
      "RS256",
      "HS256",
      "PS256"
    ],
    "jwks_uri": "https://[ONELOGIN_DOMAIN]/oidc/2/certs",
    "code_challenge_methods_supported": [
      "S256"
    ],
    "logout_endpoint": "https://[ONELOGIN_DOMAIN]/oidc/2/logout"
  }
}
See complete OneLogin instructions
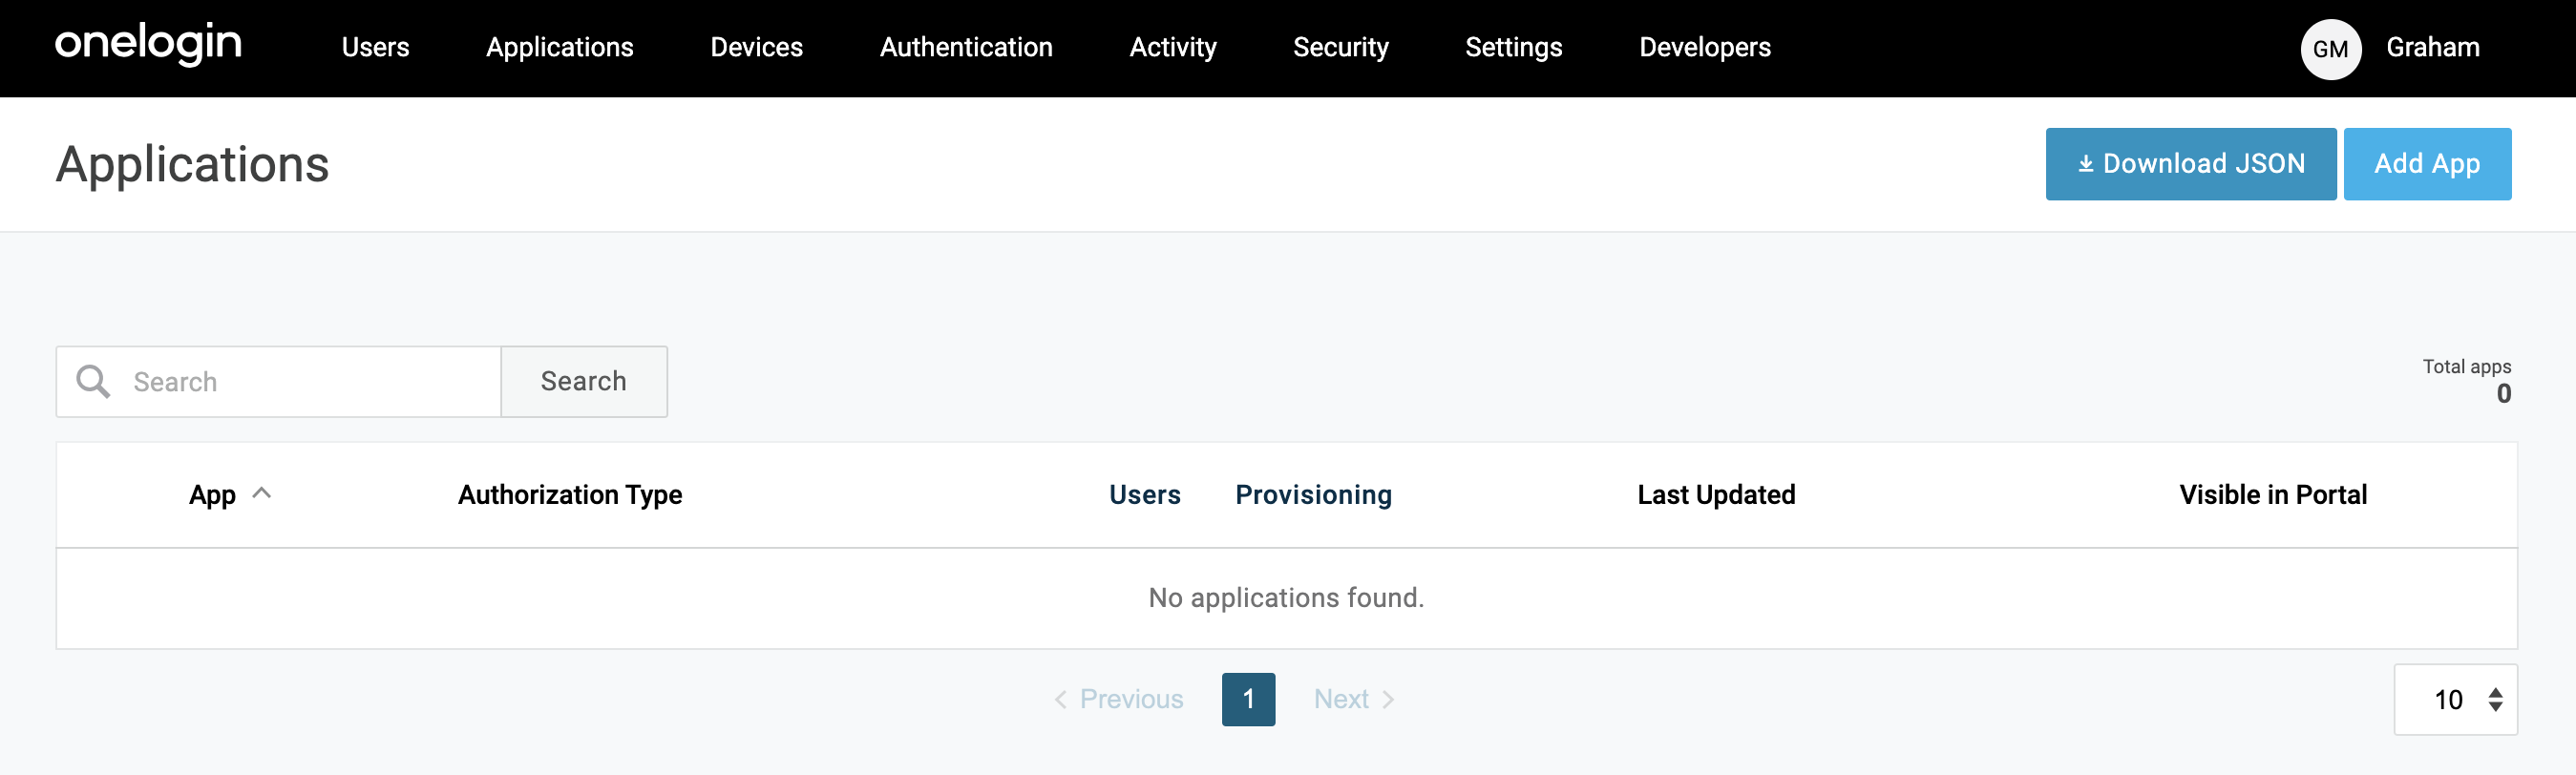
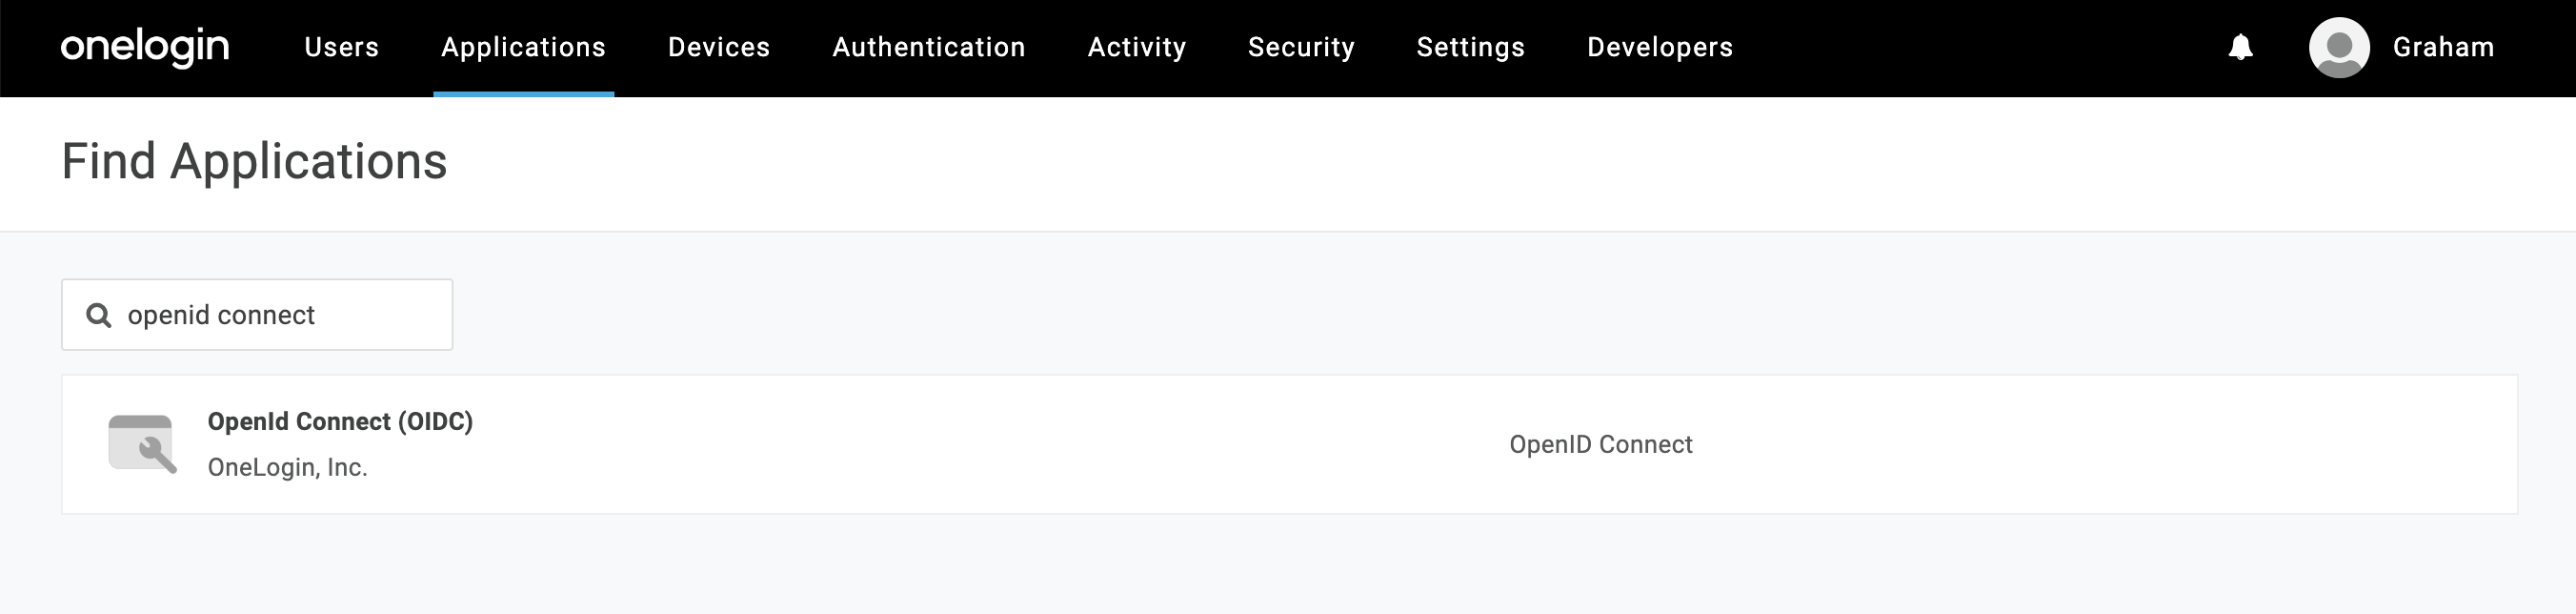
Create a new OIDC Web application. Browse to the Applications section of OneLogin from the top nav, then choose "Add App" from the top right.
When the list of applications opens, search for "openid connect". Select the option named "OpenID Connect (OIDC)".
Add the name "GrowthBook" (or whatever you would like to name it), an optional description and click save. The first save may not look like anything has happened, but you should see more options on the left menu when successful.
Click on the "Configuration" item in the left nav menu, and enter the following values for the three input fields (note: for self-hosting, replace
app.growthbook.io
with your own domain)- Login URL:
https://app.growthbook.io
- Redirect URIs:
https://app.growthbook.io/oauth/callback
- Post Logout Redirect URIs:
https://app.growthbook.io
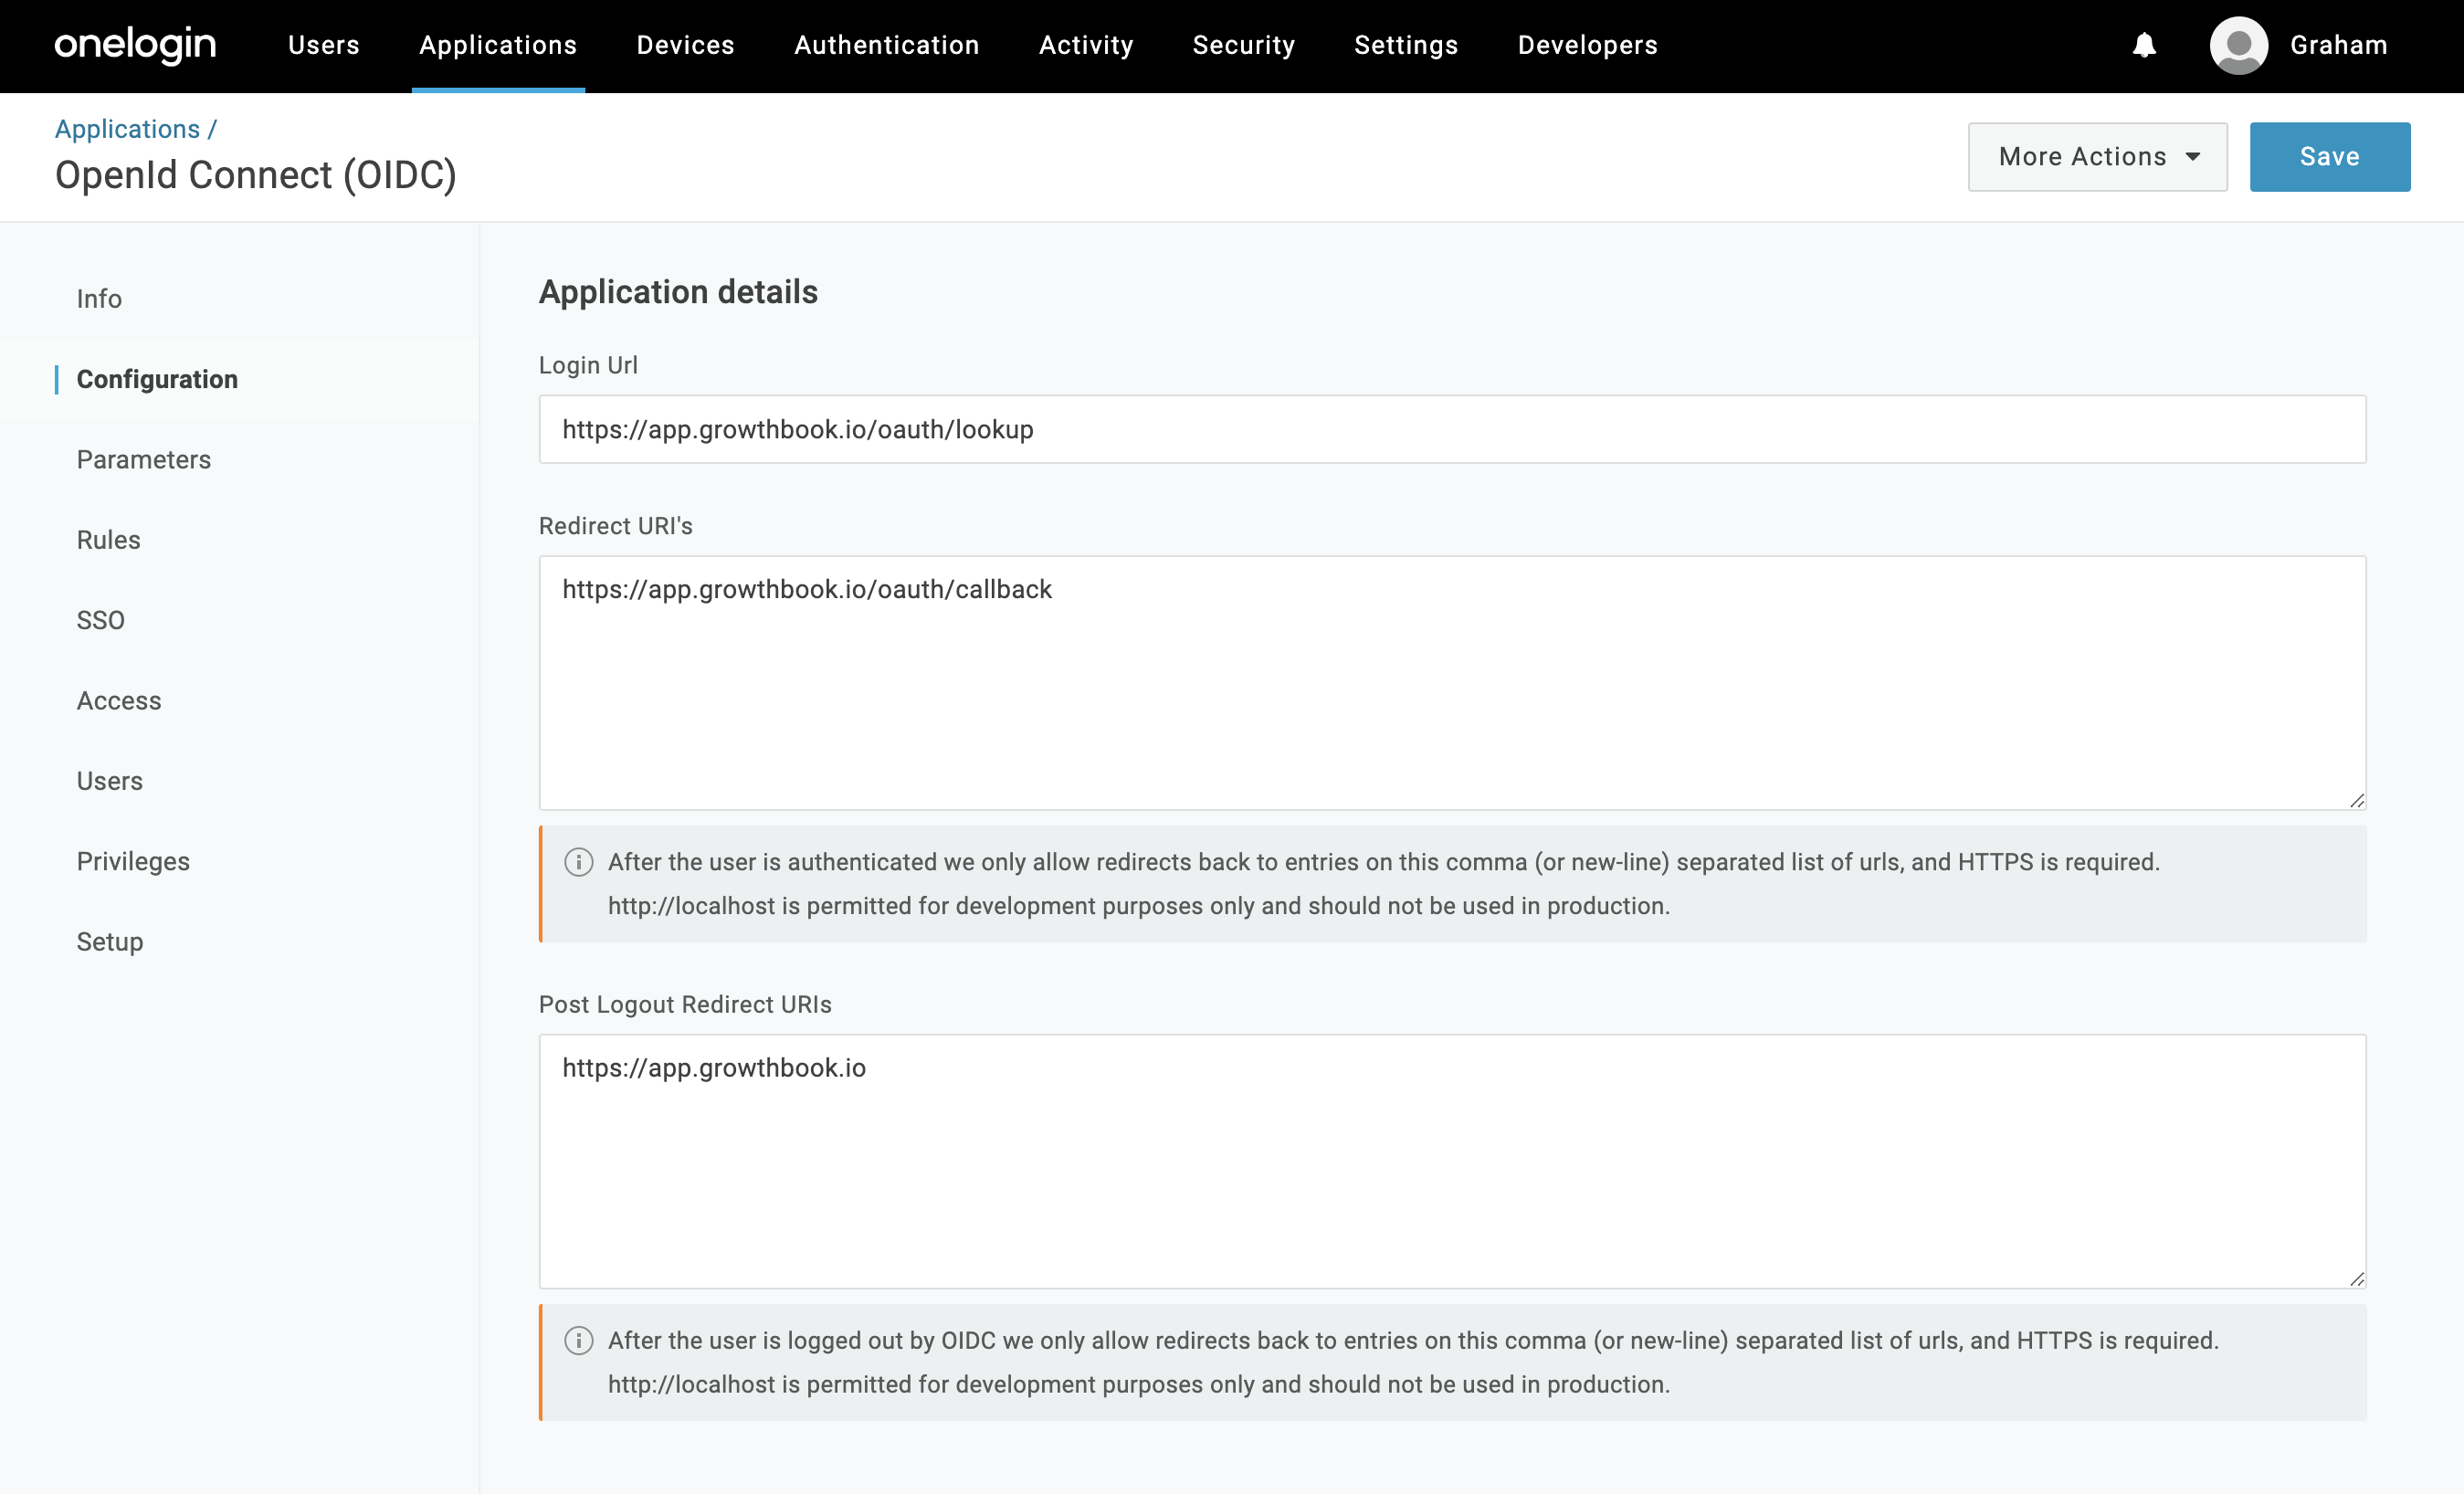 You can optionally add images for the application from the info if you like. Click Save.
- Login URL:
Click on the "SSO" item from the left nav menu. Here you need to record the Client ID and Client Secret and Issuer URL
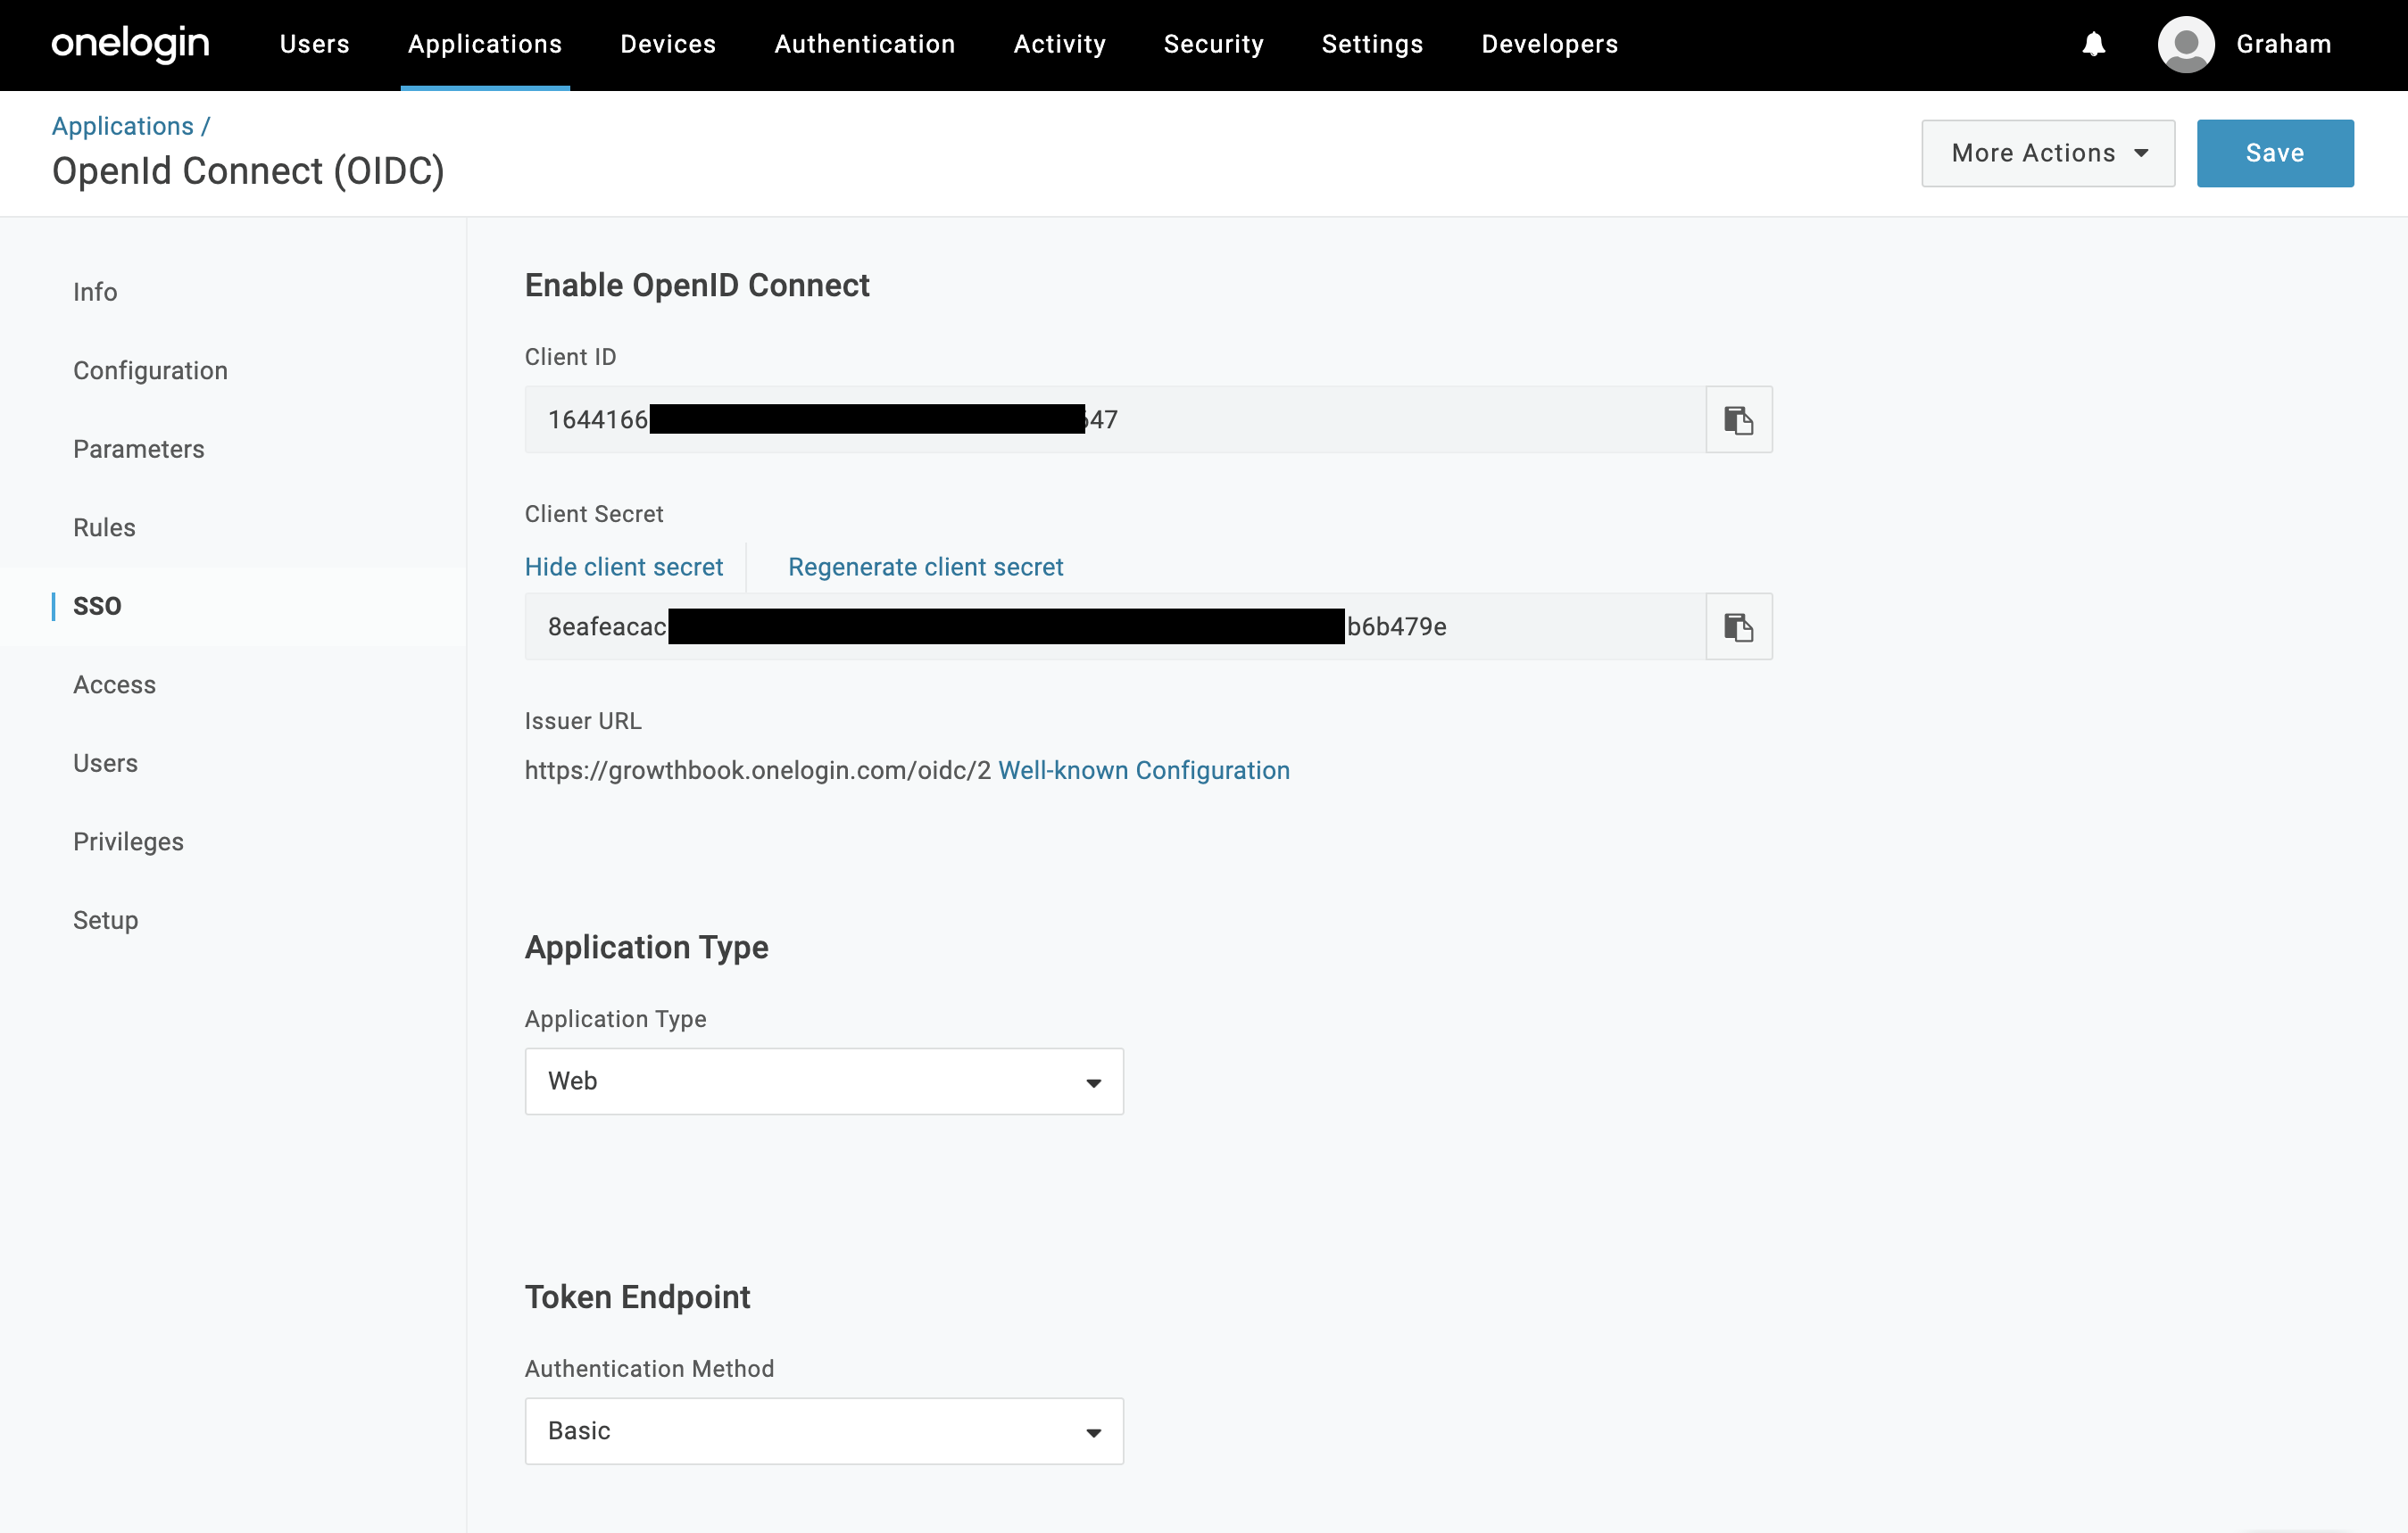 You can leave the other settings as default (Application Type: Web, and Authentication Method: Basic). Click save if you haven't already.
For self-hosted instances: construct the JSON configuration for GrowthBook. Replace CLIENT_ID, CLIENT_SECRET, EMAIL_DOMAIN, and TENANT_ID, as into the JSON object above. The ONELOGIN_DOMAIN will be the same domain from your Issuer URL you recorded earlier.
Pass the JSON string into the environment variable SSO_CONFIG of your GrowthBook container
JumpCloud
{
  "clientId": "CLIENT_ID",
  "clientSecret": "CLIENT_SECRET",
  "emailDomains": [
    "EMAIL_DOMAIN"
  ],
  "additionalScope": "offline_access",
  "metadata": {
    "token_endpoint": "https://oauth.id.jumpcloud.com/oauth2/token",
    "jwks_uri": "https://oauth.id.jumpcloud.com/.well-known/jwks.json",
    "id_token_signing_alg_values_supported": [
      "RS256"
    ],
    "code_challenge_methods_supported": [
      "S256"
    ],
    "issuer": "https://oauth.id.jumpcloud.com/",
    "authorization_endpoint": "https://oauth.id.jumpcloud.com/oauth2/auth",
    "logout_endpoint": "https://oauth.id.jumpcloud.com/oauth2/sessions/logout",
    "audience": ""
  }
}
See complete JumpCloud instructions
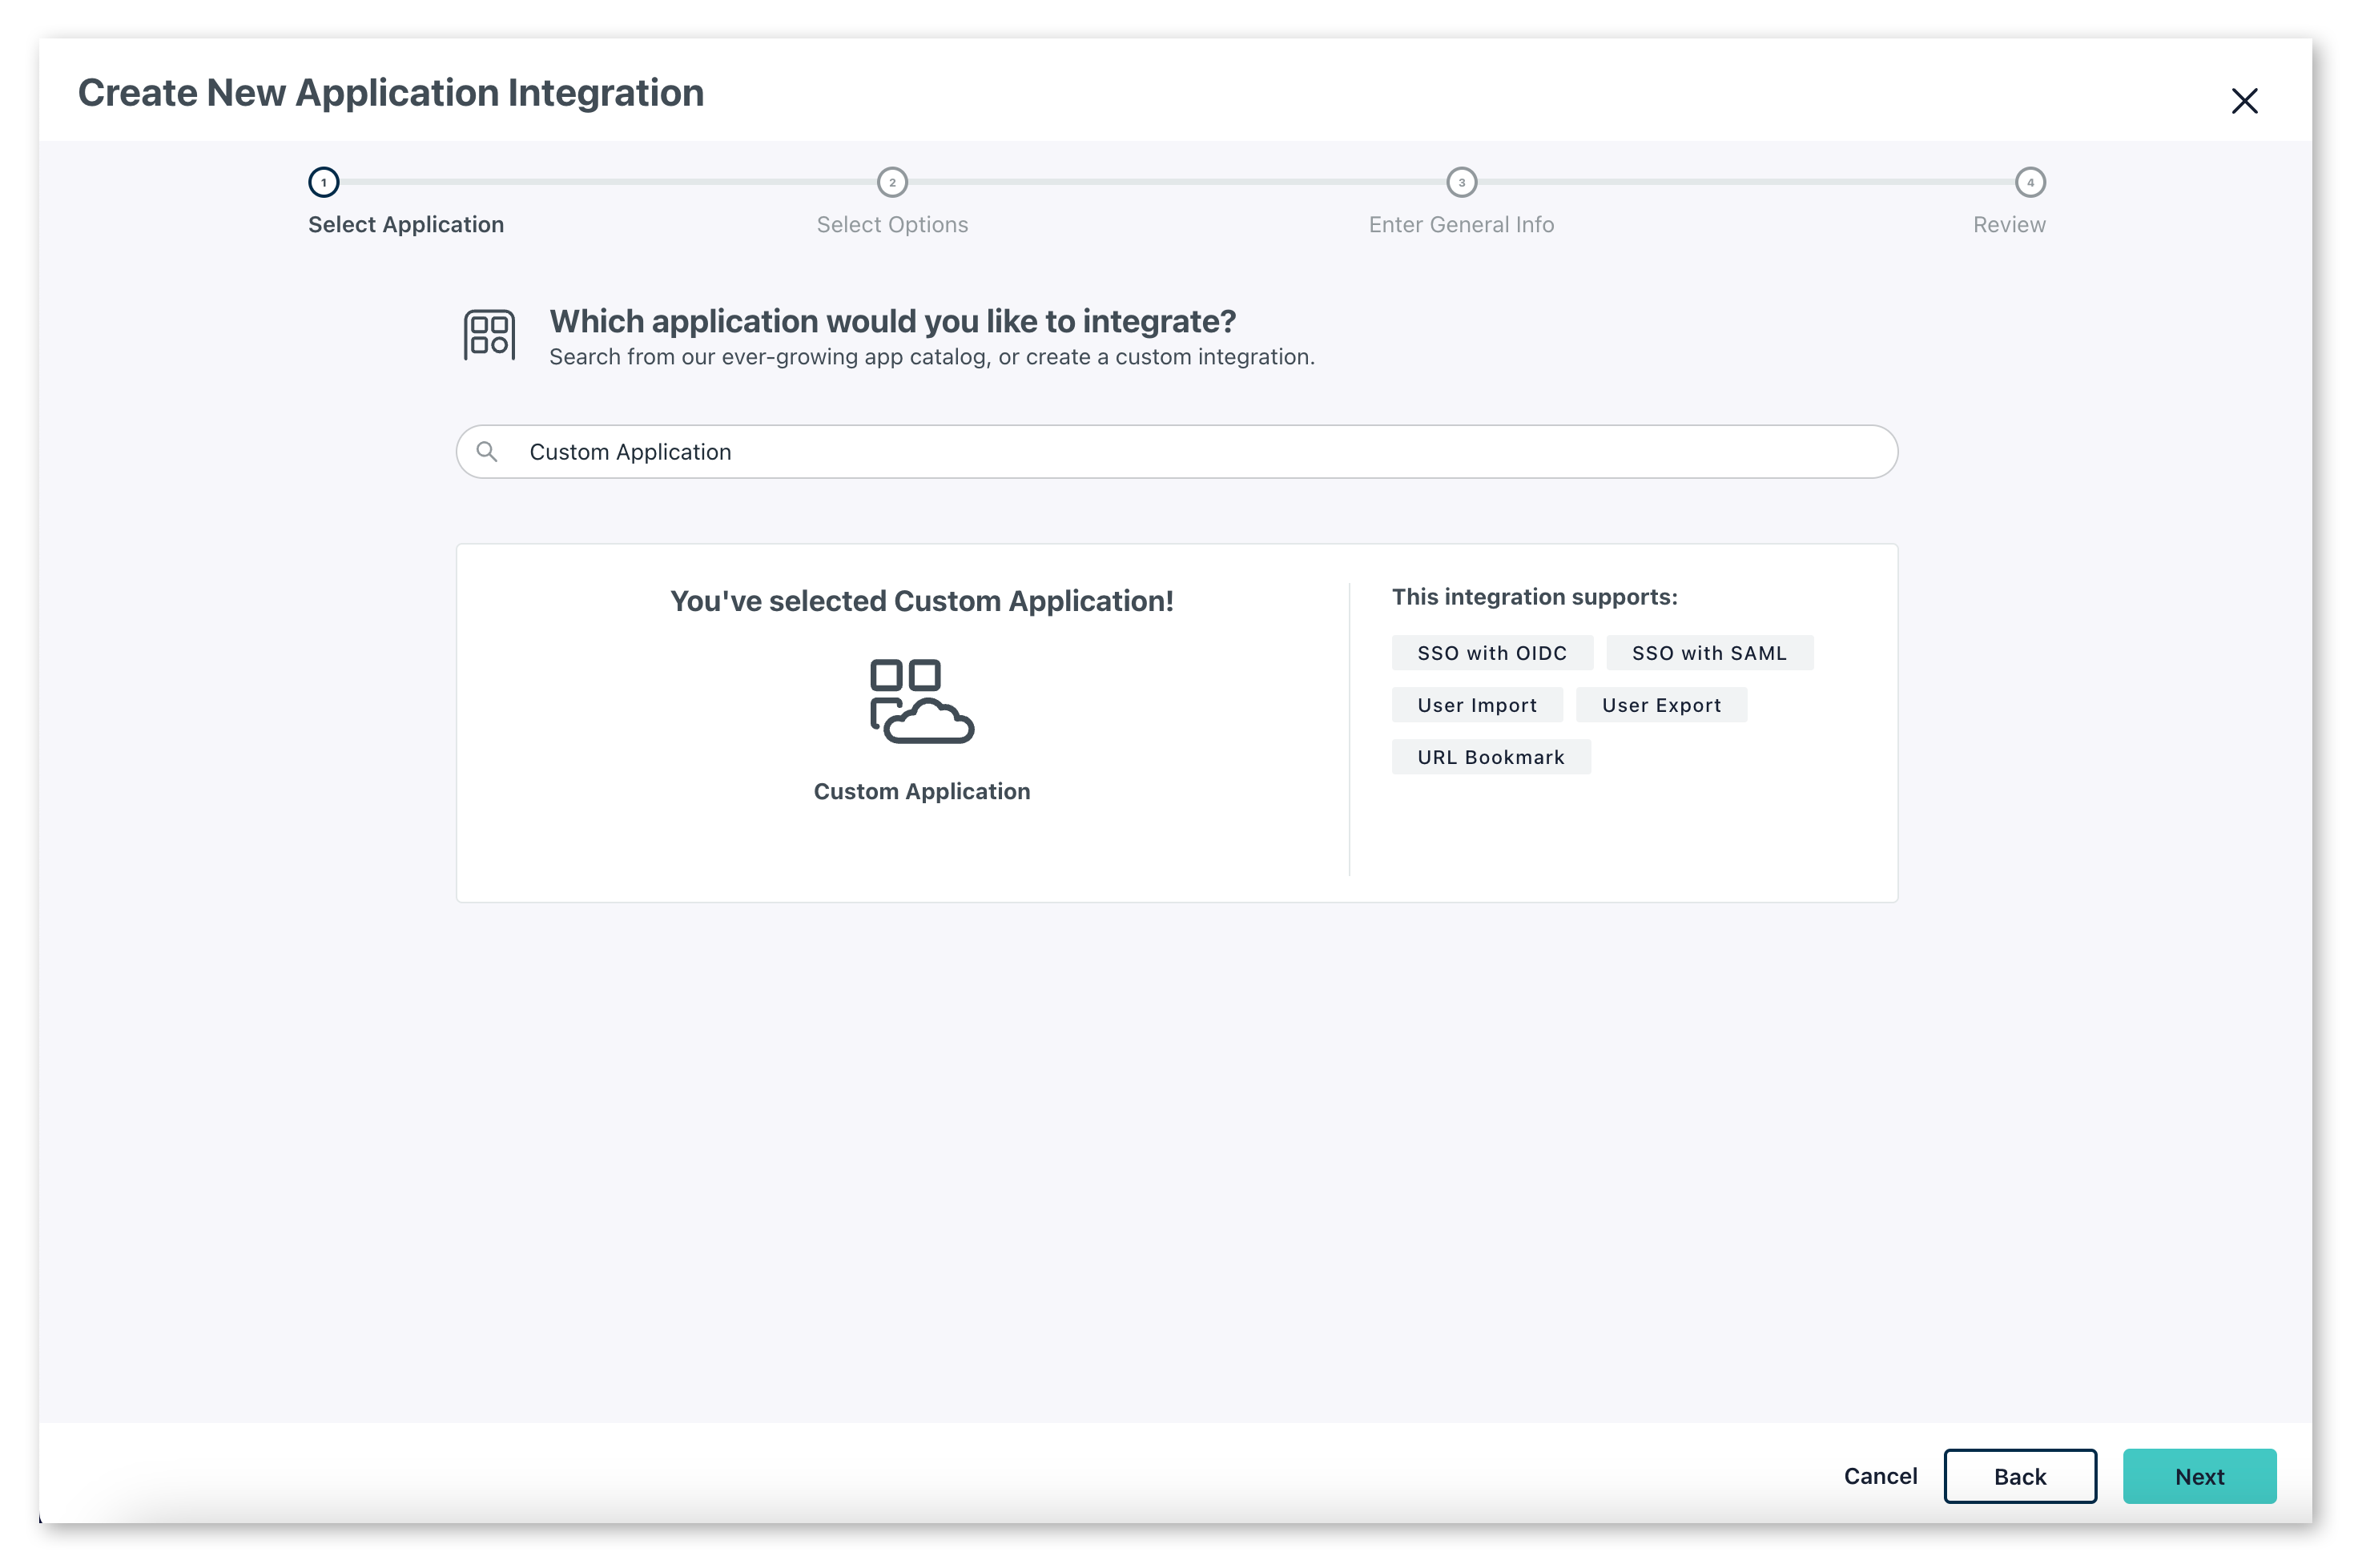
Create a new SSO Application. Browse to the User Authentication → SSO Applications from the left nav. Choose "Add new Application" from the top left.
Choose a custom application by clicking 'select' under
custom application, then click next then next again to confirm.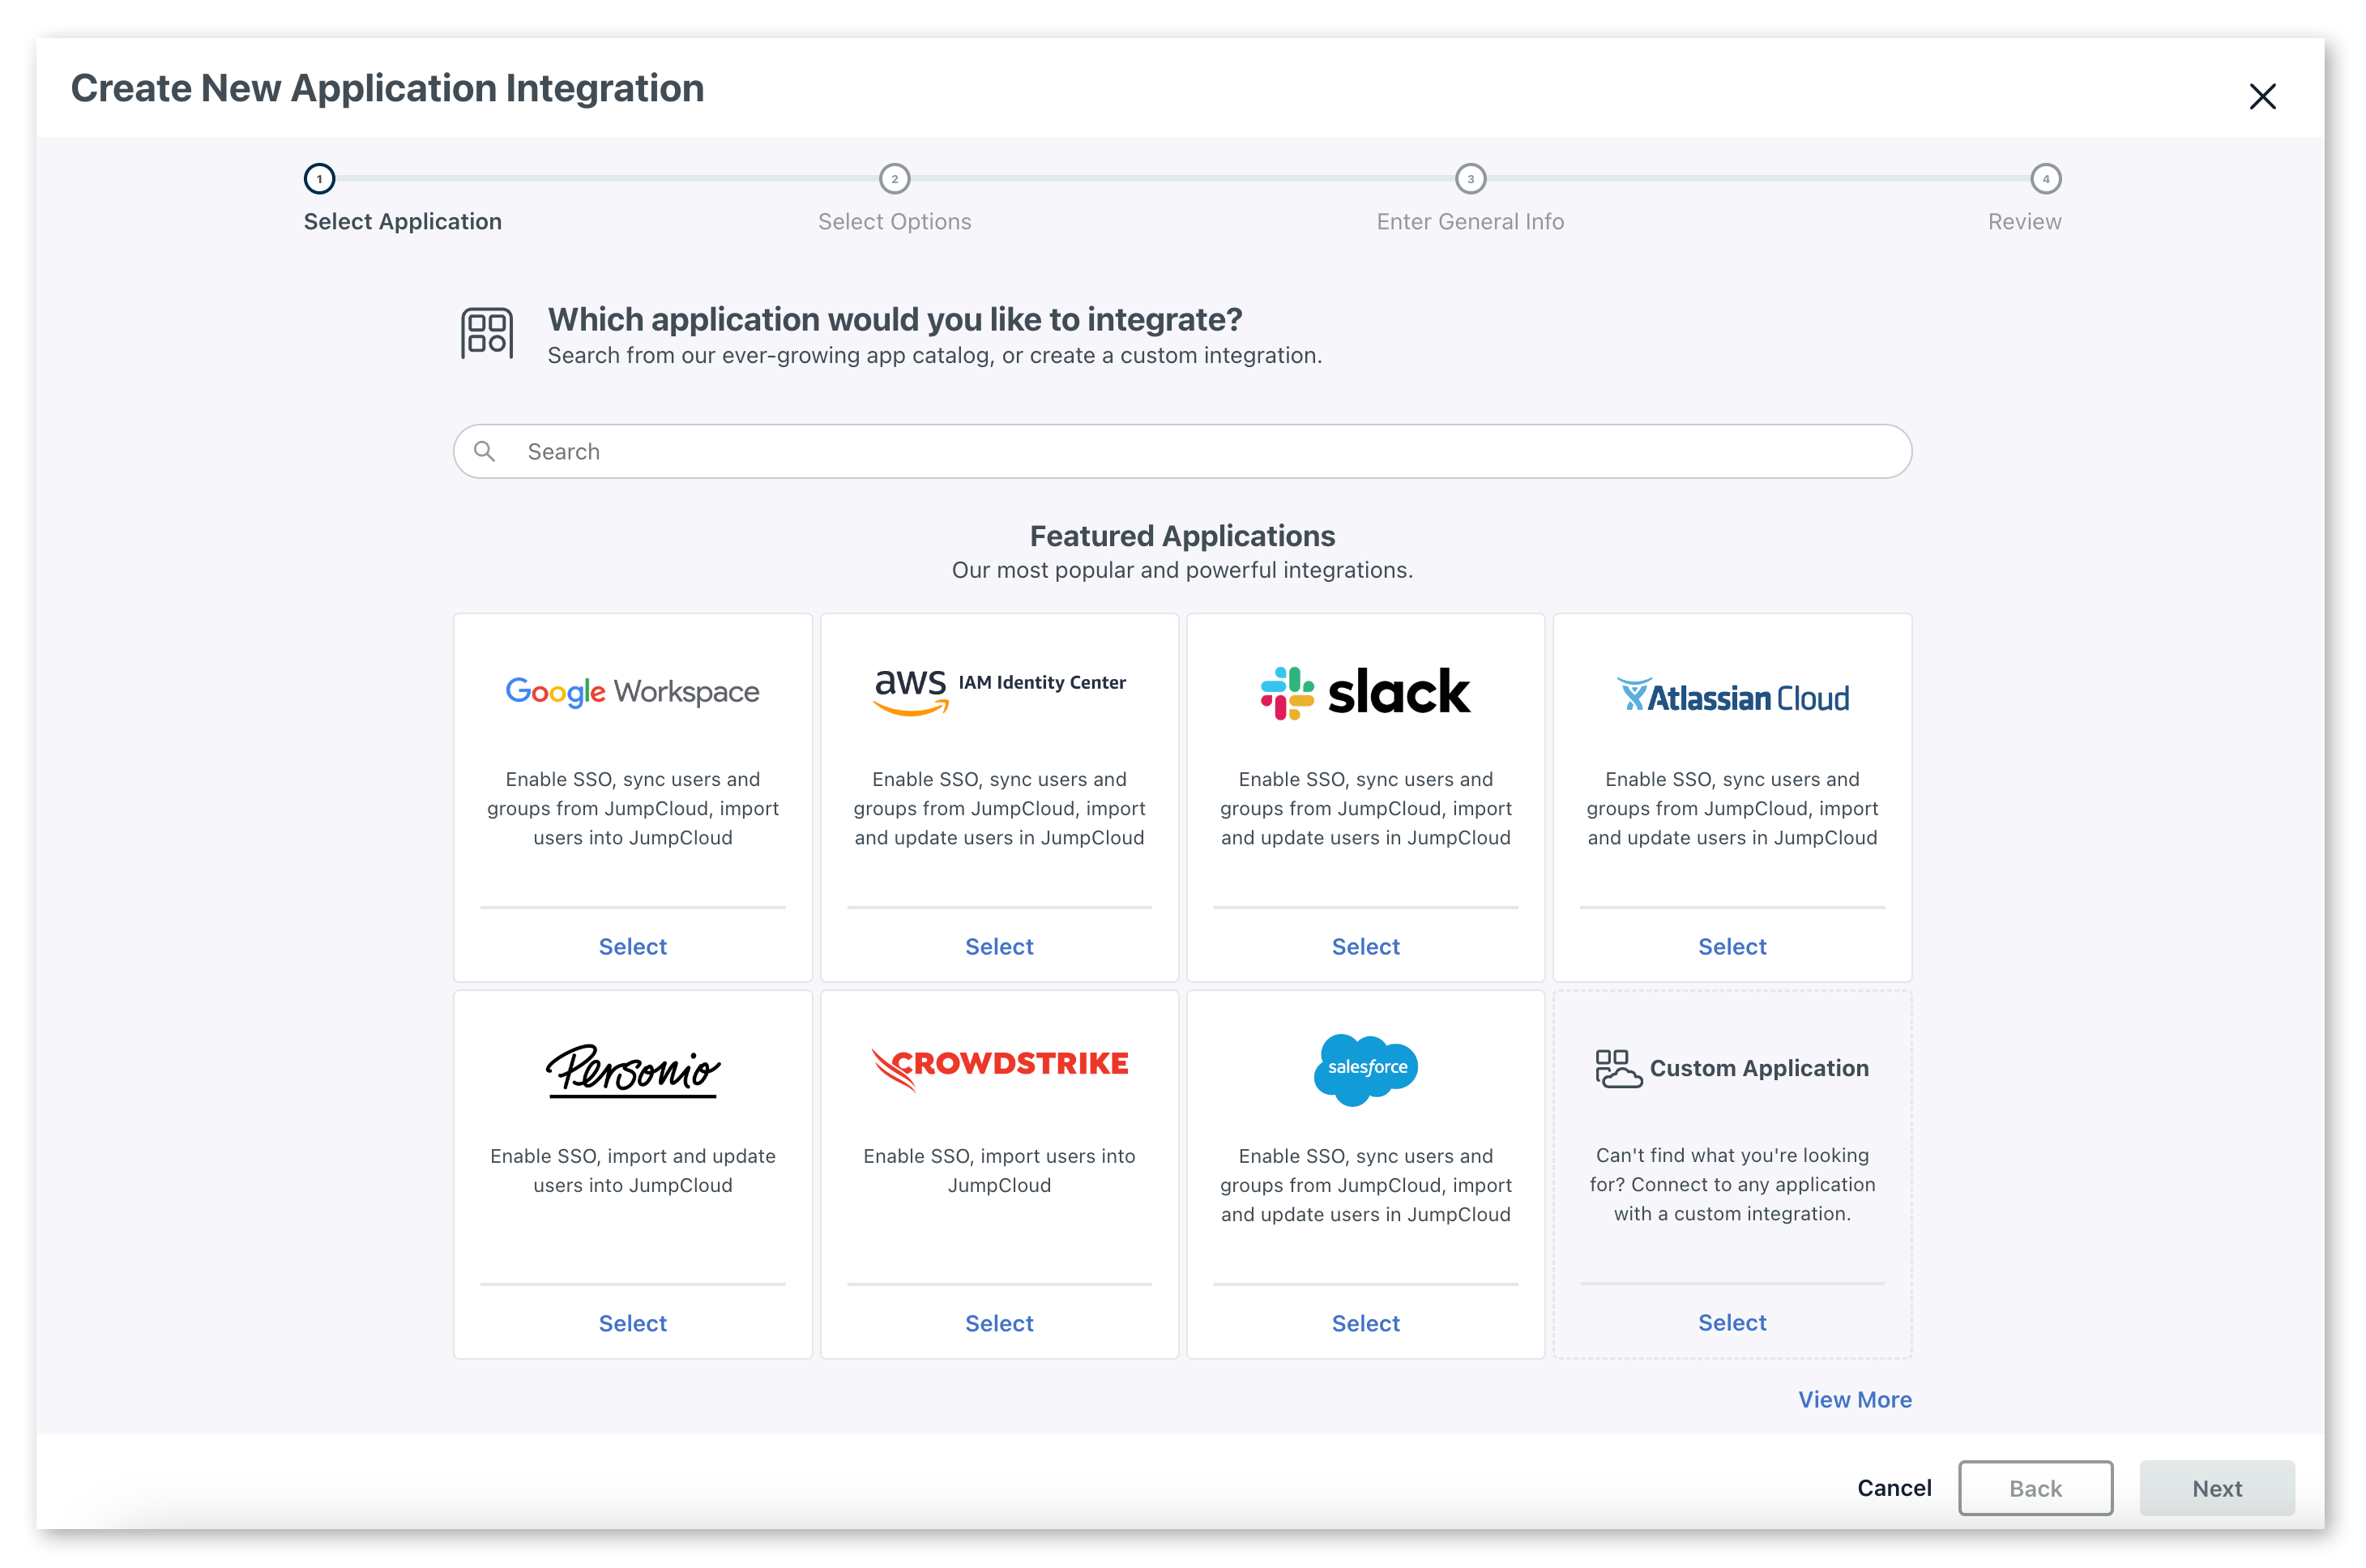
You will then be asked what features you want to enable. Select
Manage Single Sign-On (SSO). Then, in the radio buttons, select "Configure SSO with OIDC".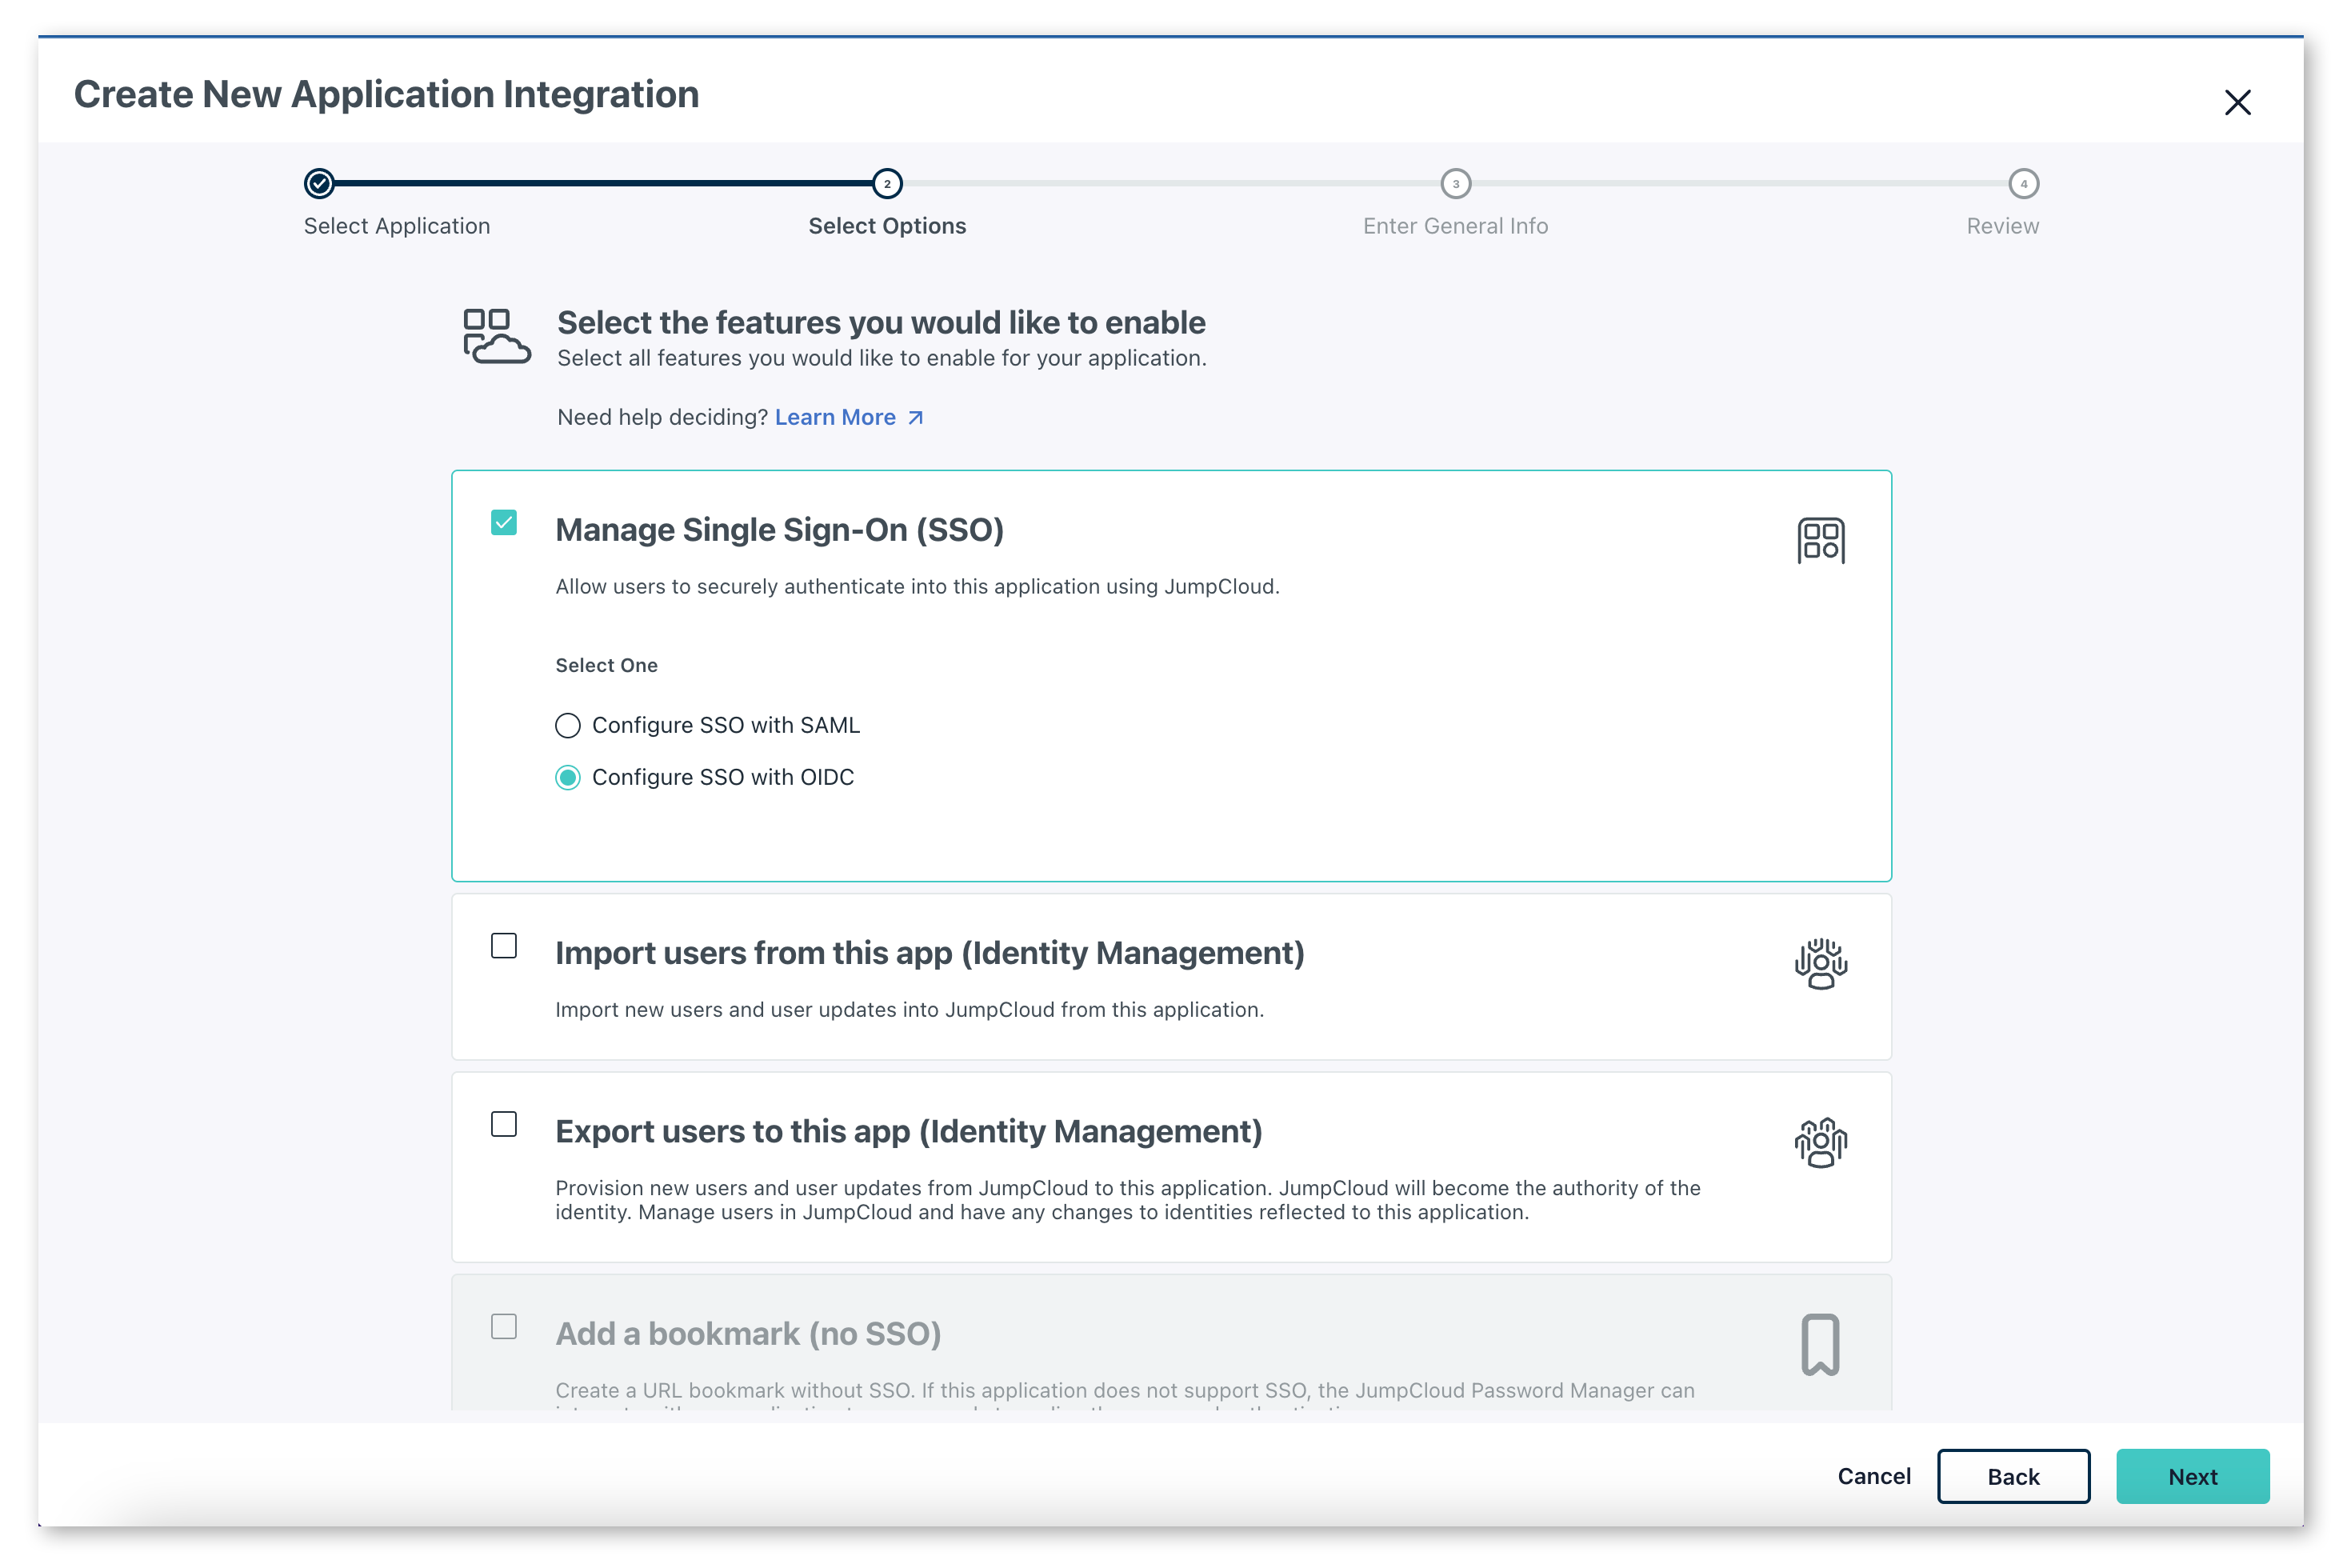
Add the name "GrowthBook" (or whatever you would like to name it), an optional description and click
next. When you've confirmed the details, clickConfigure Application.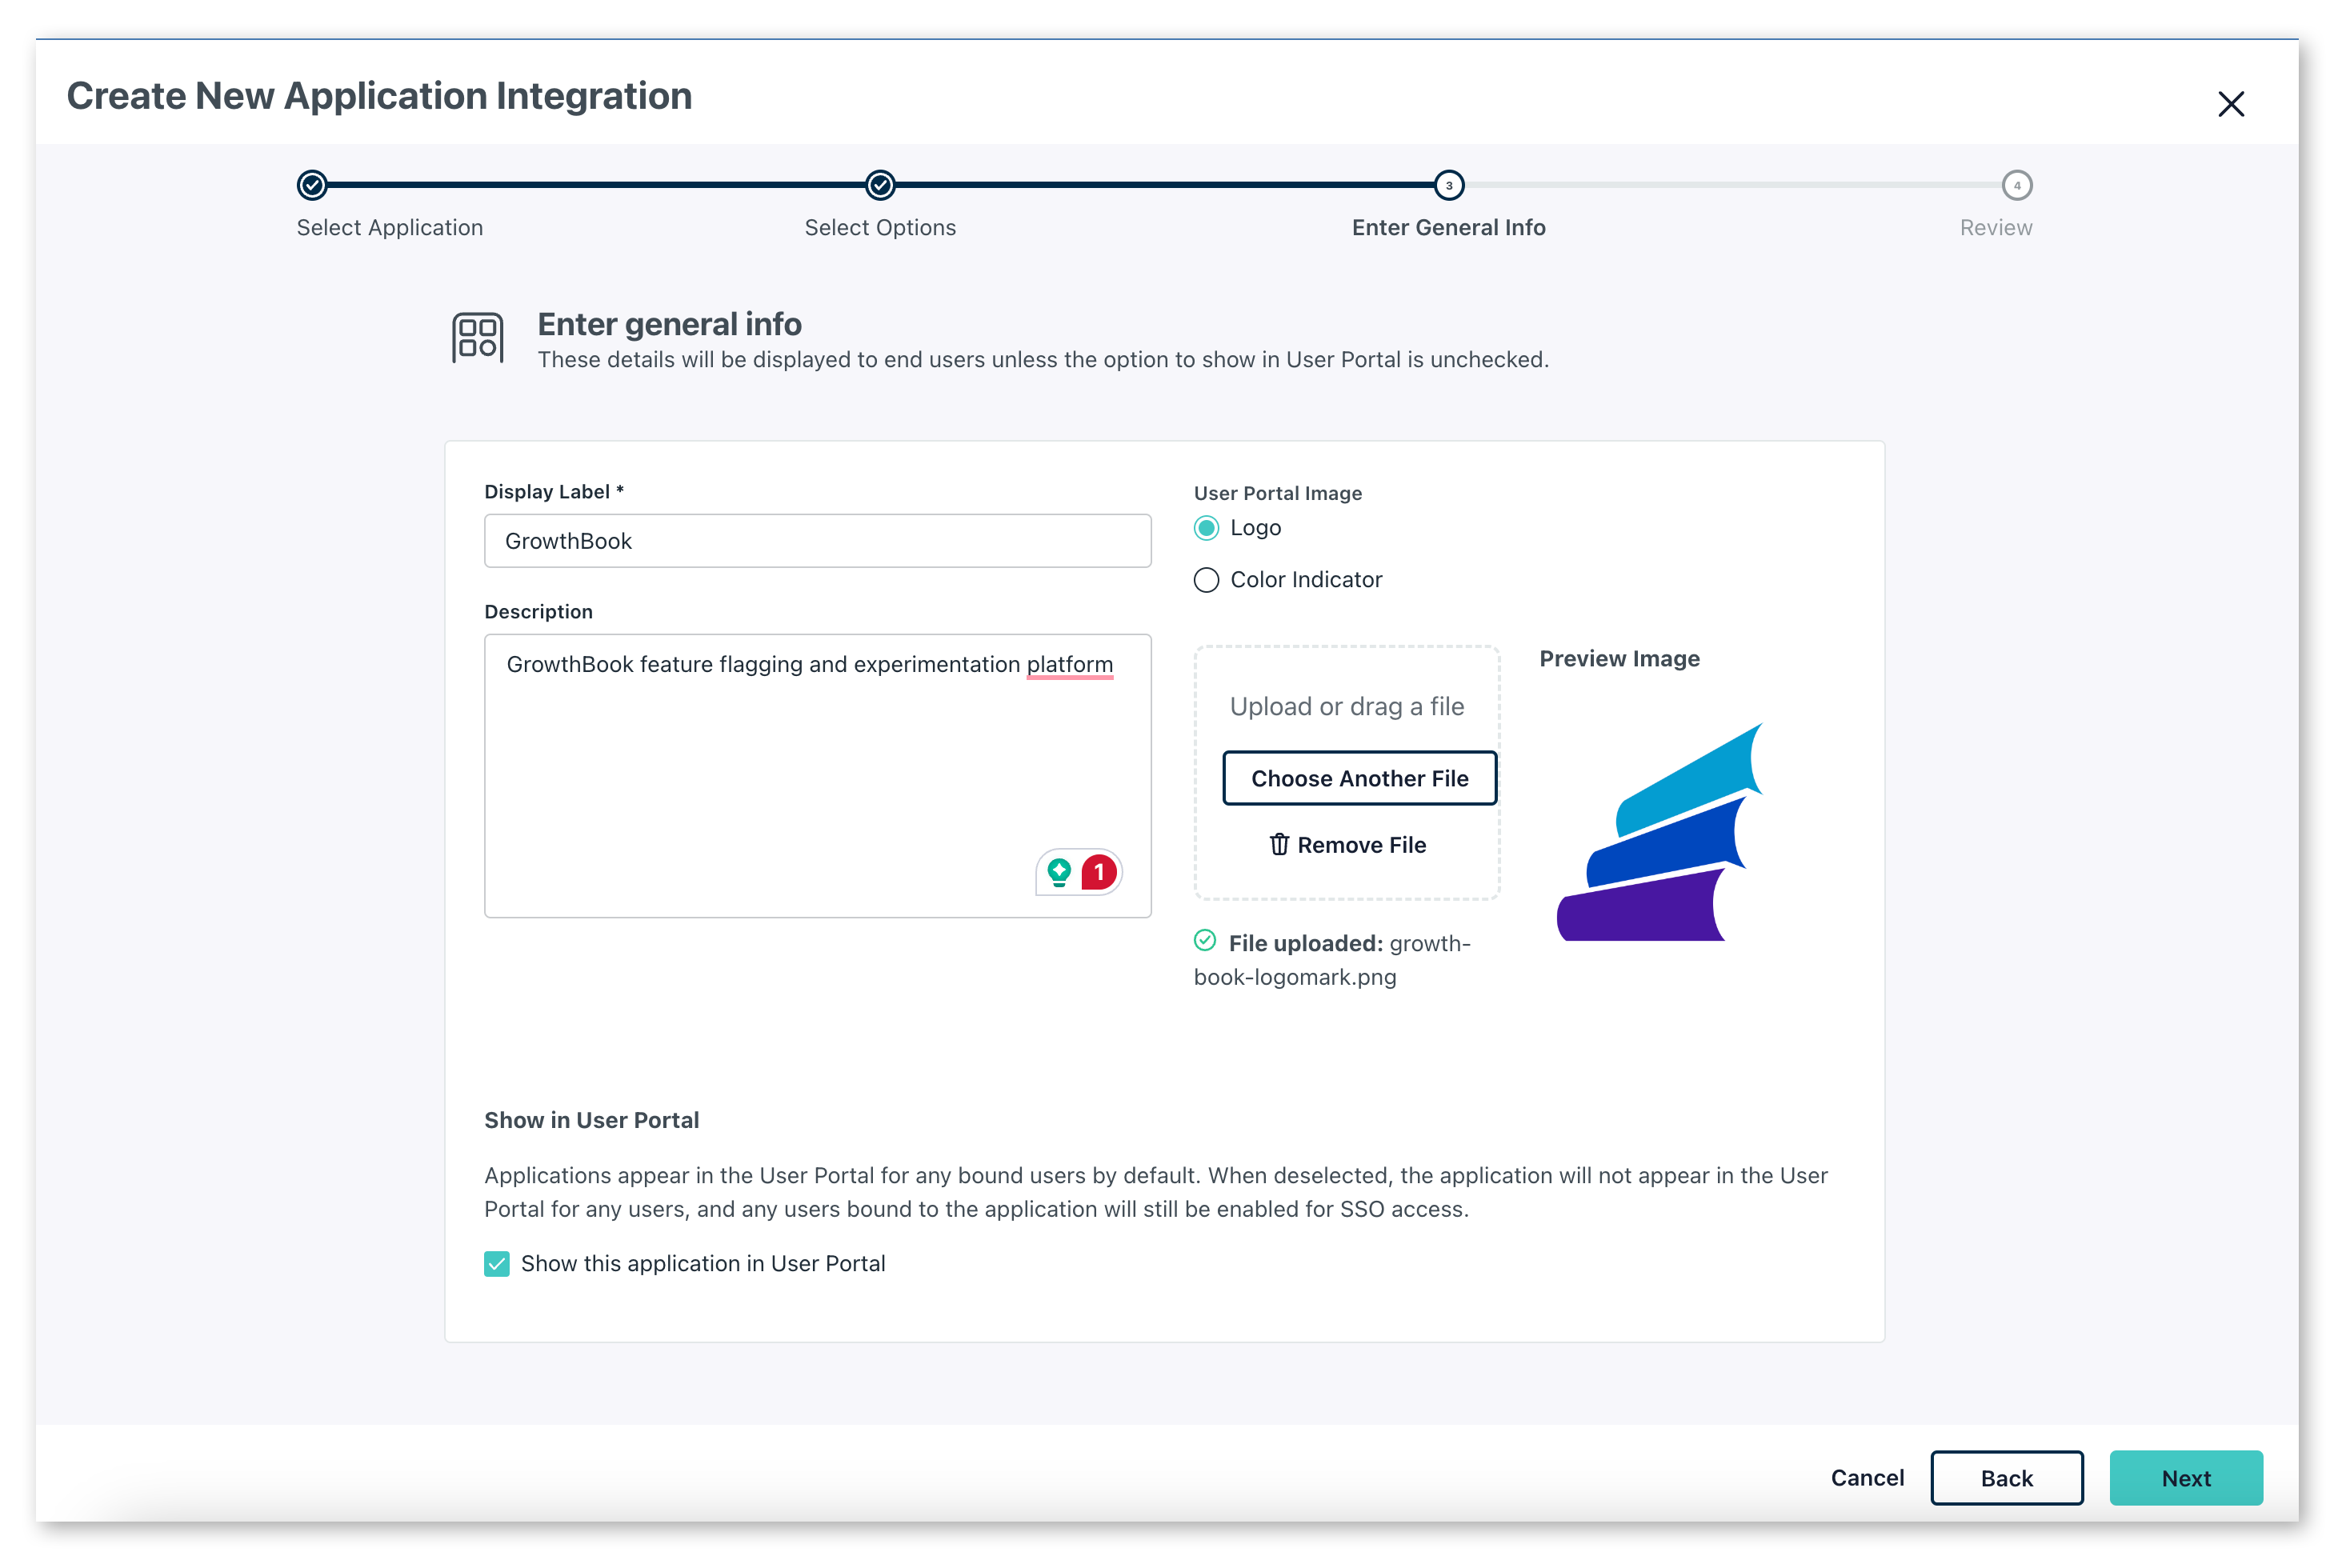
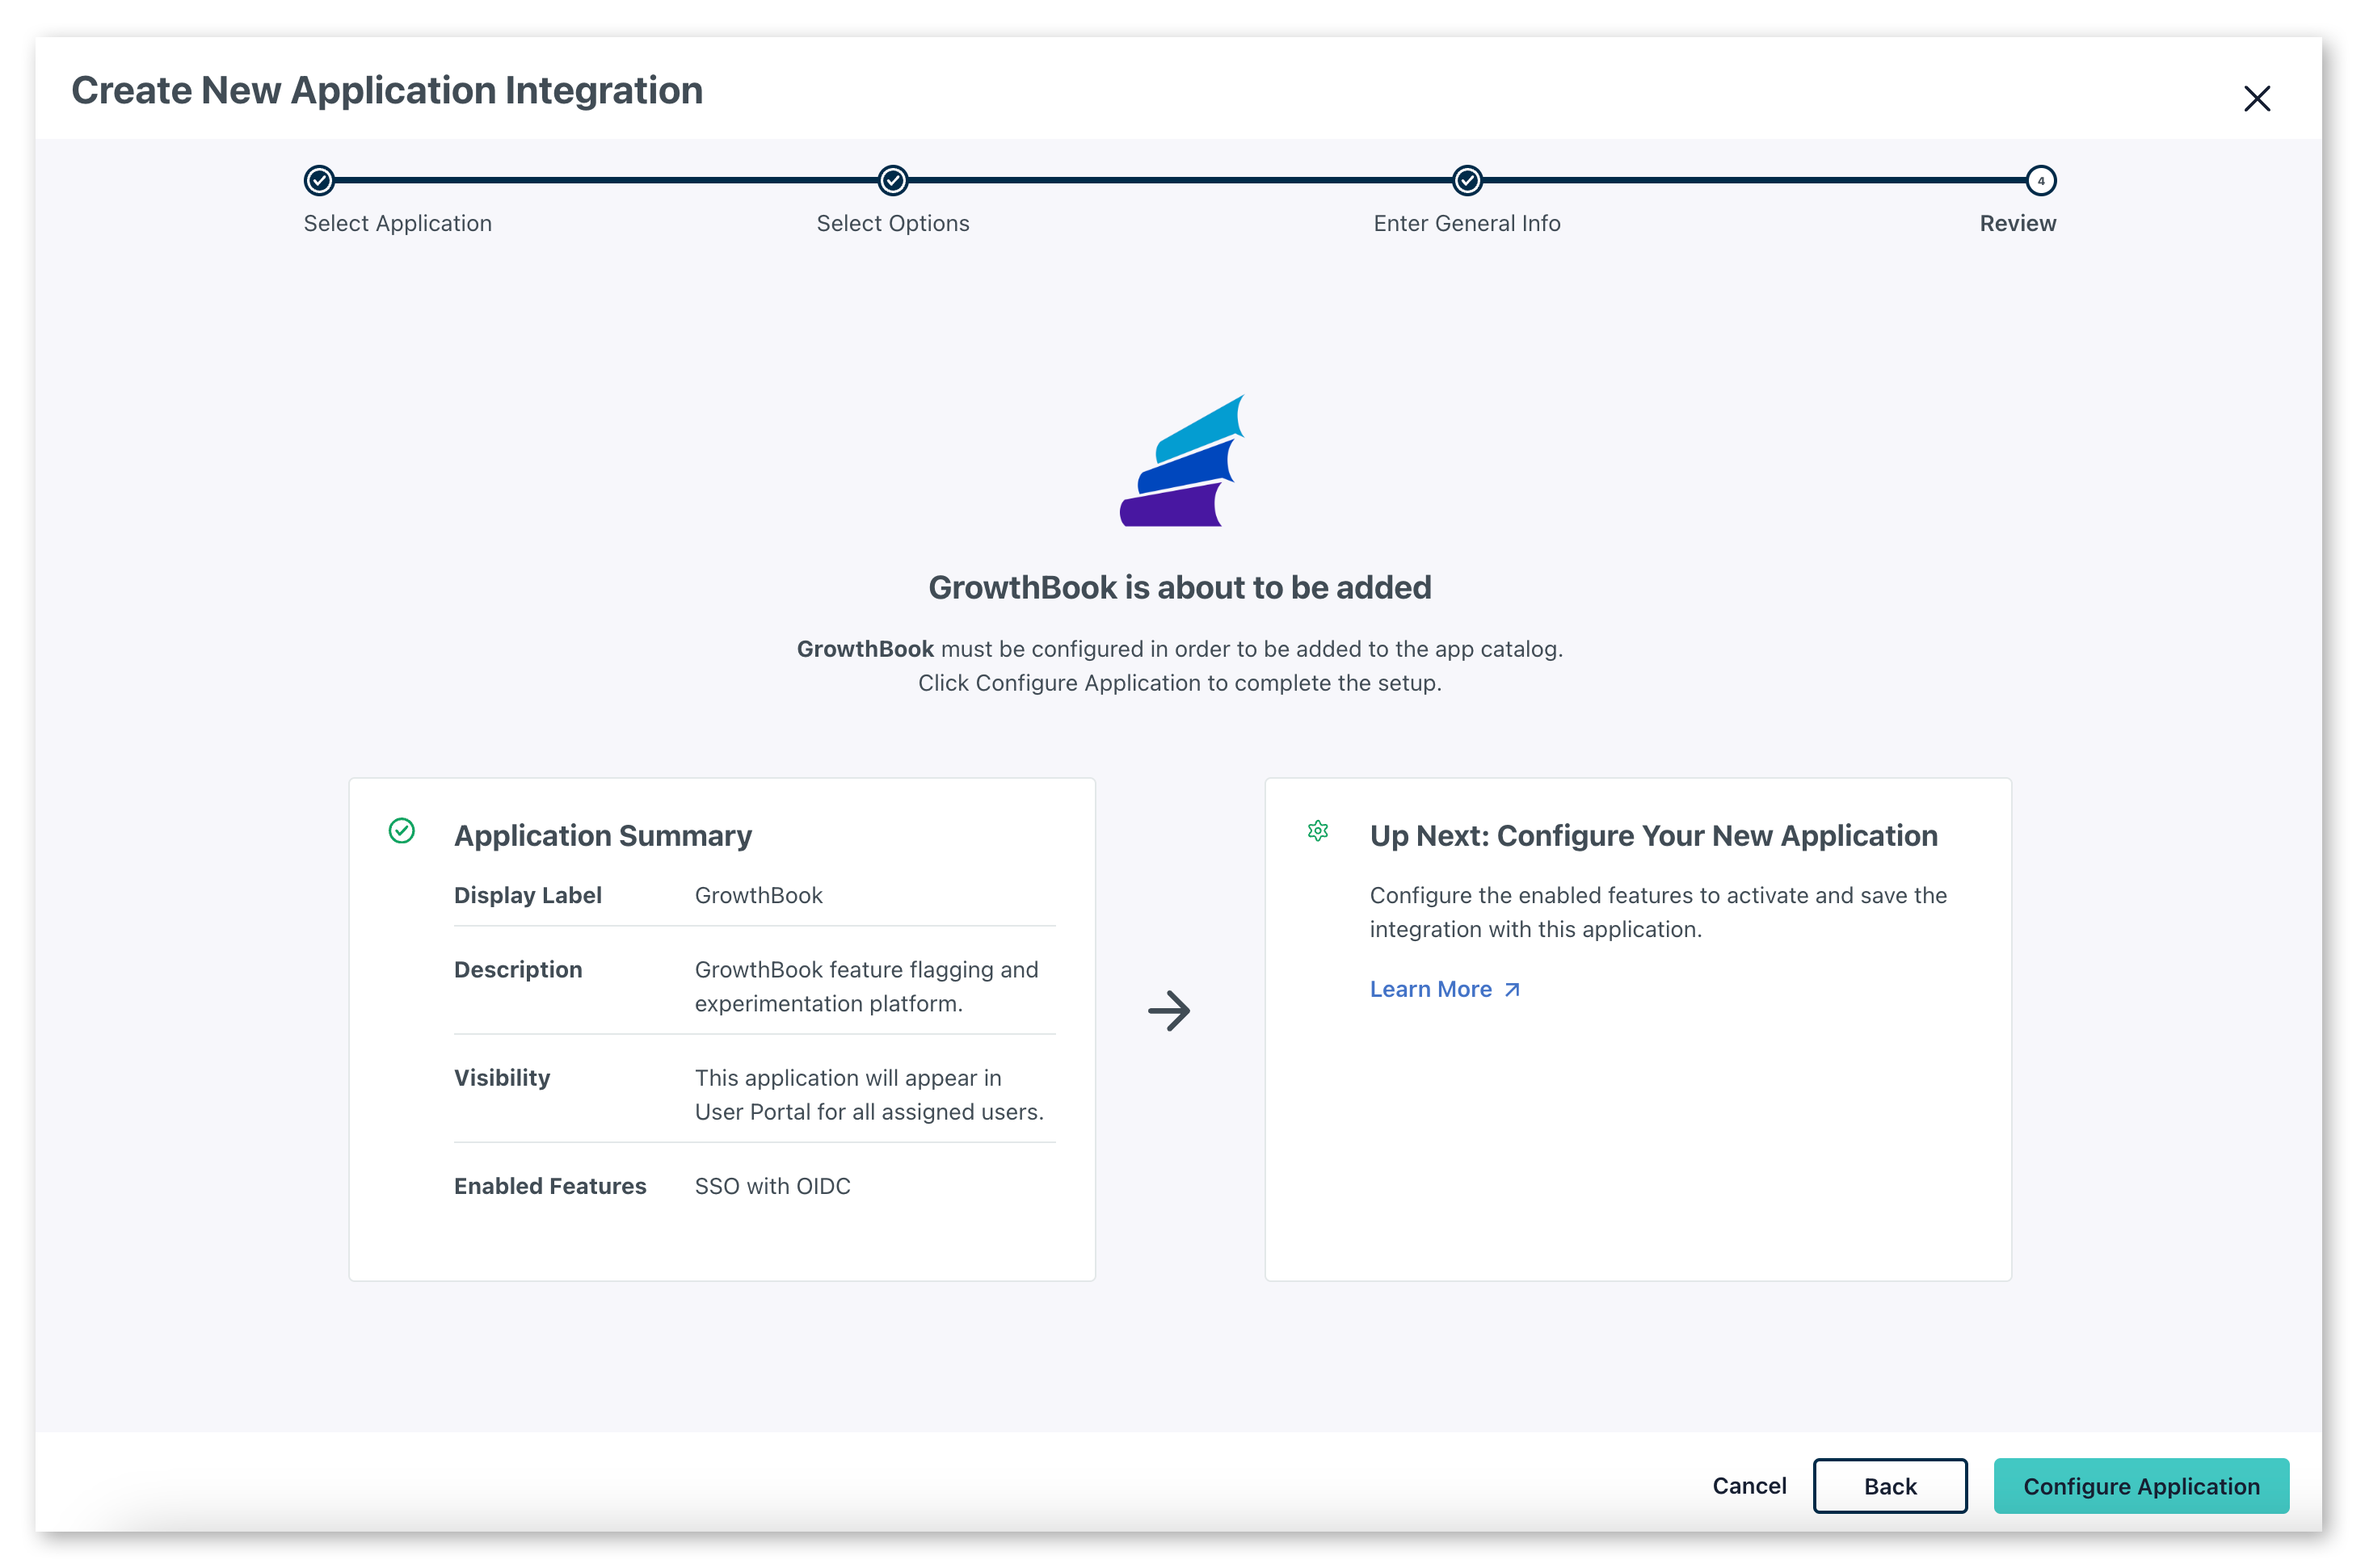
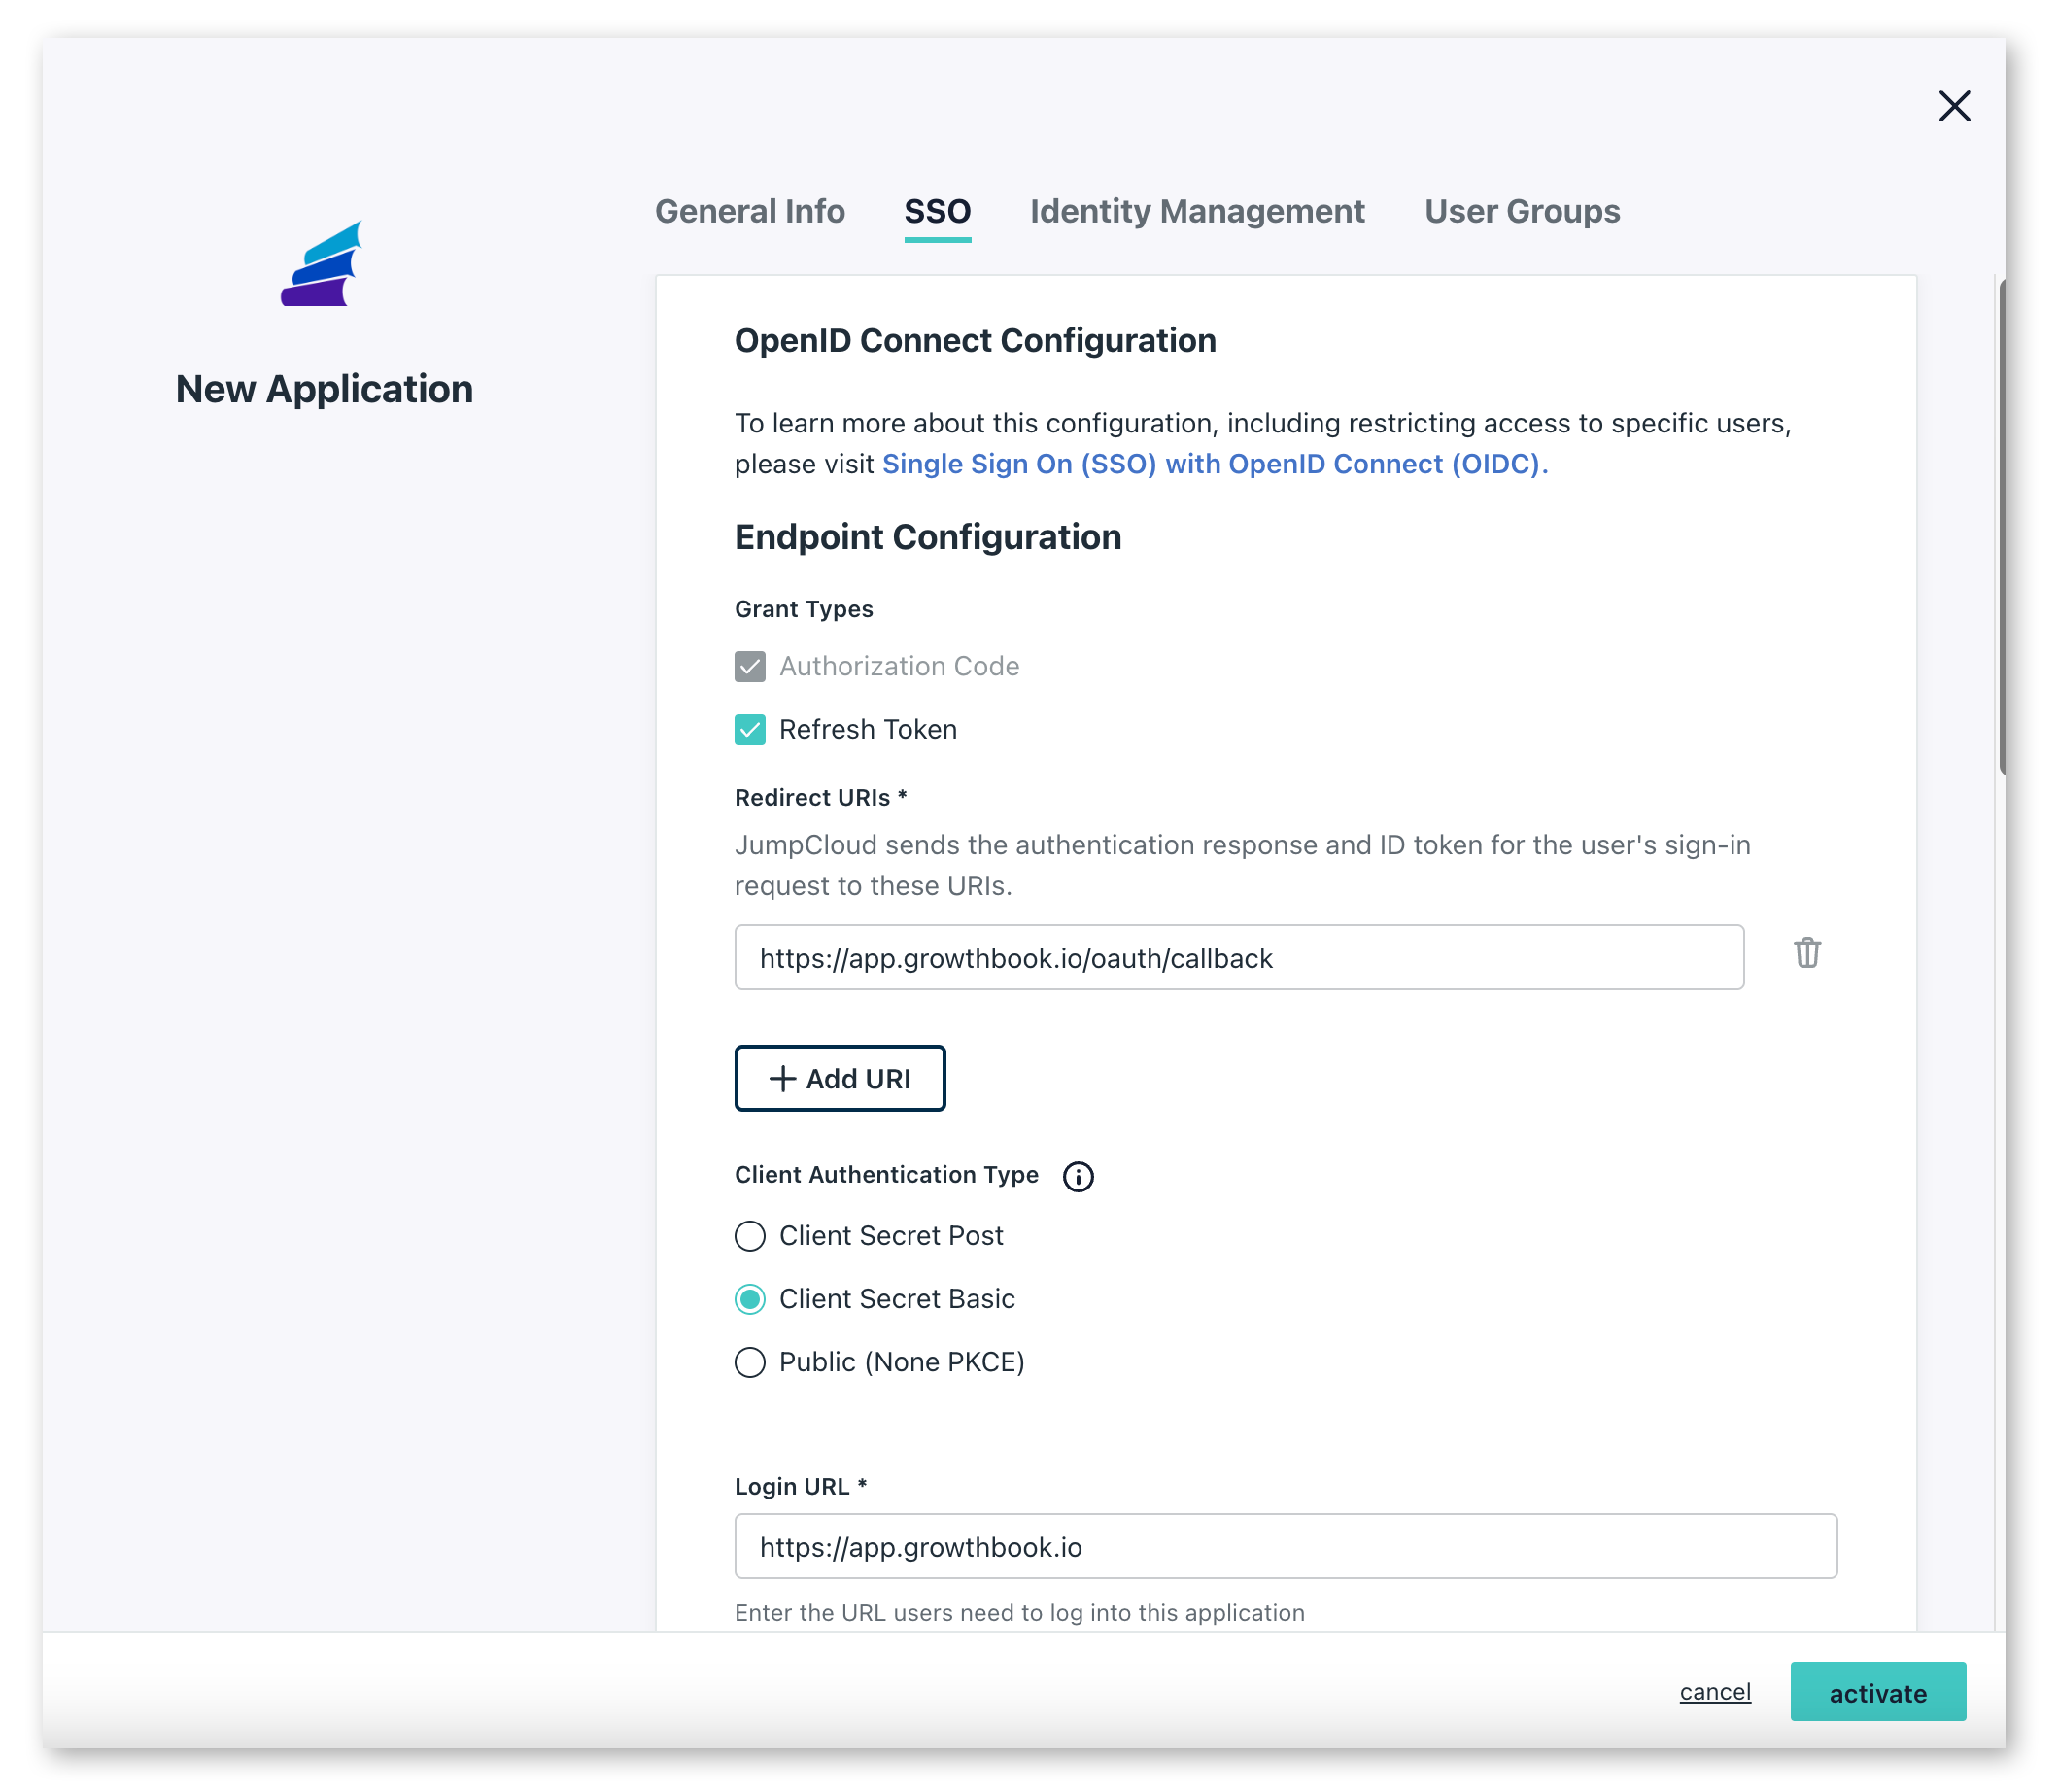
This will open a window letting you add additional configuration options for the GrowthBook application. Here are the settings you should set:
- Grant types: Select "Refresh Token" and Authentication Code
- Redirect URIs:
https://app.growthbook.io/oauth/callback
- Client Authentication Type: Client Secret Basic
- Login URL:
https://app.growthbook.io
- Attribute Mapping: Select both email and profile. The defaults for the fields that appear are all that is required.
 Once you have made the above settings, click 'Activate' from the bottom bar.
You'll then be presented with a modal giving you the client id and client secret. Here you need to record the Client ID and Client Secret
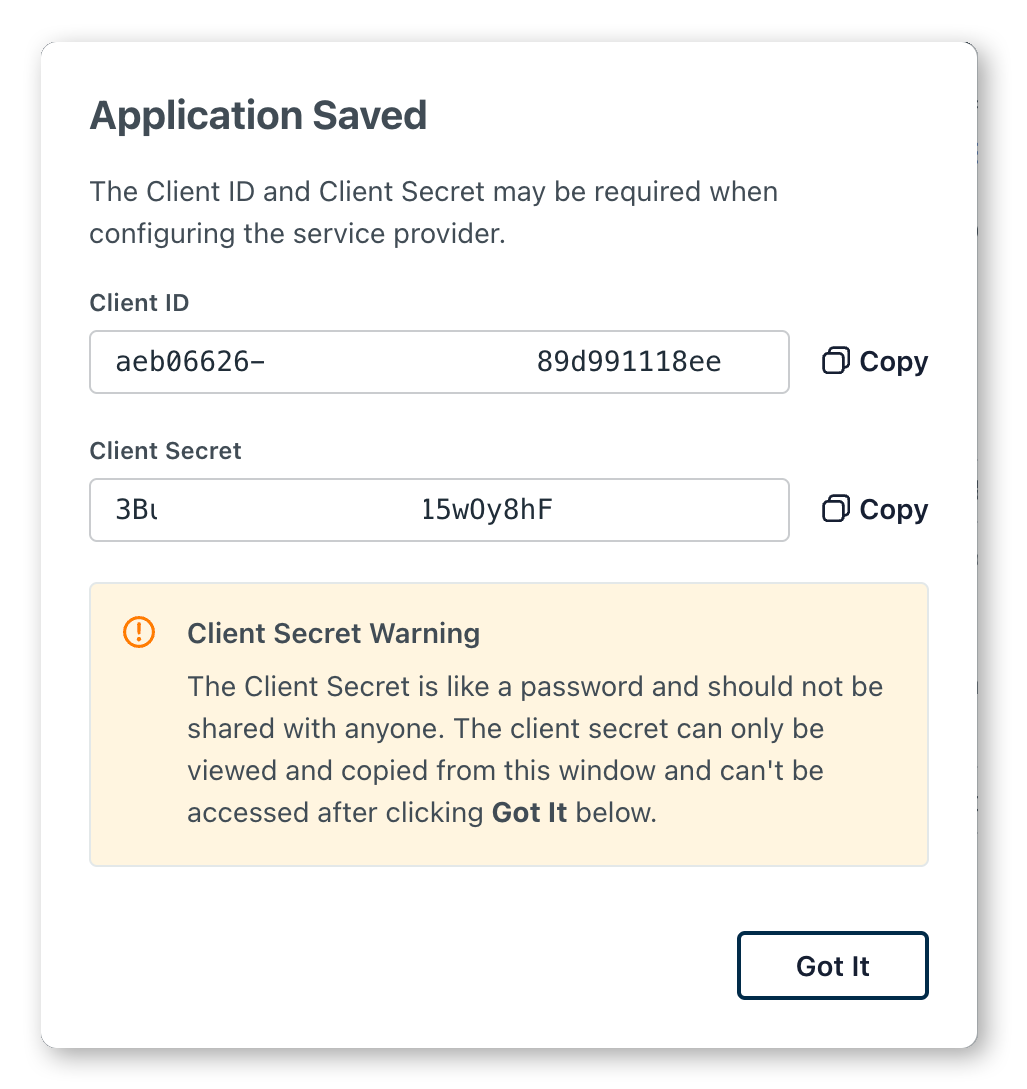
For self-hosted instances, construct the JSON configuration for GrowthBook. Replace CLIENT_ID, CLIENT_SECRET, and EMAIL_DOMAIN, as into the JSON object above.
Pass the JSON string into the environment variable SSO_CONFIG of your GrowthBook container